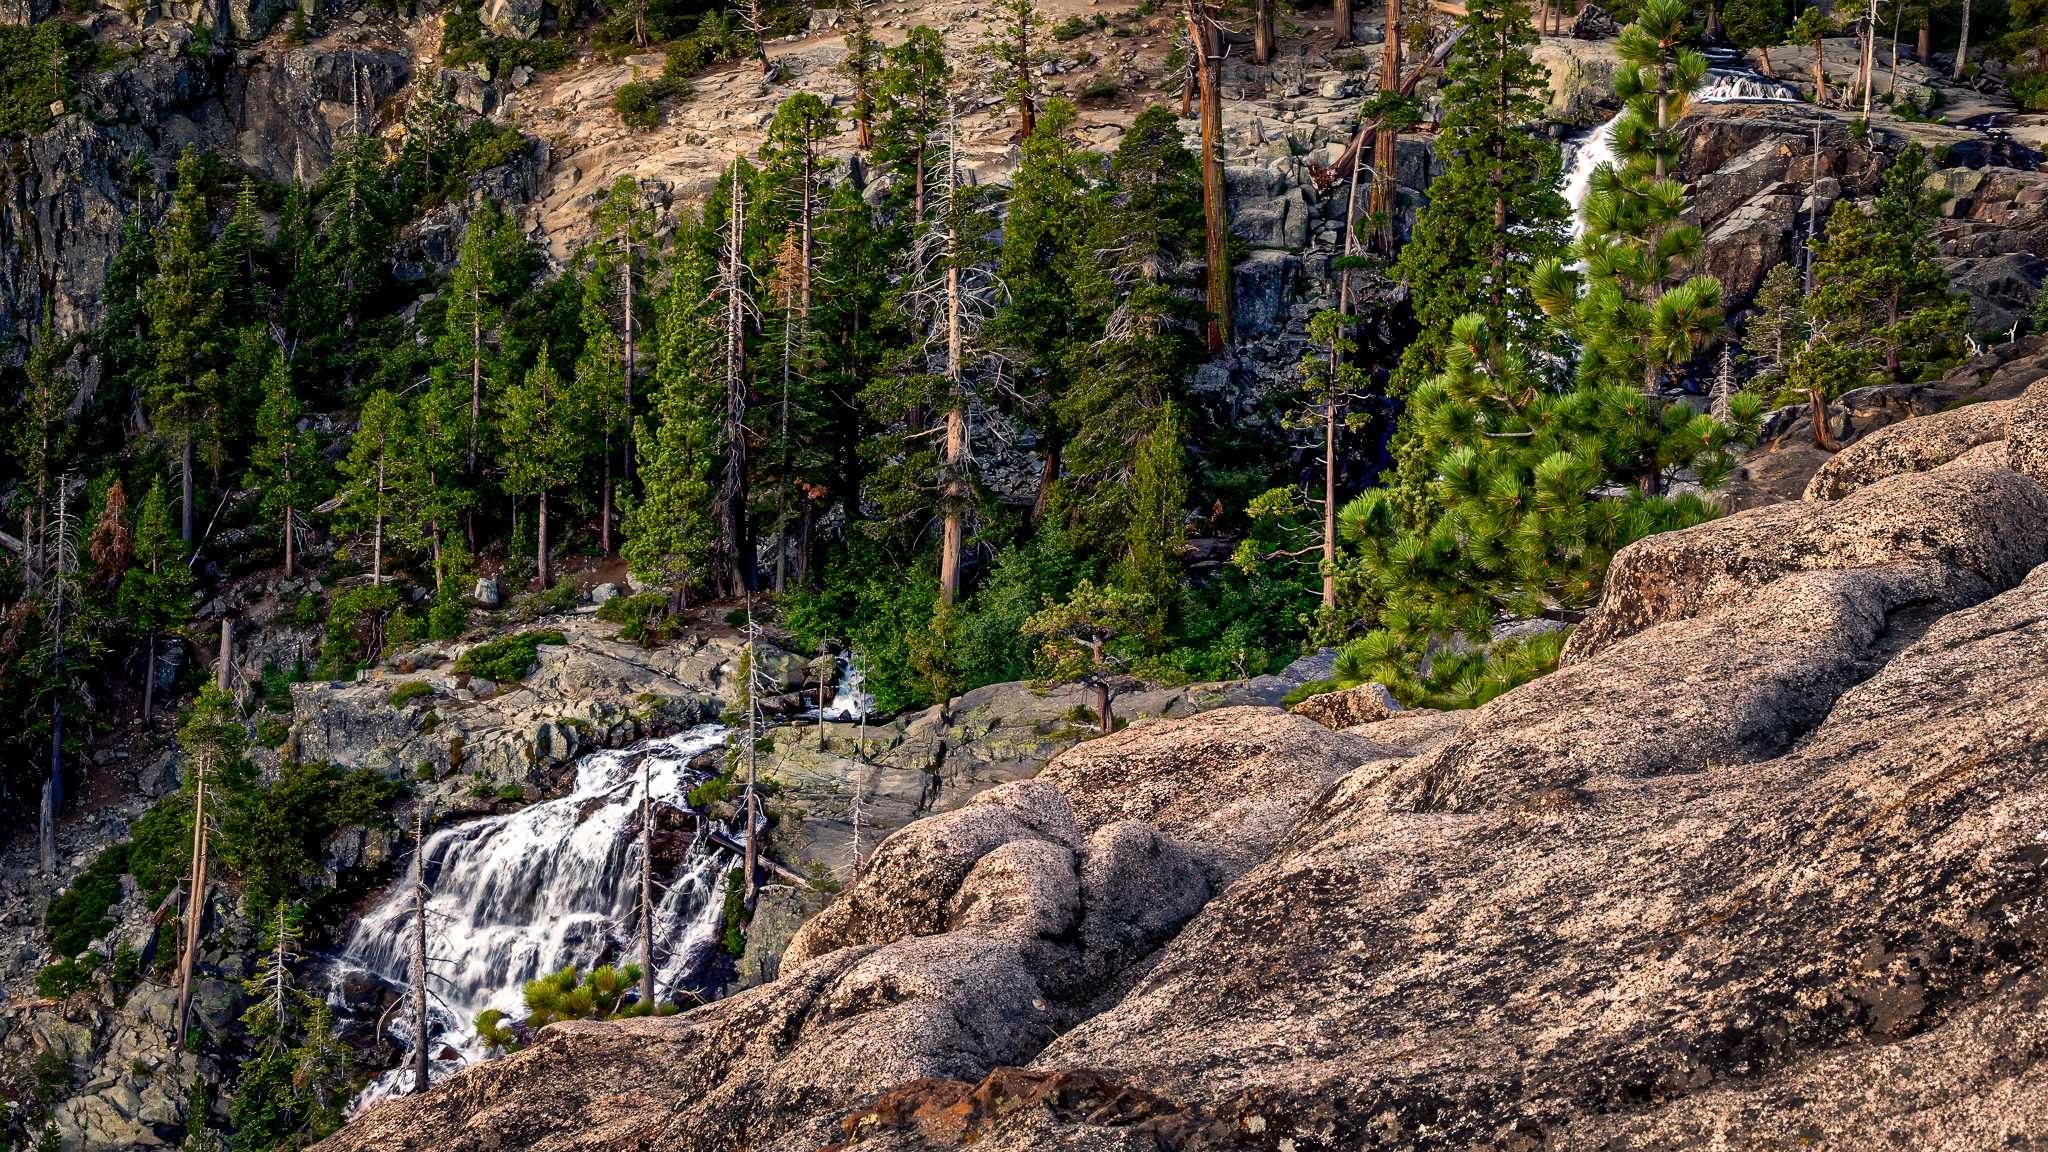
This photo of the Lower Eagle Falls, above Emerald Bay (70mm, 1/20 sec, f/16, ISO 2500) was originally captured on August 8, 2023 and was first included in a post released on October 1, 2023.
In my October 2023 post, Lake Tahoe Visit, I included some photography tips, including one about research as a part of photography planning. I’ll have more to say on that topic later in this post. All I’ll indicate at this point is I also mentioned in that post I was planning on coming back to Lake Tahoe in 2024 and was anxious to hike to a location which would allow me to get a better perspective (and hopefully, a more satisfying composition) of this waterfall.
Vikingsholm Trail to Lower Eagle Falls
The morning after our arrival at Marriott’s Timber Lodge in South Lake Tahoe, I was up, dark and early, and on my 30 minute drive (about 14 miles) to the Emerald Bay State Park Lookout where I’d find the trailhead for the Vikingsholm Trail to Lower Eagle Falls (that is, one hikes down a wide trail –more like a well maintained fire-road– to the Vikingsholm Castle area and then shifts to a narrower, more woodsy trail up to the Lower Eagle Falls Overlook).
I’ve been extremely interested (since last August when I first “discovered” what I’d been missing) in creating a composition that more completely features the majesty of these waterfalls. And, I’ve also been completely aware in planning for this trip, that I’m also facing my least favorite kind of hike – one that starts out downhill and is about 2 1/2 miles, round-trip (plus whatever I add to it just moving about).
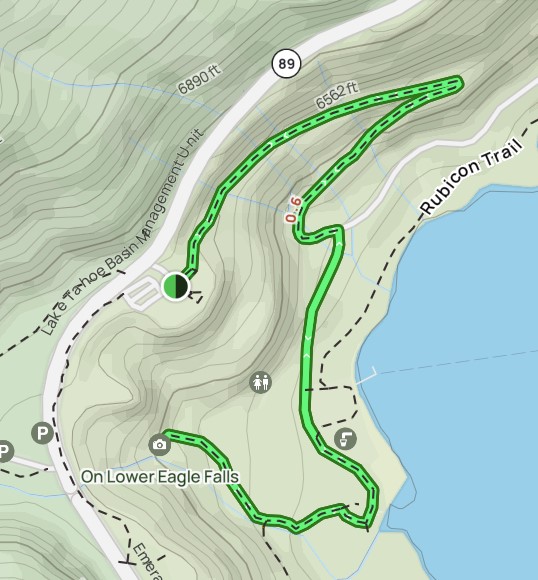
From the starting point just off CA 89 to the water’s edge is a bit over 460 feet altitude change in over about a mile and then a hike up about 1/4 mile with 190 feet altitude change to reach the falls overlook.
All in all, that’s a 650 foot altitude change both coming and going (that last uphill mile is not ‘terrible’ but is what some other hikers commented, “is a slog”). I certainly agree with those remarks and didn’t enjoy the slog — but I wasn’t forced on that hike. I chose it.
Trail map courtesy of All Trails
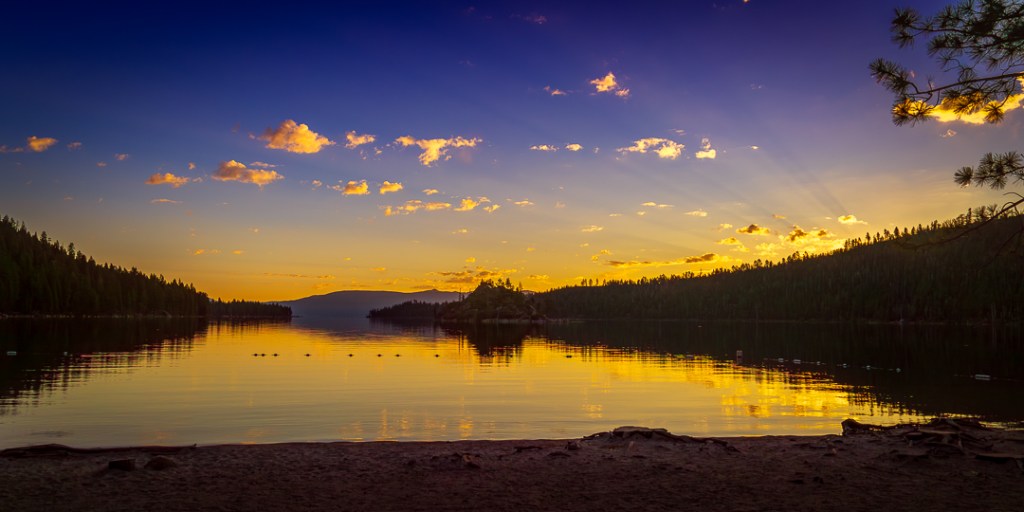
While I was down near the beach, where I had never been before (well, never on the ground – I’ve been on a boat in Emerald Bay in the past and got near the beach, a couple of times), I decided to look around and take a couple of photos.
As you might expect, the first thing I thought of was a sunrise image, right from the edge of the bay. The feel of this view of the bay is quite different than most of the other shots I’ve taken from a much higher viewpoint. But I especially liked the way the sun not only illuminated the clouds but also cast a warming glow across a large portion of the sky which is subtly interrupted by the shadows of many of those same clouds to produce what some people call God Rays. Because of the angle of the morning light, Fannette Island is difficult to see, as it seems to blend in with the southern shoreline on the right.
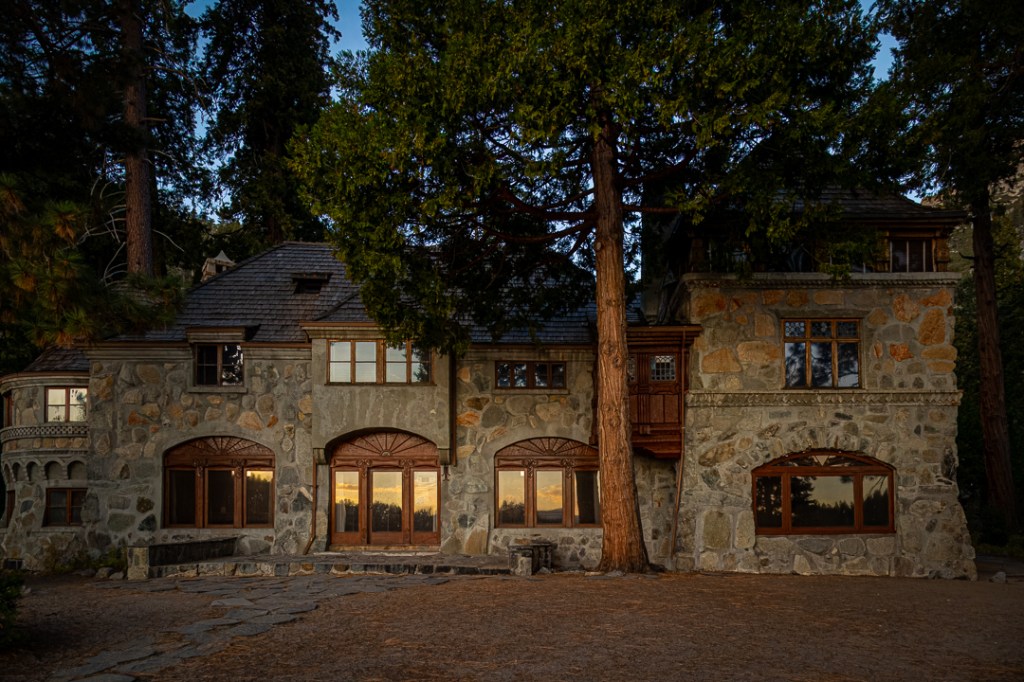
Also, while I was here (and also looking around for the Lower Eagle Falls Overlook trail) I decided to take a photo of the famous Vikingsholm Castle. I liked that I was able to catch some of the sunrise reflected in the windows of the castle.
While taking photos I also spotted the sign directing me to the trail to the Lower Eagle Falls Overlook. I must admit that at this point I was getting a little nervous; I thought I must be fairly close to the falls but as yet I wasn’t hearing them. Even though the trail was mostly uphill, it was only about 1/4 mile long and since it was a real trail (rather than a wide road) it was more interesting to follow and sightsee a bit.
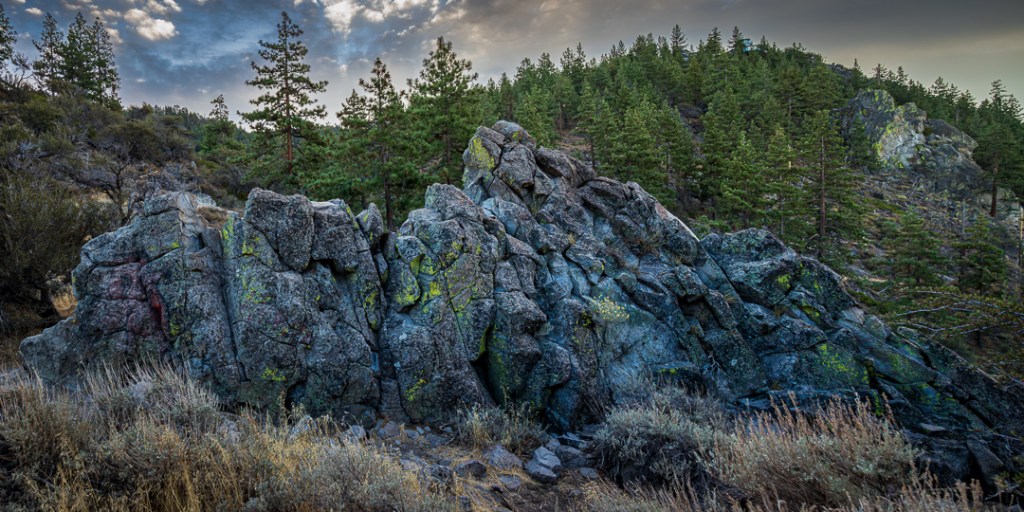
If you take a look at the image at the top of this post, you get a good look at what I was expecting to see. Unfortunately, the time of year on this trip (that previous photo was taken in early August last year after a very wet/snowy winter in the mountains) made that more difficult. This year the rain/snow was pretty good but not as full as last year — and the timing of this year’s photography plan wasn’t the same as last year’s. It wasn’t late summer (early August) but autumn (early October). There was no visible snow on most of the mountains around here this year (at this time) as there was last year. Check out my image of the Lower Eagle Falls in October of 2024 and you’ll see the barest hint of a trickle of water (more like some damp rocks, than a waterfall). It definitely doesn’t look much like what I saw, and photographed, in 2023.
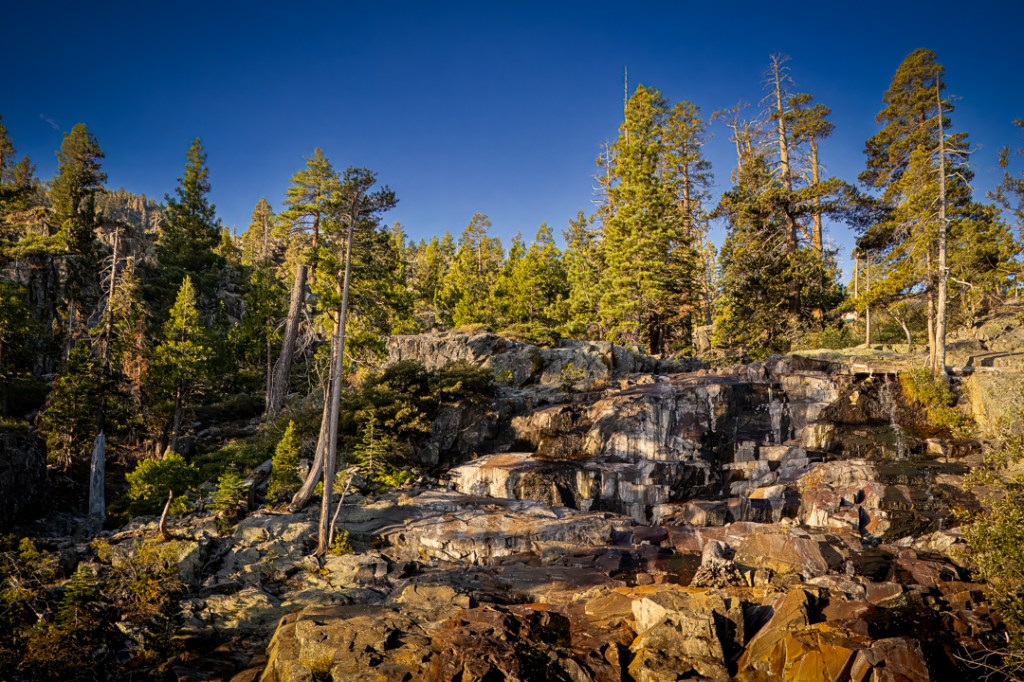
You can see a few places that are damp plus lots of dry, stained rocks (24mm, 1/800 sec, f/6.3, ISO 1000)
Photography Tip
I mentioned at the top of this blog that I’d come back to the tips I offered in that blog post of last October. You can think of this as a corollary to both Tip#2 (always look around for possible other compositions) and Tip #3 (research as a part of planning is an important aspect of good photos) from that post.
As usual, I’m mentioning this because, like those tips from last year, this is another that I got to re-learn on this photo trip. In this case, I was so focused on photographing what I’d seen under very different conditions that I didn’t take the precaution of verifying (to the extent I could) what might be different this year.
What I should have done, before just grabbing my gear and immediately beginning to hike, was take an extra few minutes to preview the falls by first visiting the overlook near the trailhead (the same location I used to take the 2023 photo). I might have decided to forgo taking this particular hike this year (and save it for a future trip with a better waterfall opportunity) and gone looking for different photography possibilities. It certainly looks like I’ll need to plan another trip down this trail in the future.
Cave Rock Trail
Two days after the Lower Eagle Falls hike, I was up at zero-dark-early again, this time headed for a much shorter (and easier) hike to a scenic overlook on the east shore (Nevada side) of the lake and only about a 7 mile (12 minute) drive away from our hotel — the Cave Rock Trail. The trailhead is found at a sharp bend in Cave Rock Drive, a short drive up the hill, off US 50.
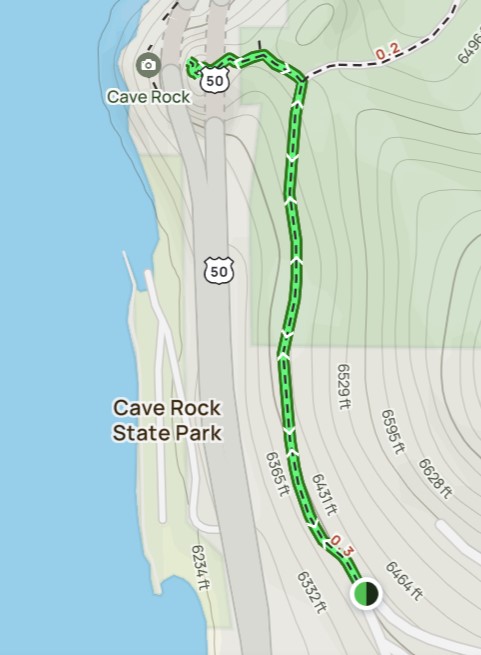
The trail is well maintained, very short (only 0.8 miles round trip), and has a slight outward-bound incline with almost all of its 118 feet of elevation gain at the very end in a nearly vertical rock scramble to reach the top of Cave Rock.
That scramble is optional and not required to find plenty of scenic viewpoints (Hint: This means I did not take advantage of that climb since, to me, the top of Cave Rock offered too much opportunity to fall more than 100 feet to a sudden and uncomfortable stop).
I took several photos both from places along the trail and from a kind of plateau area around the “base” of the top of the rock.
Trail map courtesy of All Trails
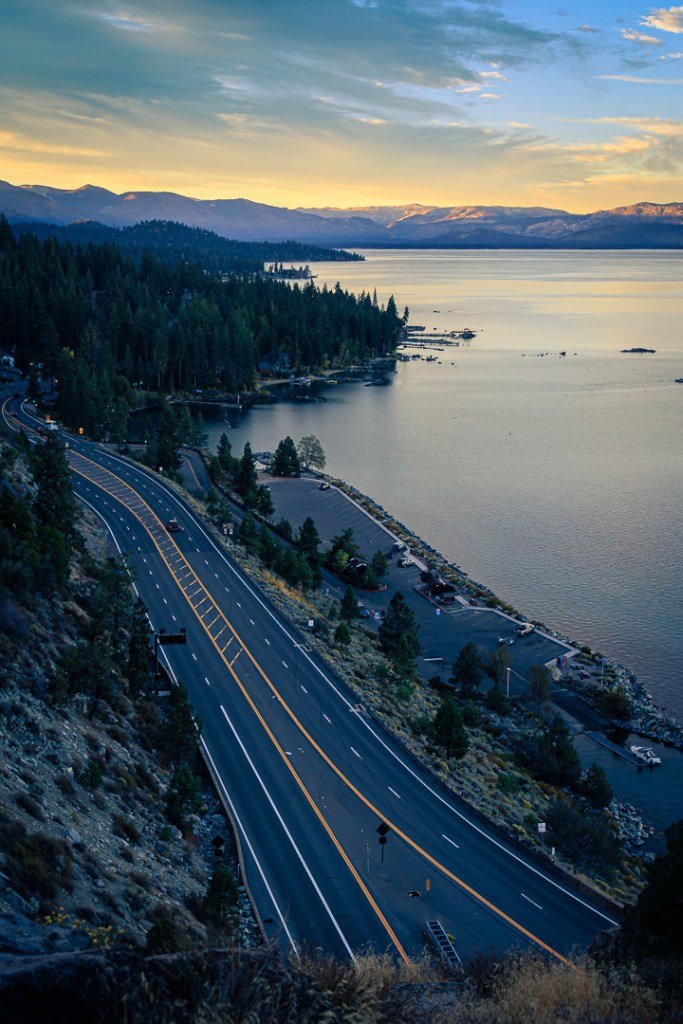
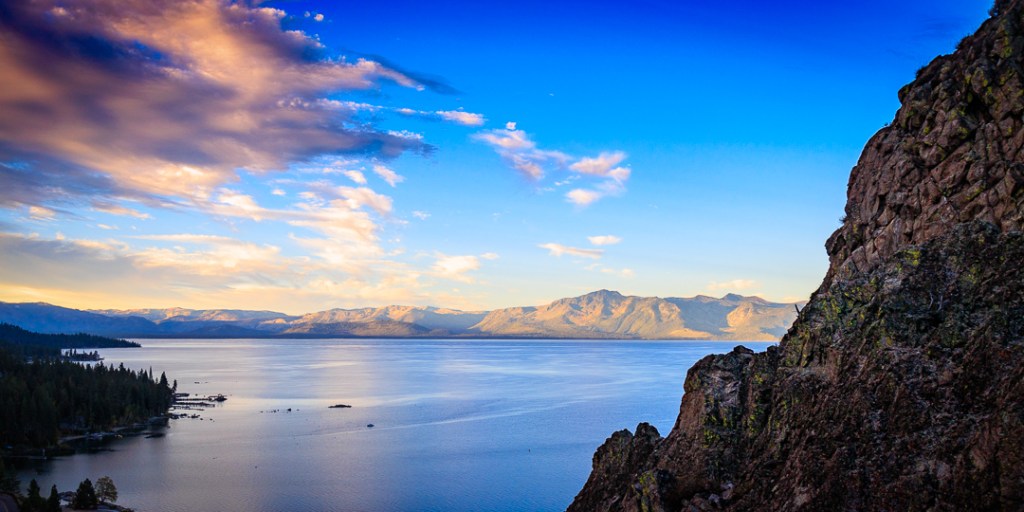
I spent about an hour taking photos at the site that morning and, once again, my first image capture was this sunrise image taken after I’d been on the trail for only a few minutes.
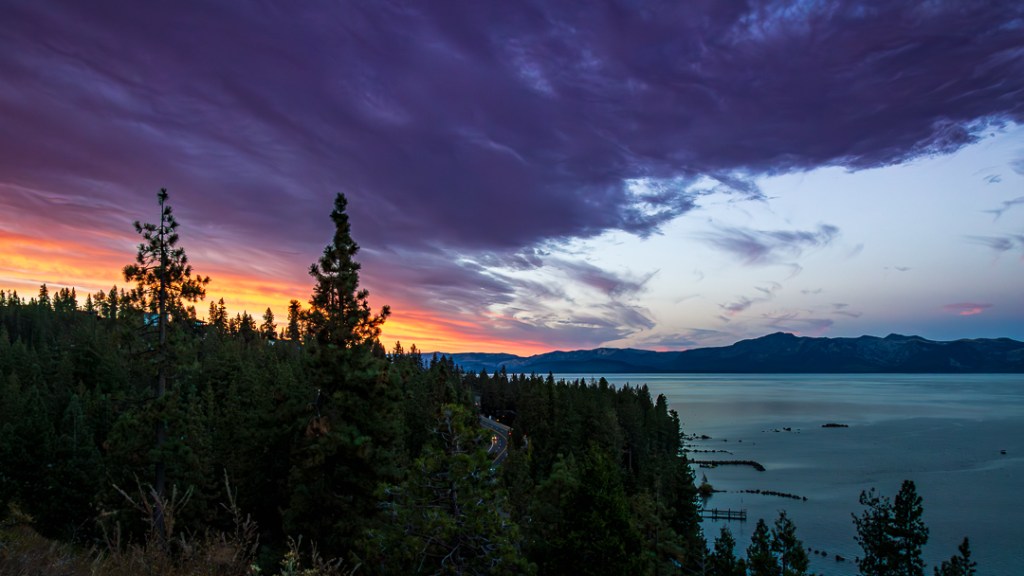
You can even see a bit of early morning traffic on US 50 and a hint of some personal residences among the trees as well as personal docks along the shore.
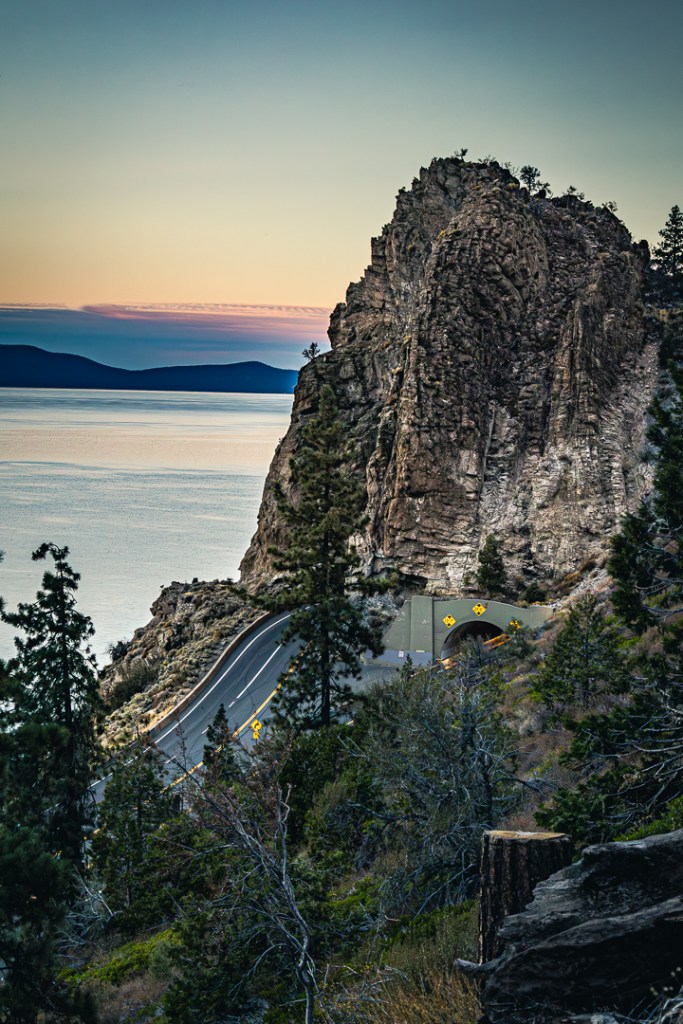
A little further along the trail I turned my camera north, toward the very prominent Cave Rock itself; a bit of the US 50 north-bound tunnel through the rock is visible in this image.
A bit later, when I was much closer to the end of the trail, but not yet at the area I called the “plateau,” I took another shot of the top of Cave Rock. Although I’d originally planned to climb to the top, this view began to cause me to reconsider that idea.
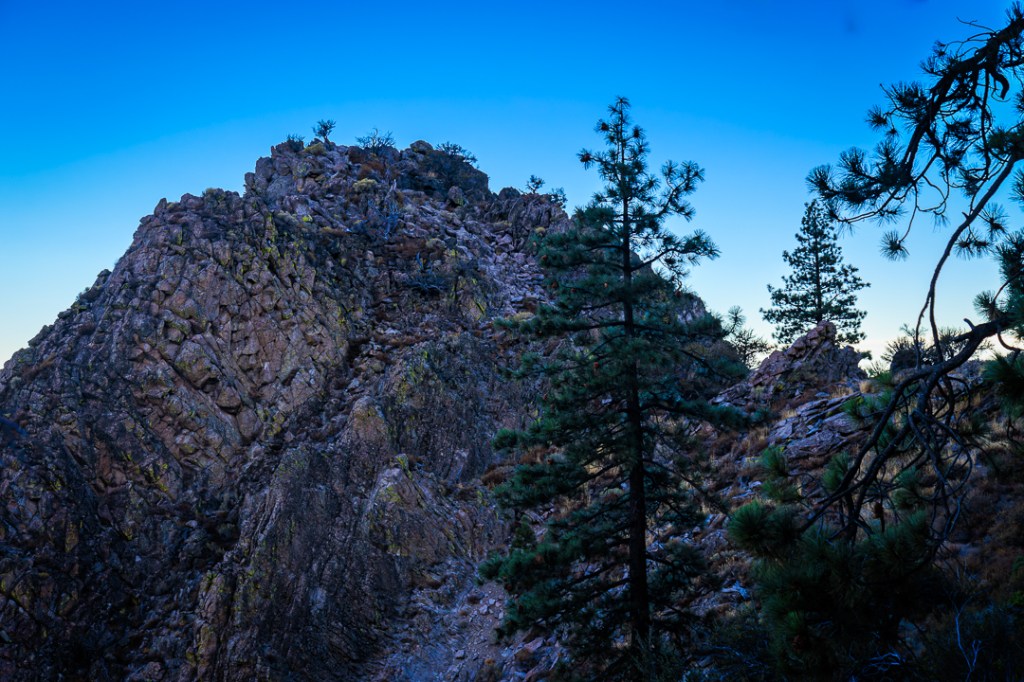
Just a few steps beyond this point along the trail and a slight uphill to a left turn in the trail and I reached what I’ve called the Cave Rock plateau. I took a closer look at (and captured an image of) the rock scramble leading to the top of the rock and also photographed northern and southern viewpoints from the plateau.
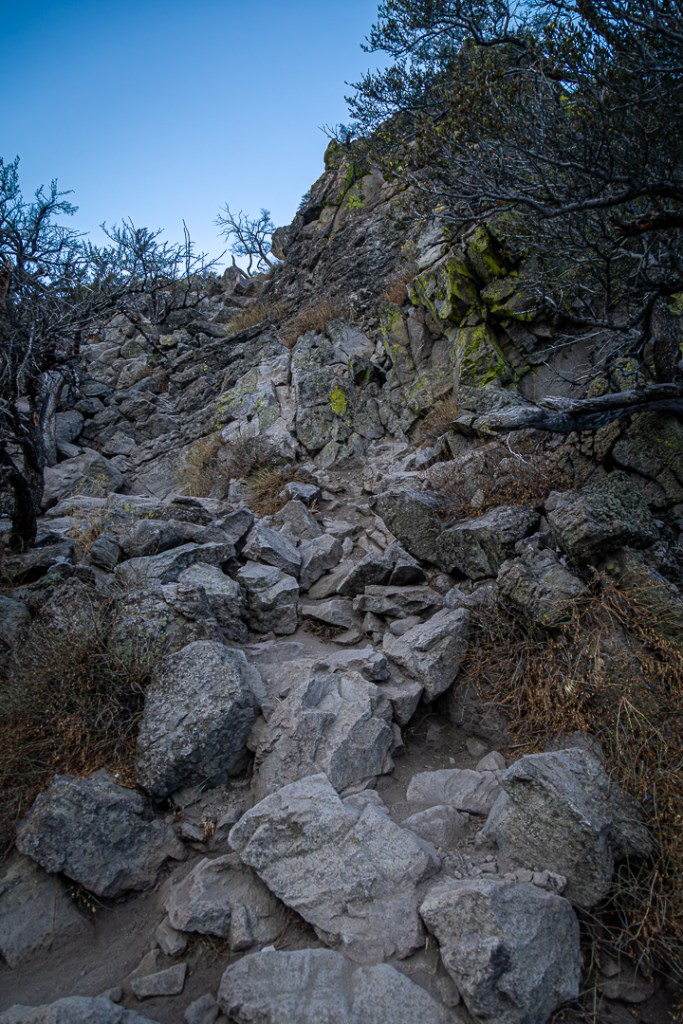
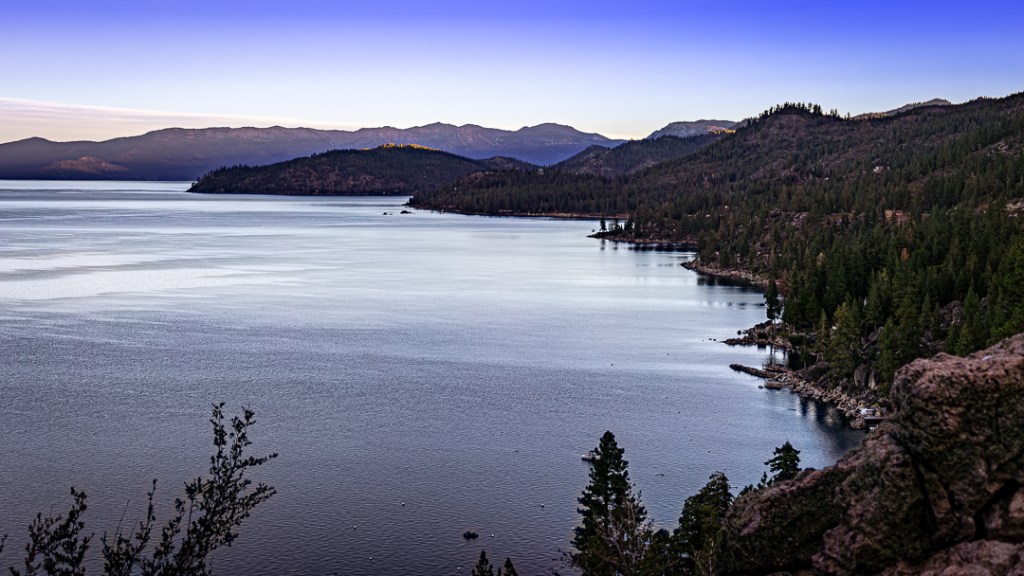
Above is a slideshow of those three images: The rock scramble just seemed like a poor choice (I’ve climbed other scrambles that were at least as difficult in other circumstances but this one just seemed too risky versus the insignificant advantage of simply reaching the top). The south-facing view includes Cave Rock State Park which includes a parking area, a swimming area, and a boat-launch ramp. The north-facing view includes a large portion of the eastern shore line and well as the mountains above North Lake Tahoe (just beginning to receive direct sunlight).
When I faced away from Cave Rock (looking east) I noticed this unusual ‘wall-like’ rock formation and liked it enough to take a photo of it.
As I was getting ready to follow the trail back to my car, I took another long look at the wonderful views provided by this trail and captured this image which includes a small portion of Cave Rock surface.
And here’s an image of a portion of the Cave Rock Trail itself.

To be quite honest, in another situation I might have spent time in post processing removing the distracting telephone and power poles and all those wires, just to make the image more attractively wilderness oriented (because that’s how it felt to me, while I was there). But the truth is, this area is very settled with paved roads and other residential infrastructure supporting homes (just take a look at a Google map satellite view of this area to see the coverage already in place). So, I left the evidence of infrastructure in the photo for that reason.
If you’ve stuck with me all the way to this point, I thank you — I know this was a bit longer than many of my posts. If you enjoy seeing the photographs, you might like to see them in a higher resolution (larger) and with more color and detail fidelity.
They can easily be seen by viewing them in one of two places (either my CedBennett.Photography website or my Flickr website). To make it much easier for you to find most of the images featured in this blog post, click this direct link to the Lake Tahoe Area album in my CedBennett.Photography website; to see all of the images from this blog post, click this link to the 2024 Album in my Flickr website. Both sites offer the opportunity to show the images enlarged, even close to the full size of the viewing monitor.
A SUGGESTION: I’ve never mentioned before, what I’m going to suggest here. But, if you enjoy reading my occasional blog posts and viewing the included photos, you might consider subscribing to the blog. I typically post (at most) about five or six articles in a year, and of course, you can always ignore any particular blog post announcement email you’ll receive as the result of subscribing (or even unsubscribe, if it ever gets to be more than you expected).
Subscribing is easy. You may have noticed while reading a post, that anytime you have to scroll up (whether you use the scroll bar, your mouse, or even the up-arrow or page-up keys on the keyboard) a little dialog bar will show up in the bottom, right-hand, corner of wherever you are in the post. And that dialog bar will include the word “Subscribe” (without the quote-marks). [It also includes two other words (“Comment” and “Reblog” plus a “…” option)]. If you click on the “Subscribe” word, another dialog will appear, just asking for your email address. Once you complete that process, you will likely receive another communication asking you to confirm your subscription.
If you choose to subscribe, Thank you. If you choose to not subscribe, I also Thank you (no matter how you came to read this post).
Note: I also tried this on a phone (although I really don’t recommend reading this particular blog on a phone, even though it is supported, because the photos become postage-stamp sized). I assume, perhaps incorrectly, that folks read this blog primarily because of the photos; that’s why I always include information about seeing the images in other contexts, where they can be seen in more detail. At any rate, the phone option does bring up the dialog when one scrolls up, but the Subscribe and the “…” option are not offered (I don’t know why).
