
McWay Falls, Julia Pfeiffer Burns State Park in Big Sur, California (45mm, 160 sec, f/13, ISO 200)
To be perfectly honest, one of my reasons for choosing Monterey for this trip was my desire to photograph the McWay Waterfall in the Julia Pfeiffer Burns State Park in Big Sur, about 42 miles south from our hotel near the Old Fisherman’s Wharf in Monterey. It is one of only two waterfalls in California which empties directly into the Pacific Ocean.
After breakfast at the hotel, Billie and I headed out that morning toward Big Sur. CA highway 1 (also known as the Cabrillo Highway) is a very scenic drive although the scenery is enjoyed more by the passengers – it is a curvy road, much of it hugging the coast along cliffs high above the water so the driver is more involved with keeping the car on the road and in its lane. It didn’t take much over an hour to reach the entrance to the park and then park, grab my gear, and take the very short (0.4 mile) but fairly level trail to the falls overlook.
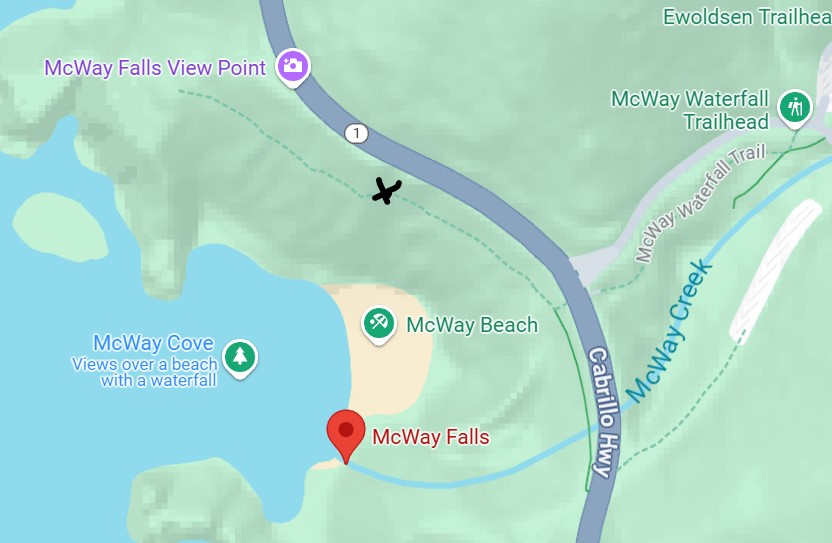
I was surprised at how short the hike was since I expected it to be much longer. That was when I learned that the trail had been shortened because of serious damage to it at about the half- way point. [I’ve added an X to the map at approximately where the rest of the trail was completely blocked to any access.]
Map segment courtesy of Google Maps
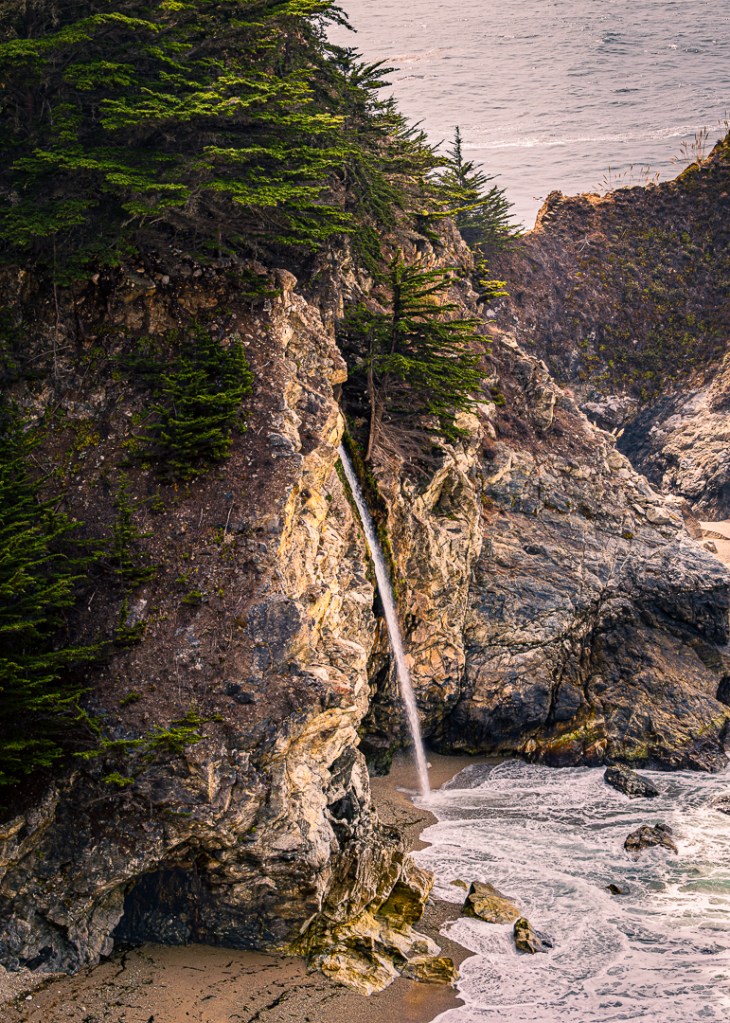
The view from the shortened trail was terrific; it allowed me to obtain the image featured at the top of this post. Here’s another version of the same waterfall, but zoomed-in to focus primarily on the waterfall itself.
I was very happy to have obtained these images but at the same time my inner-photographer was unsatisfied. I realized, after some thought, that I was internally uncomfortable to not be able to see, and photograph, the actual top of the waterfall (this view, caused mostly by the sharp angle of the view-point to the subject, which is itself caused by the shortening of the trail). I remembered, at that point, that as we approached the entrance to the park, I had spotted a pull-out on the highway and wondered if it would give me a better angle of view on the waterfall.
Looking at the map segment above you can see that Google has also identified that same view point that turns out to be about 200 feet further west than the best view point on the shortened trail (because of that major bend in the road). At the time, of course, I didn’t have this map segment to look at but my memory was that the view point was possibly at a better angle. So, I went back to my car, left the parking lot and drove up the hill to the other view point off the highway, and tried again. Here’s the image I got from that new location.
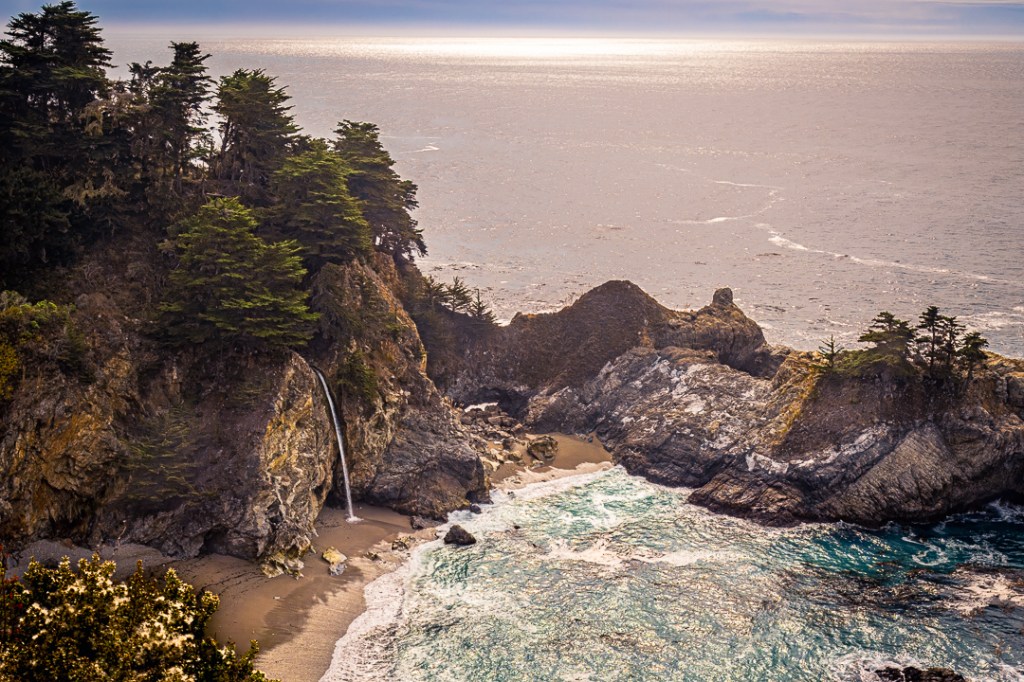
It is quite clear that moving to the roadside view point provided enough movement toward the west to allow me to see past the rock bump that was blocking the earlier view. In addition, we were also viewing the scene from a somewhat higher perspective; both of those changes also allowed us to discover a “hole” in the little peninsula at the back of cove next to the waterfall. That means that there is an arch that has been formed and will probably grow (and/or collapse) over time.
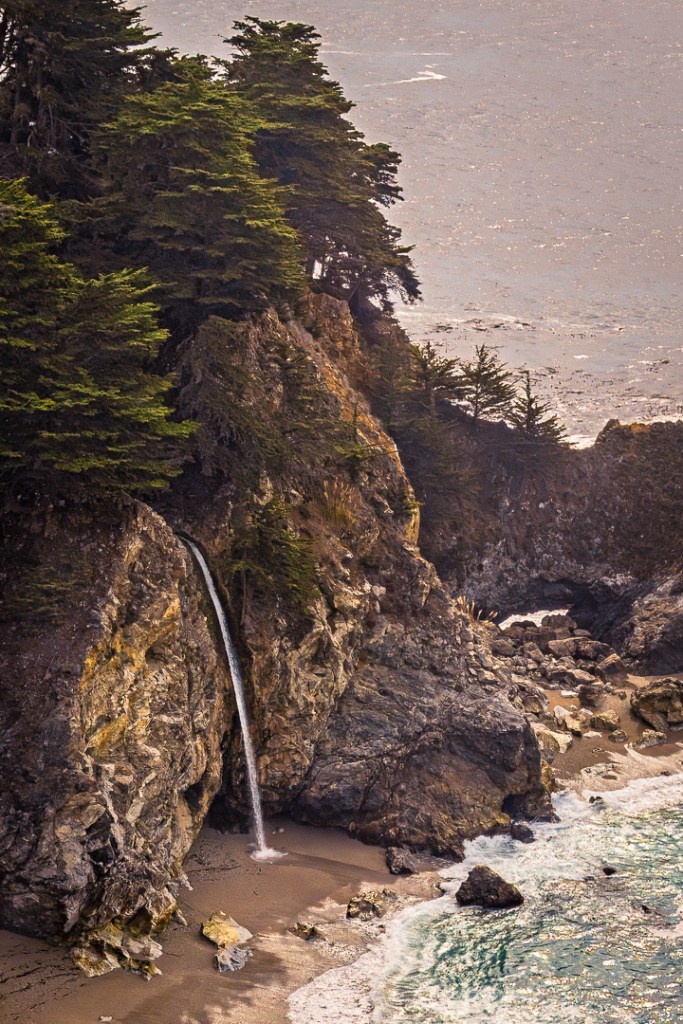
Just for fun (and exhibition here) I created a cropped version of this photo to approximate a similar close-up image of just the waterfall (and the hole).
I must admit, my inner-photographer was feeling much more satisfied with this second view of the McWay Waterfall.
Having succeeded in capturing the image I came for, we left the waterfall and started heading north, back toward Monterey. We only got a bit over a mile up the highway, when I spotted a Vista Point and pulled into its parking lot. After looking around a bit, I set up facing a southerly view and took several overlapping, vertical, image segments with the idea of producing a very high resolution panorama of that section of the coast (later, in post-processing).
Photo Tip: What I just mentioned above is a great way to produce a wide (and/or tall) “wide-angle” image without the typical distortion common to wide angle lenses – that is, the tendency to make distant things look smaller and further away than they actually are. Using this multiple image merge approach will avoid that look and also provide an image of much higher resolution. More over, it is a technique that is fully supported in Adobe Photoshop and the several versions of Lightroom (both Classic and the cloud-based versions). The key is to make sure your camera is very level and that each image segment is overlapped by the next image by at least 30% (50% is even better) so the software can merge all the separate image segments into a carefully blended, level, combined image.
At any rate, here is the high resolution, panorama result of my eight-segment photos:
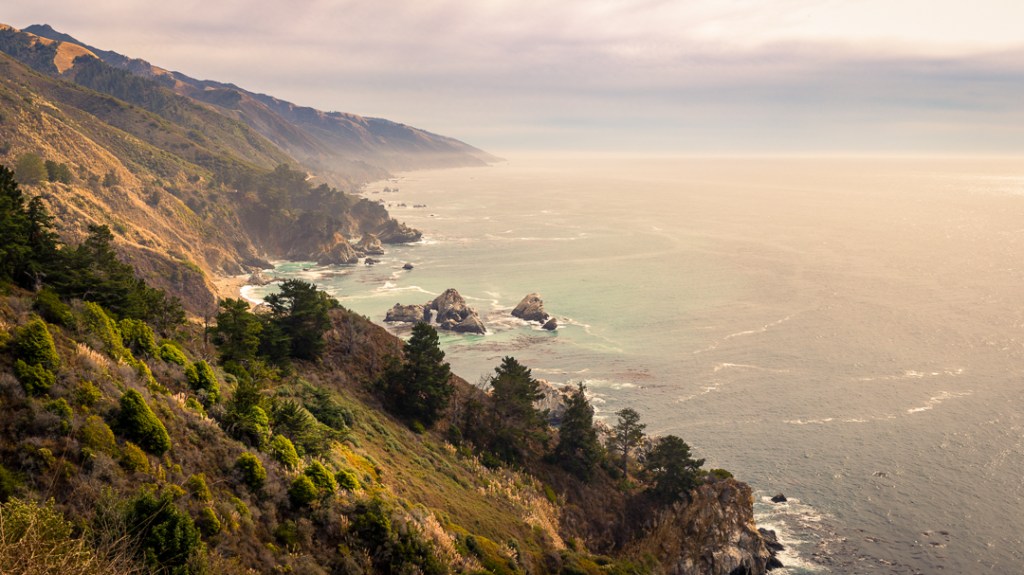
I particularly liked the amount of detail in the image, the unusual quietness of the ocean, and that very thin layer of moisture hanging low above the coast in the distance (probably near the McWay area that we had just left).
After taking the photo series, we left that vista point and continued back to Monterey, went out for a lovely dinner, headed back to the hotel, and called it a day. I woke up the following morning with a desire to drive at least a part of the same miles we’d covered already, just looking for other potential compositions. Billie decided to stay at the hotel and continue to work on knitting a scarf she was trying to complete.
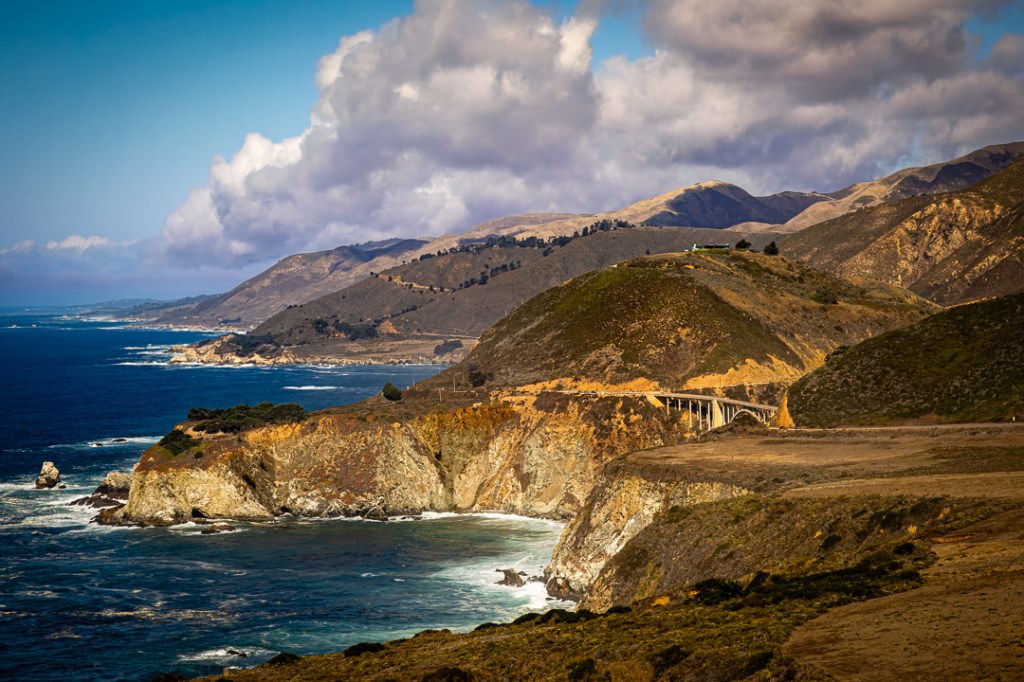
In driving up and down that portion of the Cabrillo Highway, we/I crossed the famous Bixby Bridge each time. It reminded me of an anniversary trip we took to Monterey in 2018 during which I spent quite a bit of time photographing that bridge from various angles. Here’s my favorite image from that trip.

During that 2018 visit, I didn’t wander much beyond the bridge itself (except to also try photographing it from the other side). During this 2024 trip, I noticed another potential view point. Looking at this 2018 image, if you look at the very top of the photo, you’ll notice a cut in the mountain that is the highway going around that ridge. It turns out that there is also another Vista Point there, called Hurricane Point. It is about a mile from the bridge.
While I was on this solitary drive, I stopped at Hurricane Point and captured this image showing the bridge ‘in situ’ which revealed (to me) some of the other residential buildings (links to a map view) in the area (like the one on top of the hill above the bridge, or the one you can’t see in this photo that is nestled among the large clump of trees at the end of the point just to the west of the bridge).
With this image in my camera, I headed back toward Monterey but after passing Carmel, I turned off and headed over to the town of Pacific Grove which is on the southern edge of Monterey Bay. I wasn’t sure what I might find there but the bay-front drive along Ocean View Boulevard is very scenic and quite attractive. I stopped and took a few snapshots but it was when I was near the tip the bay’s end that I began to see interesting action.
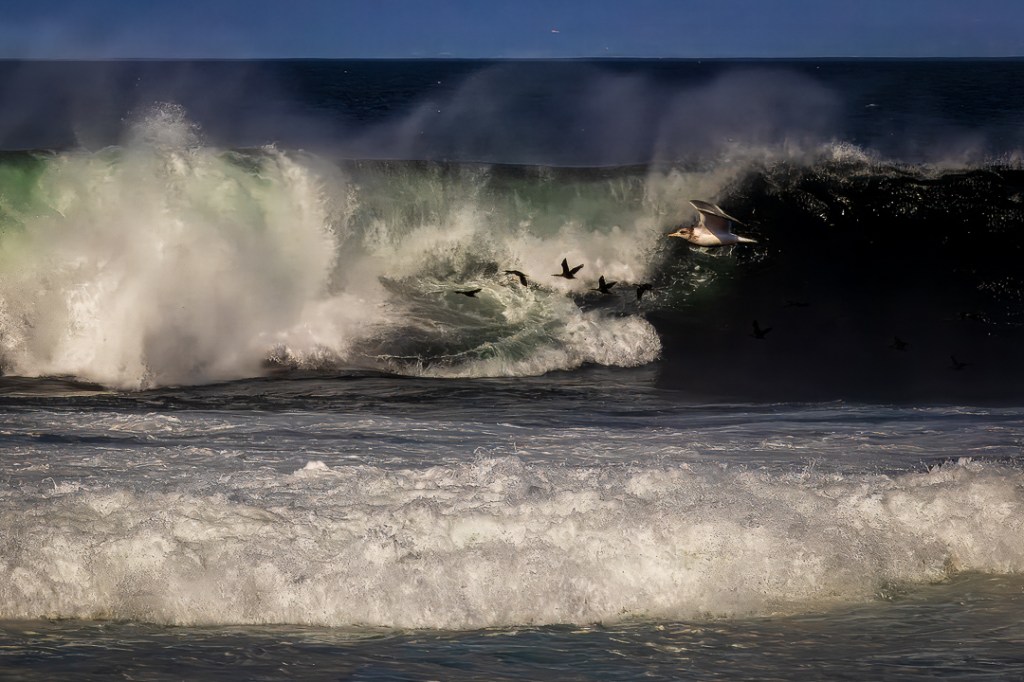
This first image, that I call “Seagull and friends” was taken in the area known as the Pacific Grove Marine Gardens State Marine Conservation Area (what a mouth-full title 😁). I caught these birds flying in front of the breaking wave but was still using a zoom lens with a maximum (relatively short telephoto) focal length of 105 mm. This particular photo was severely cropped in post production to highlight just this aspect of the overall scene. That lighter blue-gray band at the top of the image is not sky, but the blurred and hazy hills in the distance which surround Monterey Bay.
I realized, after taking the above shot, that I was in an area where I might be taking some more bird photos, so I switched to my 100-500mm zoom lens. And, sure enough, as I walked around this Pacific Grove Marine Gardens State Marine Conservation Area (links to map view) I came across a large number of sea birds that seemed to fill the sky. I call this photo, “A Seabird Convention?”
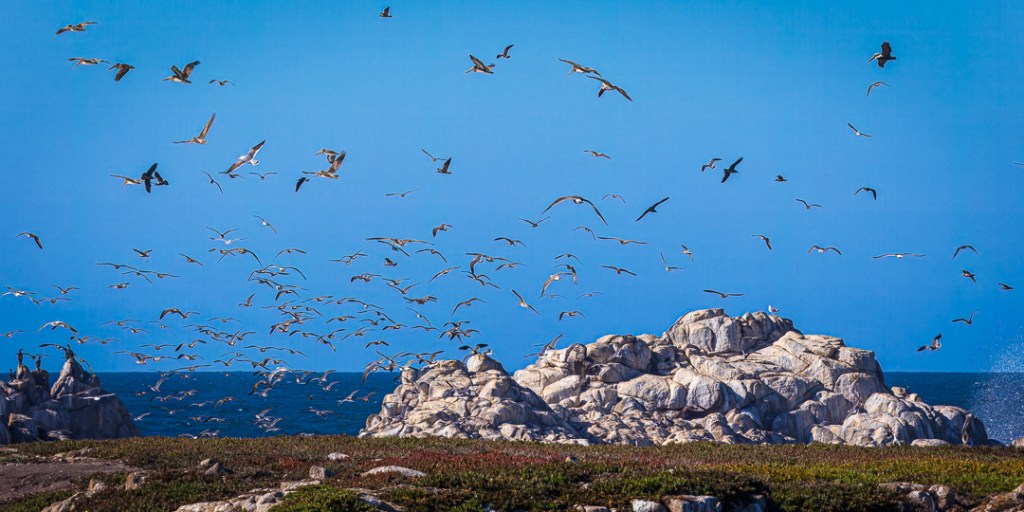
As far as I can tell, there are mostly two different bird species (that I can identify) in the air — seagulls and pelicans. Over to the left, there are several longer-necked, black birds just resting on the rock but I don’t know what they are (do you? If so, please let me know in the comments, below). They may be the same species as the birds flying near the seagull in the previous photo (they certainly look similar to me). [Note: I talked to some bird experts after first publishing this post and their opinion is the the pelicans are Brown Pelicans and the black ‘mystery birds’ in both images are very likely Cormorants.]
I kept looking but didn’t come across any other different birds. But I did notice, as I found myself facing the Pacific Ocean more than Monterey Bay, that the ocean was way more active than I’d seen it since we’d been here. I ended up taking several photos of waves crashing against rocks and eventually put these four images into a slideshow to sort of represent what I was watching.
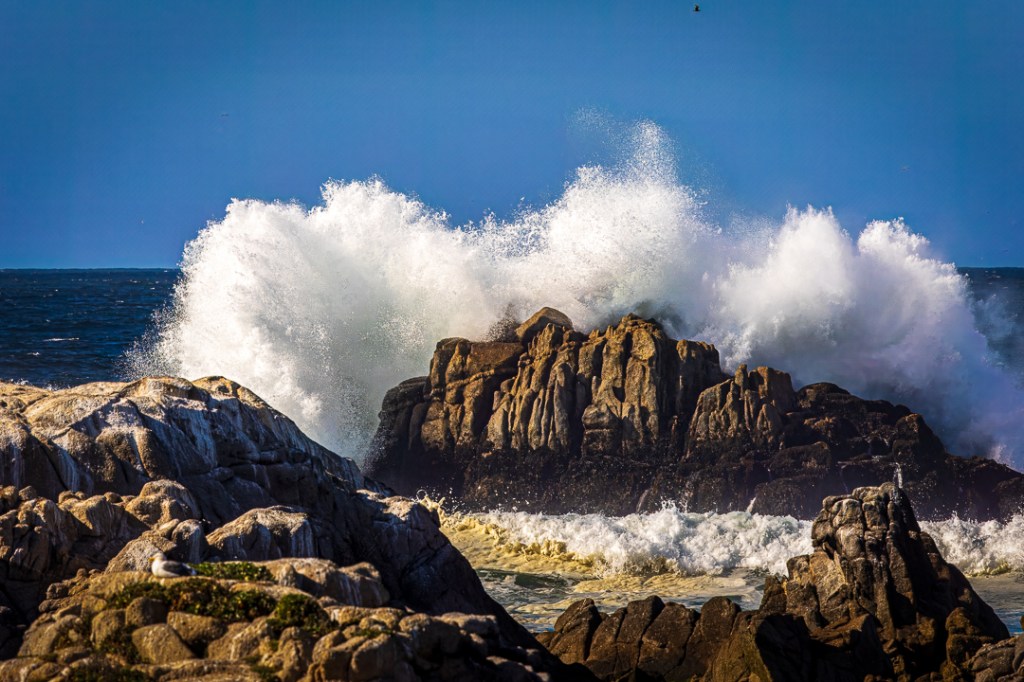
Crashing wave progression; Pacific Grove Marine Gardens State Marine Conservation Area (500mm, 1/500sec, f/16, ISO 320) 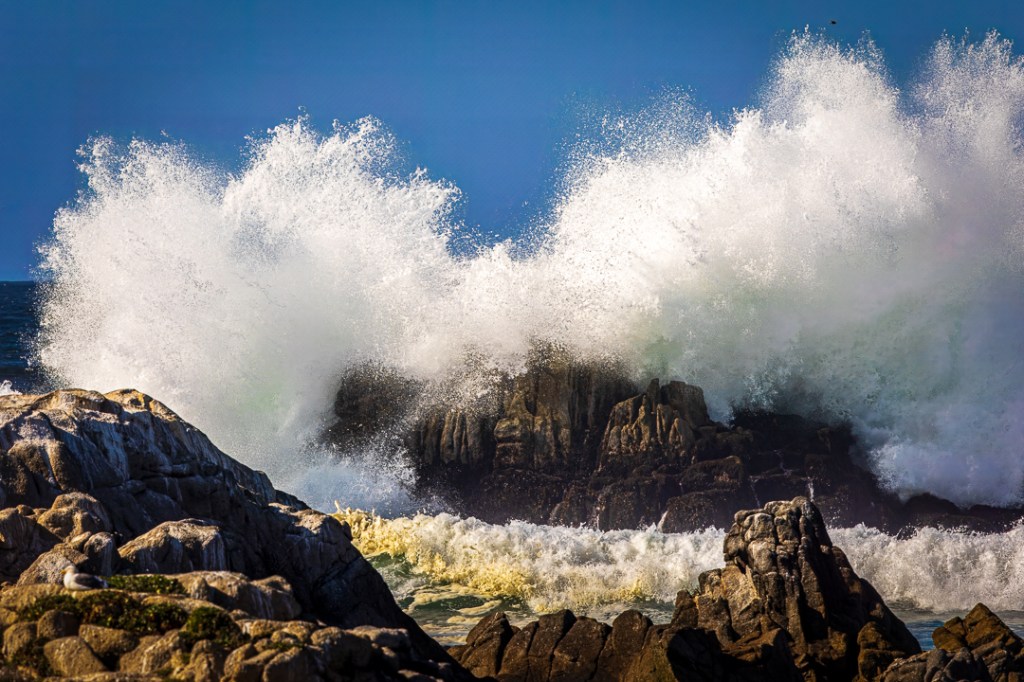
Crashing wave progression; Pacific Grove Marine Gardens State Marine Conservation Area (500mm, 1/640sec, f/16, ISO 320) 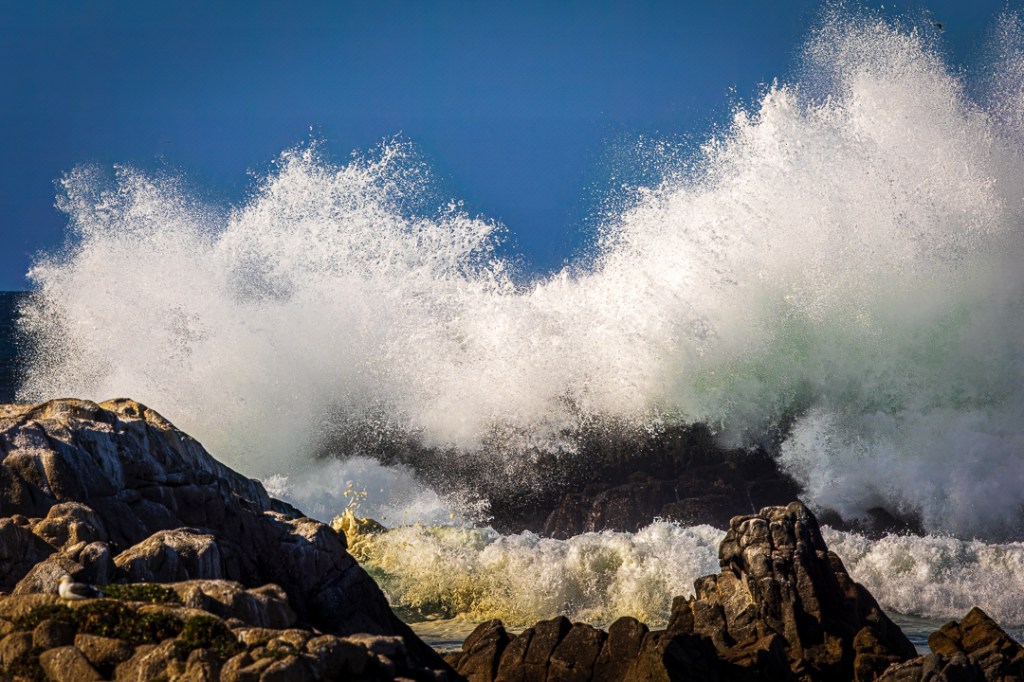
Crashing wave progression; Pacific Grove Marine Gardens State Marine Conservation Area (500mm, 1/640sec, f/16, ISO 250) 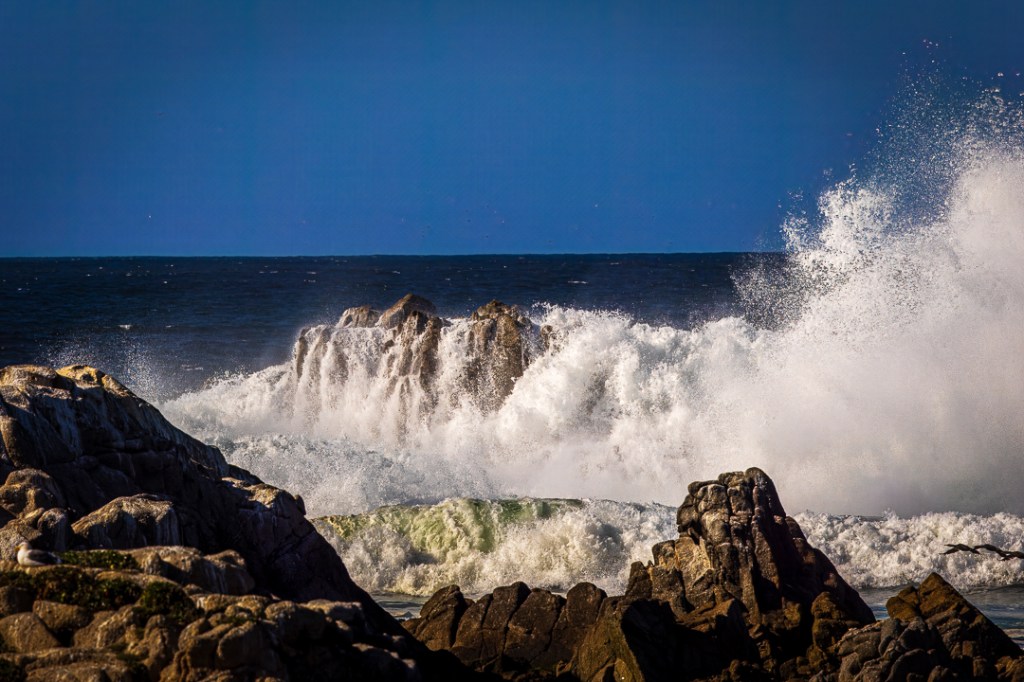
Crashing wave progression; Pacific Grove Marine Gardens State Marine Conservation Area (500mm, 1/640, sec, f/16, ISO 200)
In addition to noticing the fast growth of the wave as it crashes over the major rock in the center, you may notice that a bird some distance away, at the very top, somewhat toward the right side of the image, shows up in the second and third frames (moving toward the right). Also, in the last frame a couple birds enter the image in the lower right corner.
Photo Tip: Also, for those interested in cameras and the technology, the camera is automatically making small changes to the shutter speed and the ISO settings to control the changes in light (brightness) exposing the sensor (because as the wave gets bigger (or smaller) it introduces more (or less) almost pure white light which reflects more (or less) brightness toward the camera as the changes occur). You can stop the rapid slideshow by clicking the control at the upper-right of any of the images and then use the arrows on the sides of the slideshow to move them slowly if you want to actually read the small changes I mentioned above.
Also, in another Photo Tip, particularly since I mentioned earlier in this post the common wide-angle lens distortion of making distant things look smaller and more distant I should note that these images illustrate the opposite common distortion of telephoto lenses — they tend to compress distances. That is, things may be farther away from each other (and the viewer) than they appear. In these four photos, the sitting seagull and the rock formations in the foreground seem to be fairly close to the rocks that are helping the waves to crash and the waterway between them seems fairly narrow — perhaps only about 8-10 feet apart at most.
But, in fact, they are much more distant from each other than is apparent. And there is nothing showing in between the two formations that can give the viewer any clue about the actual distances involved. That is the telephoto compression effect.
Those were the last images I took while on this trip. We stayed in Monterey for another day and then headed home. If you’ve stuck with it all the way to this point, I do thank you.
If you enjoy seeing the photographs, you might like to see them in a higher resolution (larger) and with more color and detail fidelity.
They can easily be seen by viewing them in one of two places (either my CedBennett.Photography website or my Flickr website). Only five of the images in this post are in my photography website.
- To make it much easier for you to find four of the images featured in this blog post, click this direct link to the San Francisco Bay Area – South album in my CedBennett.Photography website.
- To see the one image in this post from our 2018 trip to Monterey, click this direct link to the Bixby Bridge image.
- To see all but one of the images from this blog post, click this link to the 2024 Album in my Flickr website.
- To see the one image in this post from our 2018 trip to Monterey, click this direct link to the Flickr Bixby Bridge image.
Both sites offer the opportunity to show the images enlarged, even close to the full size of the viewing monitor. Generally, Flickr can show an image somewhat larger than my CedBennett.Photography website can.
A SUGGESTION: I started mentioning this idea in my previous post. if you enjoy reading my occasional blog posts and viewing the included photos, you might consider subscribing to the blog. I typically post (at most) about five or six articles in a year, and of course, you can always ignore any particular blog post announcement email you’ll receive as the result of subscribing (or can even unsubscribe, if it ever gets to be more than you expected).
Subscribing is easy. You may have noticed while reading a post, that anytime you have to scroll up (whether you use the scroll bar, your mouse, the up-arrow or page-up keys on the keyboard, or even your finger on a tablet or smart phone1 screen) a little dialog bar will show up in the bottom, right-hand, corner of wherever you are in the post. And that dialog bar will include the word “Subscribe” (without the quote-marks). [It also includes two other words (“Comment” and “Reblog” plus a “…” option)]. If you click on the “Subscribe” word, another dialog will appear, just asking for your email address. Once you complete that process, you will likely receive another communication asking you to confirm your subscription.
If you choose to subscribe, Thank you. If you choose to not subscribe, I also Thank you (for visiting and checking it out, no matter how you came to read this post).
1Footnote: I did try this on a phone (although I really don’t recommend reading this particular blog on a phone, even though it is supported, because the photos become postage-stamp sized). I assume, perhaps incorrectly, that folks read this blog primarily because of the photos; that’s why I always include information about seeing the images in other contexts, where they can be seen larger and in more detail. At any rate, the phone option does bring up the dialog when one scrolls up, but the Subscribe and the “…” option are not offered (I don’t know why).
