
We actually covered more ground than we usually do so I thought providing this annotated map of the area might help readers.
1. Where we stayed
Billie and I headed up to Lake Tahoe on September 11, returning home on the 25th. As usual, we stayed at Marriott’s Timber Lodge just south of California‘s border with Nevada at Stateline A few things we’ve grown used to had changed since our last year’s visit.
Readers may remember that the very large Ralph’s market that anchored the shopping area within easy walking distance of the resort had suffered a serious winter accident a few years ago when an extra heavy snow caused a part of Ralph’s roof to collapse. The market decided to quit rather than repair/replace the damage and we found that similar support from existing grocery competitors required a drive instead of a walk to do any serious shopping.
This year, not too long before we arrived, a Target department store had taken over much of the same space, including a grocery department. We found it only somewhat useful for groceries, and used it only for simple shopping needs but continued to drive to larger, better supplied stores, whenever we had serious grocery shopping to do. Hopefully, it will have improved by the time we return next year.
The other major change, which concerned and disappointed us even more, was the closing of our favorite fine-dining establishment, Café Fiori. We learned about that before we arrived (after trying to make reservations) and then found local newspaper articles describing the “lost our lease” issue causing the closure. We hope they decide to find another location and re-open at some time soon; they are a real loss.
Meanwhile, we did learn of another fine-dining restaurant, on Emerald Bay Road (also CA 89) at about a mile-ish past the “Y” going northwest. That restaurant is called Evan’s American Gourmet Café and is certainly worth a visit (reservations highly recommended). We ate there twice during our stay.
Just FYI, the altitude of the surface of Lake Tahoe is 6,225 ft and just about everything we do while visiting there is above that (keep in mind that where we live is definitely at an altitude that is less than 200 ft). We spent our first couple of days sort of organizing our nest, keeping an eye on email, shopping, doing some planning, and just getting acclimated, especially to the altitude. I had as a photographic goal for this trip to do some photography at places other than those I’ve visited multiple times already (but not necessarily ignoring those familiar places).
We had left home later than usual (for reasons I no longer remember) on a Thursday (arrival is always near the end of the day for check-in — so, basically our goal is just to get our stuff moved in, go have dinner, and then sleep). Our later than usual check-in meant we got whatever was left after most other new arrivals had already checked in; we were not particularly happy with our room assignment. We arranged to move to a different location the following day, and were much happier with the change (however, that took about a half day to get it fully done).
2. Searching for other sites
On Saturday, we did some planning and decided to do a general tour of the lake area the next day (using notes I had cribbed from a favorite photography site guide, Photographing California: Volume I – North: A guide to the natural landmarks of the Golden State by Gary Crabbe and by driving around the entire lake, stopping here and there to check out newer (for us) possibilities.
In retrospect, although we did drive the entire lake as well as several highways and back roads looking at different places, I didn’t come away from the exercise with much in the way of useful information. In fact, I only took a couple of shots from a single ‘overlook’ location that does help provide an idea of the vastness of the lake and the surrounding region. Unfortunately, it did not help me to decide on new places to photograph. Here are the two photos from that day.
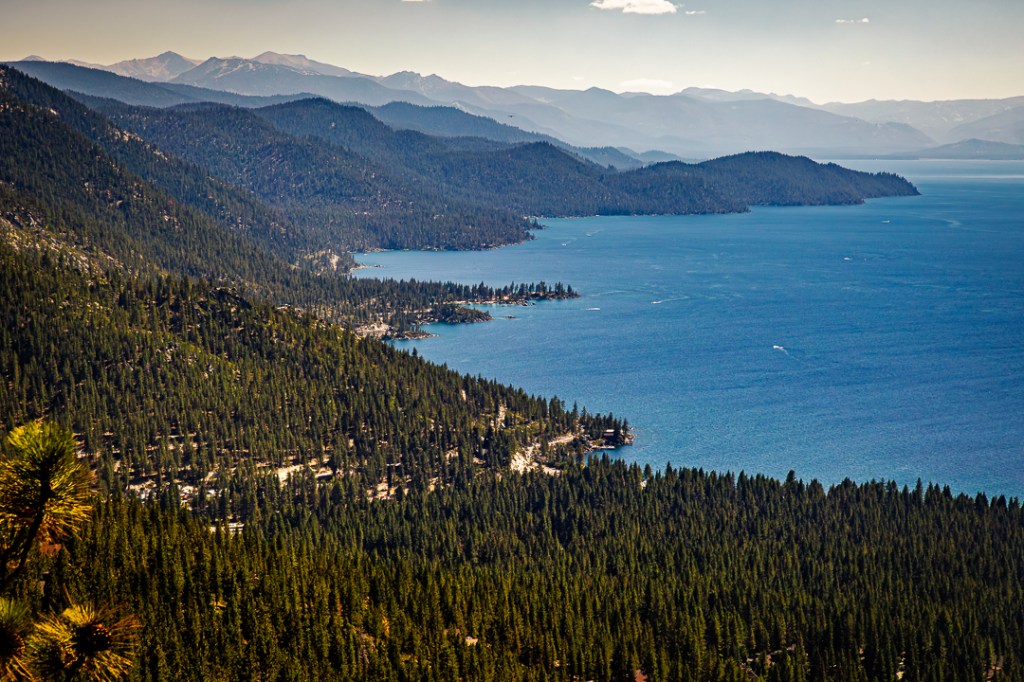
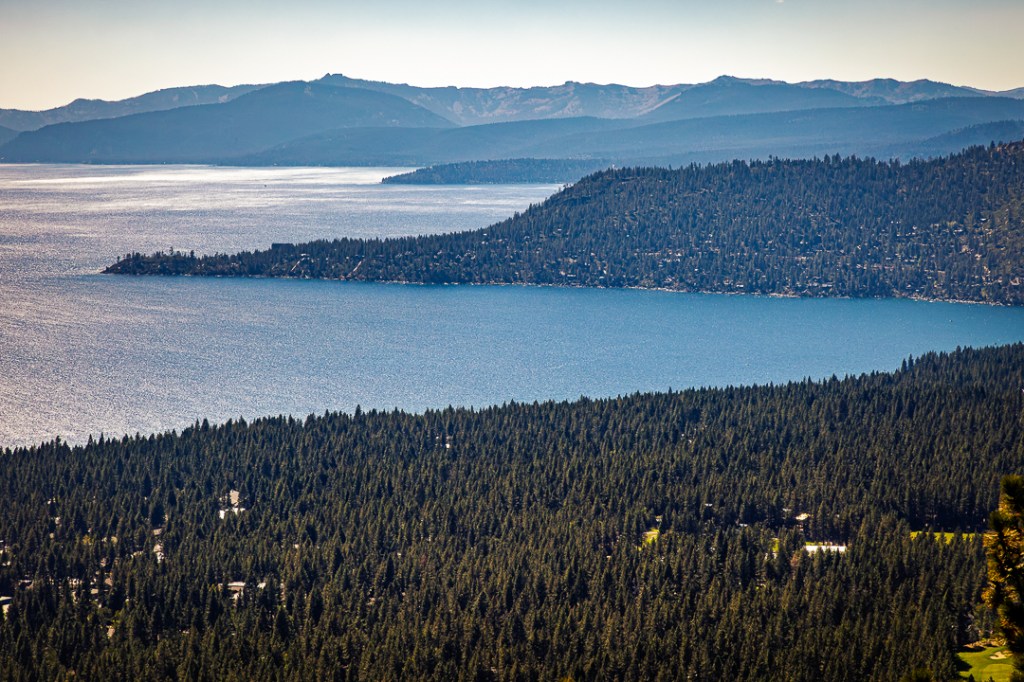
As I think about it now, I believe we tried to cover too much in too little time. Next time, instead of tackling the entire lake area, I think we’ll try to be more focused by selecting a smaller section or two and just going there and spending time looking around (and maybe taking some test or idea shots).
3. Re-visiting old haunts
Since our search had not produced much help in identifying some newer photo sites for me, I decided to just head out the very next morning and visit some places I’d had some success with in the past. And for me, one of my favorites (regular readers will probably guess this one) is the area around Emerald Bay. Now, I should add here that my expectations for the area were not as high as they might be earlier in the year. By mid-September, nearly all visible snow has already melted so run-off in creeks, rivers, and especially falls are not particularly photogenic. So my “…very next morning…” was not my usual attempt to get out there at ‘zero-dark-early’ since I didn’t even have very high hopes for early morning cloudy sunrises.
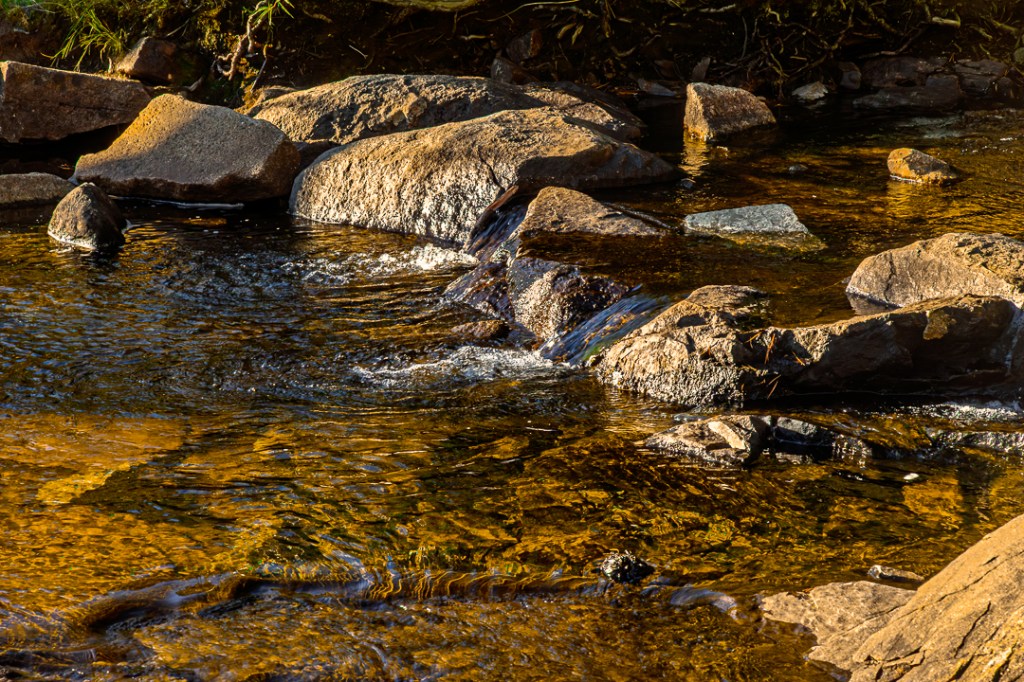
It takes about 30 minutes or so, to drive to the area above Emerald Bay and a bit more time to climb down to where the Lower Eagle Falls start on the east side of the highway. As I mentioned, my expectations were low. But I believe I managed to get several captures that illustrate just how low the river and waterfall levels were at that time. Here is the one I liked best; even though the water level is obviously very low, and the low force of the flow is barely able to move the water downhill, the rising sun has managed to shine through and light up the water and the surface under it in this image.
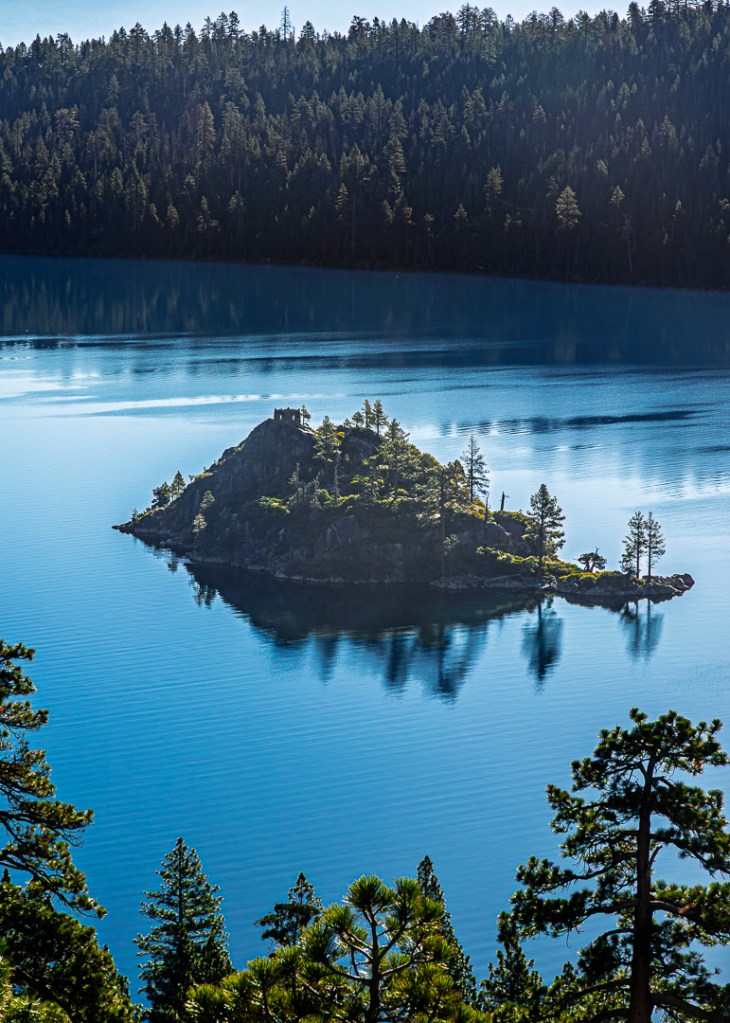
I spent a bit more time trying to develop other compositions but finally decided to change my perspective. I climbed back up to the highway and the trail that parallels it to hike the half-mile north to the Emerald Bay State Park Lookout. From the lookout it is possible to see Emerald Bay from a slightly higher altitude and at more of an angle across the bay rather than the ‘straight out the bay toward the lake’ view of the site I had left.
I took two different photographs of Emerald Bay from that perspective; one focused primarily on Fannette Island and the other facing directly down, toward the Vikingsholm Beach. At the peak of the island (the only island in Lake Tahoe) you can see the ruins of a small stone building. That ruin is called the “Tea House,” constructed by Lora Josephine Knight, the former owner of Vikingsholm. The photo of the beach is somewhat obscured by the number of trees and the angle of the shot. But it is possible to see a hint of the Vikingsholm Castle hiding under the trees.
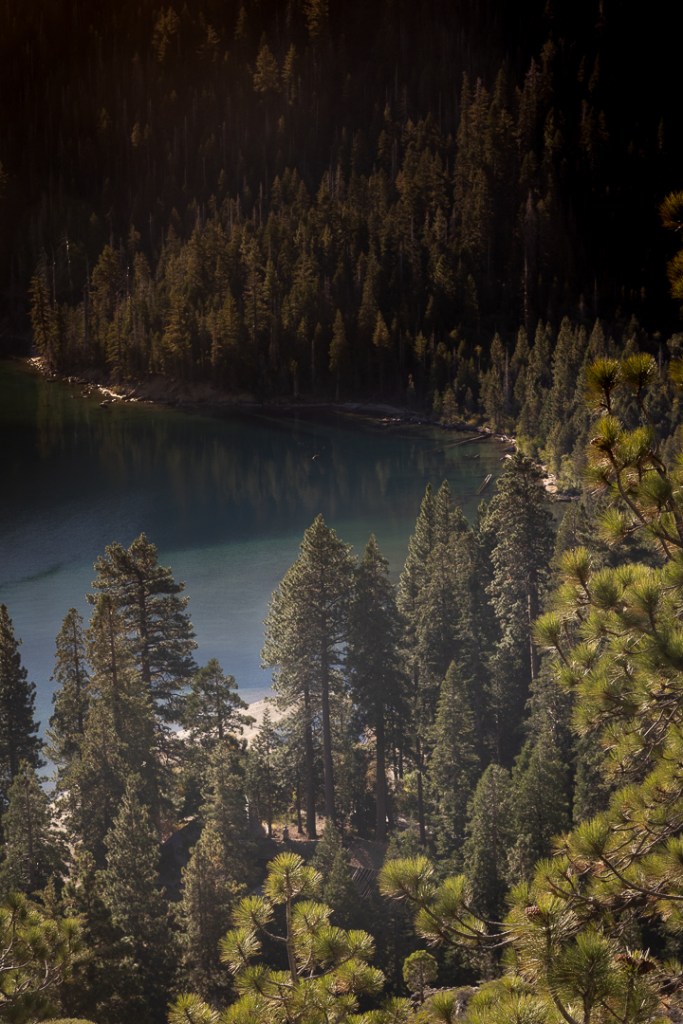
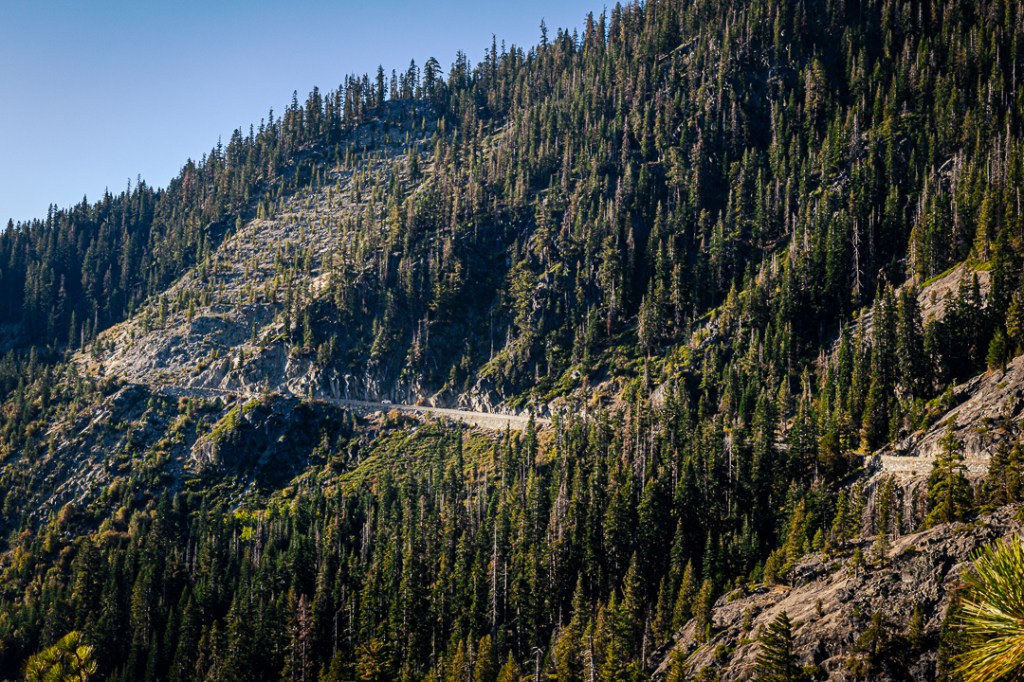
While I was there I realized that I had not taken any images of the area around which all these wonderful sites exist. You can get a sense of scale when you try to pick out the few cars on the highway that were caught in the photo below. The highway is well maintained but in this area it is quite curvey and only has one lane in each direction. We do not generally visit Lake Tahoe in the winter but I image it takes a very careful and experienced snow driver to navigate it even when it is plowed and open. Also, like most country roads, much of it is not artificially lighted. I do know what it is like driving it in the dark.
I had an amazing time on this first day up here, out with my camera gear. I found that, even though I did not have high expectations, I was able to find some compositions that were fun for me to shoot and I could feel that the juices were starting to flow — it was a good feeling.
I also must have started thinking in terms of planning toward smaller areas of the Tahoe region (mentioned earlier in this article as an idea which has become clearer to me as I’ve been writing this post) because I found myself paying more attention to familiar signage coming and going to Emerald Bay. One of the signs I noticed pointed to Fallen Leaf Lake. I remember thinking as I passed it, that it was a place I was familiar with but not one I’d spent much time thinking about with regard to photography.
4. Checking out Fallen Leaf Lake
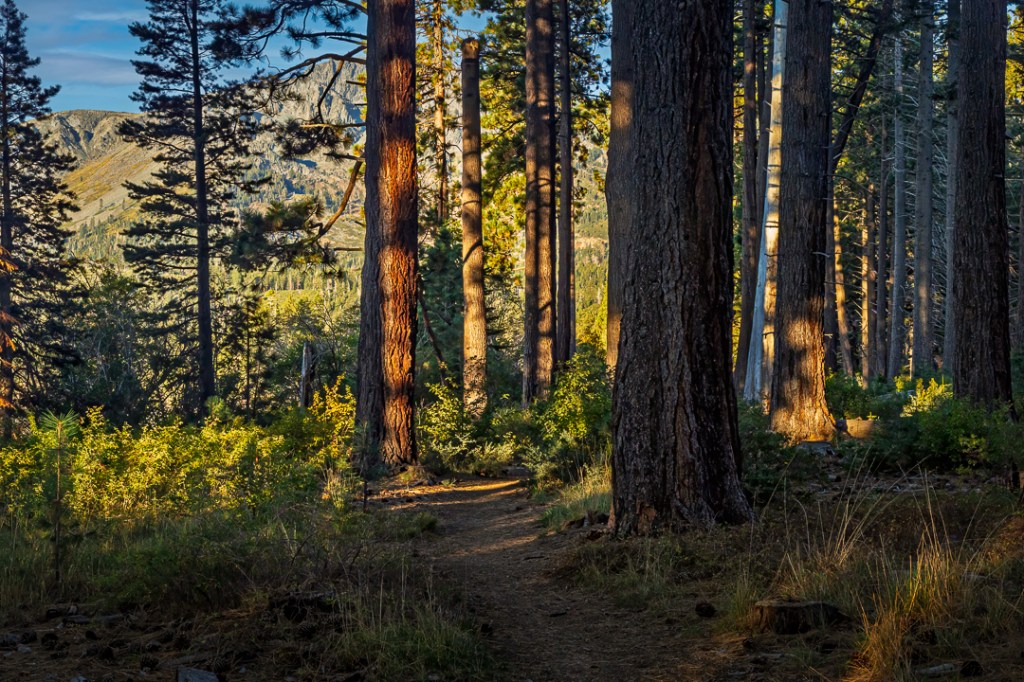
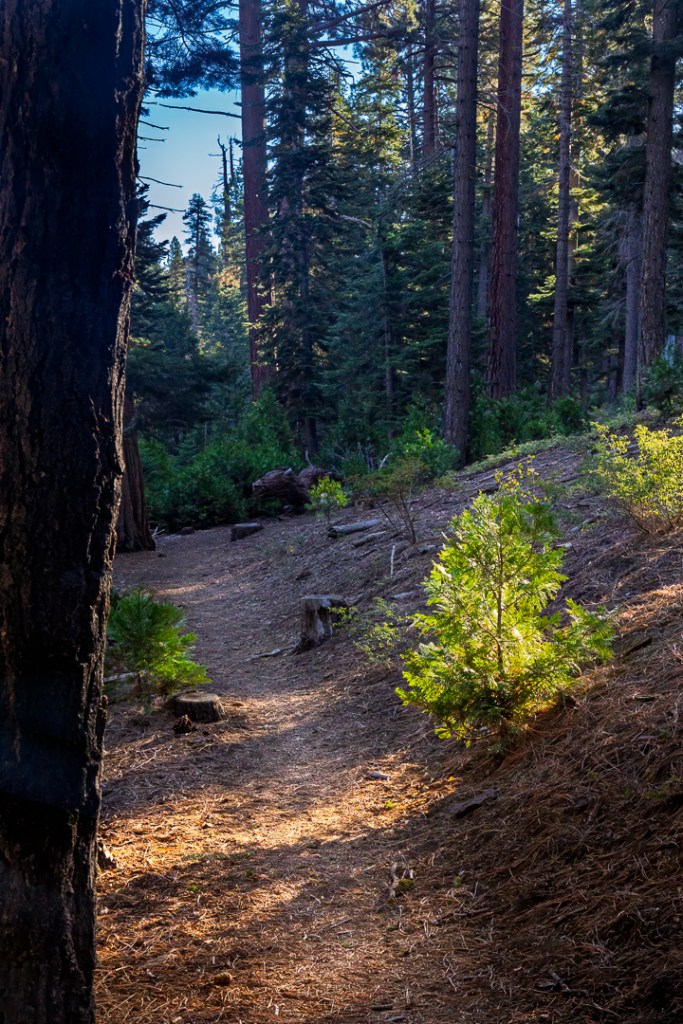
The more I thought about it, the more it appealed to me. I spent a few days doing some research on Fallen Leaf Lake and then decided to do an exploration hike using some of the trails on the eastern and northern sections of the lake to gain some trail sense of the place and get a closer view of the scenery. I started the next morning leaving early enough to reach the parking and trailhead before 7 AM, avoiding an initial hike in the dark.
I learned pretty quickly that there were a lot of inter-twining trails, all named Fallen Leaf Lake Trail. So part of my task was to try to ingrain a sense of the trail layout into my brain for follow up exploration days. Meanwhile, I was beginning to realize that the feeling of the area was very positive — it just felt like a simple day walking in these very pleasant and colorful woods (it also didn’t hurt that all the initial hiking was mostly level).
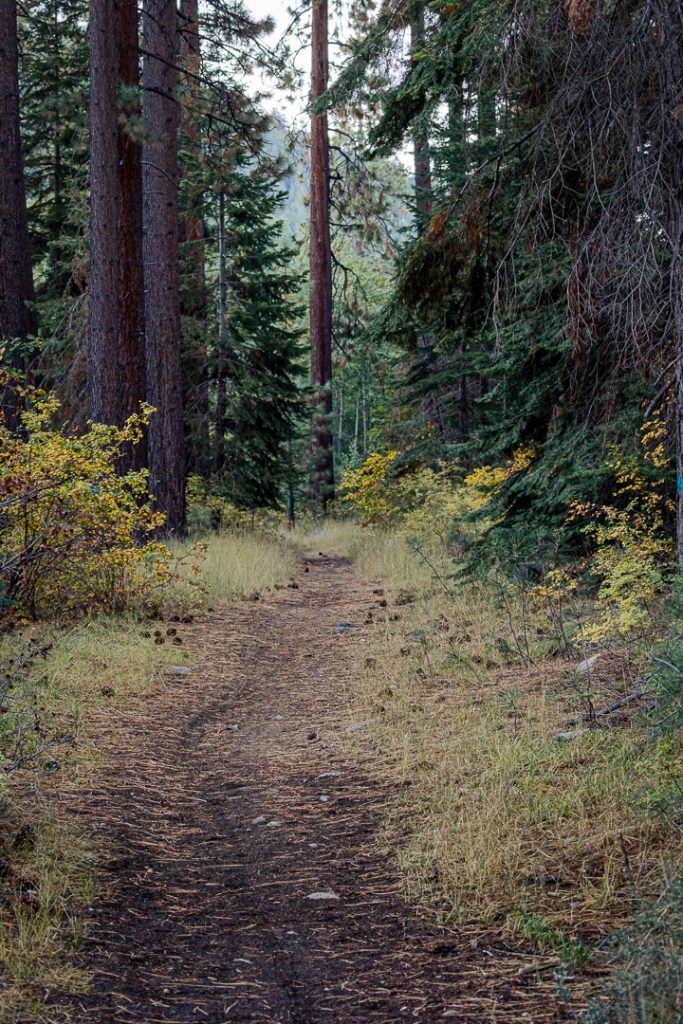
(100mm, 1/100 sec, f/8.0, ISO 2500)
Since I was mostly trying to gain a mental map of the area, I chose to adopt a southerly route, always choosing trails that continued in that general direction. I knew that the lake was somewhere close by to the west of my position and so I knew I was paralleling the lake’s general layout.
Fortunately, I had mounted my longer 100-500mm zoom lens in hopes that I might come across a bird or more to photograph. And, as it happened just a bit further along this trail, a Steller’s Jay flew down to the ground a short distance in front of me, to seek some breakfast.
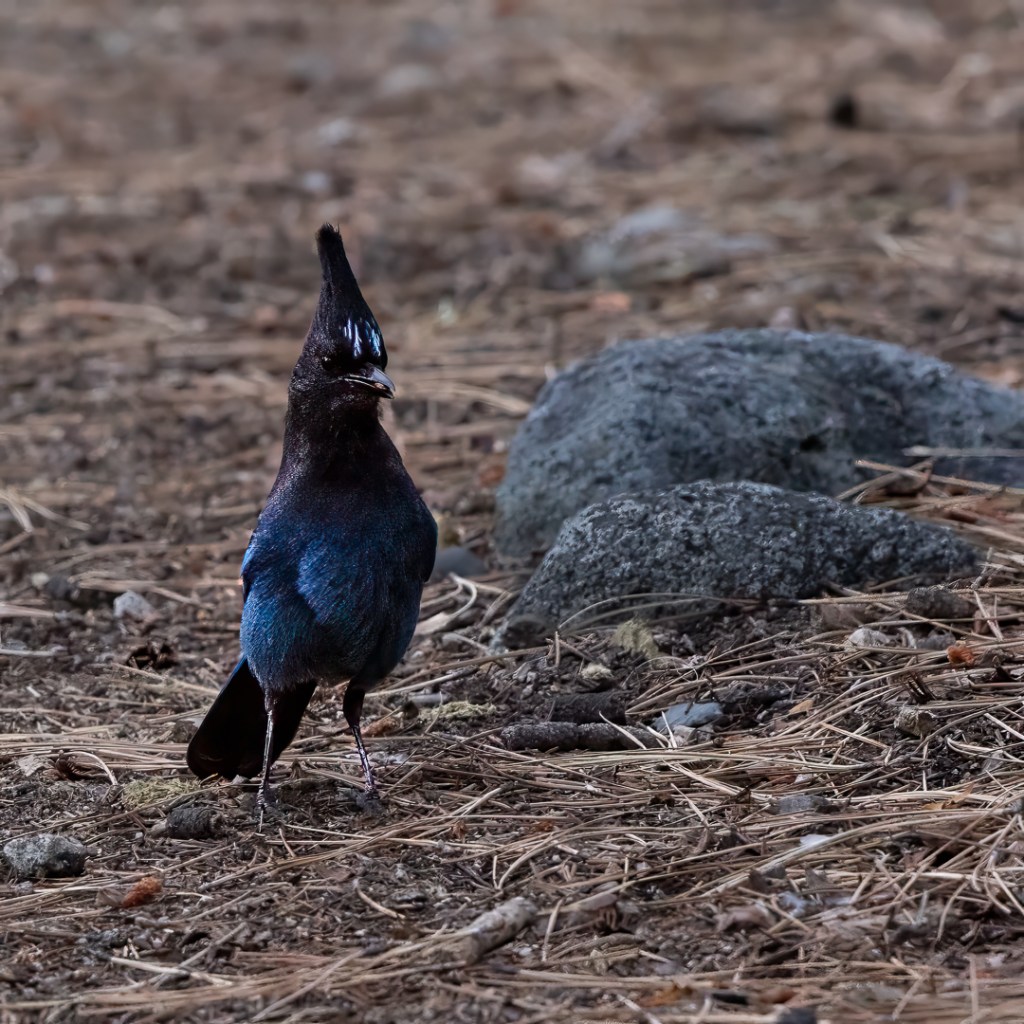
Then the jay started dancing around moving quicking into the brush, back onto the trail, then up to a tree, then another branch, then back to the ground. I was having serious trouble just getting the bird into the viewfinder, let alone in focus. I must have taken at least 25 images, hoping I’d get one that would be usable.
As you can see from this (happily) in-focus image, the depth of field I was dealing with was very narrow — the material on the ground in front of the jay starts to lose focus at about 3 inches in front and also 4 or 5 inches behind (basically no more than an 8 inch DOF for a quickly moving subject). A few other of the images were close to usable except that some part of the bird (e.g., a foot, a wingtip, a beak) was outside that range or an in-focus shot had the jay facing away from me). The rest of the images were totally useless (in some cases the bird was no longer anywhere in the frame). Clearly, I need more practice doing this kind of photography!
Not long after the bird encounter, I decided to try to get closer to the lake. Traveling south, as I was, I was aware of a kind of berm or natural ridge that extended steeply up, to my right. The next time I came to another branch in the trail that faced up the ridge, I took it. It turned out to be as steep as it appeared but not that high. It was only up about 60 feet (or a bit more) and then it rounded and headed down toward another branch of the trail that seemed to follow the lake’s coast fairly closely. The image on the left is my first view of Fallen Leaf Lake (at least on this trip).


Since I was now facing the actual lake and also felt I’d gone far enough south on this first exploratory outing, I changed direction and began to follow the trail, and the lake’s coastline, traveling north but also understanding that following the coast would soon turn me toward the west, as we would soon reach the northern edge of the lake.
As I continued to hike along the lake, I started to hear a distant motor sound, which quickly grew louder. I stopped hiking for a moment and turned around to see what was making all the racket. In another moment I saw the powerboat and the skier. I grabbed my camera and took a couple of quick shots as they came by and then began to turn completely around until they disappeared heading toward the south end of the lake.
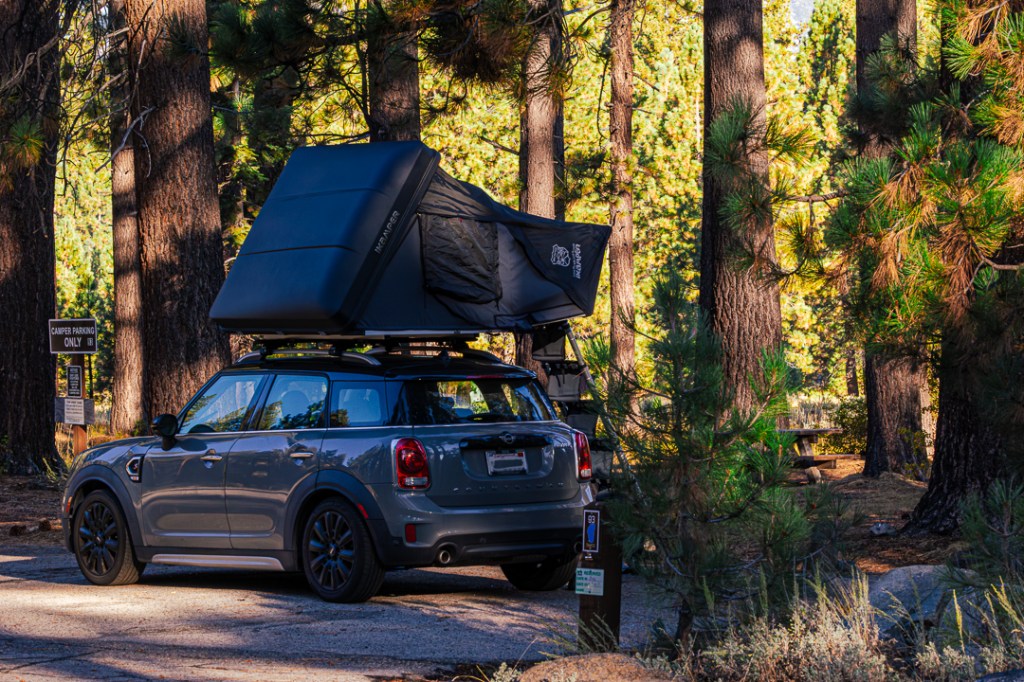
That boat and skier made me realize that I was already very close to the northern edge of Fallen Leaf Lake. I decided I’d done enough exploring for the day and kept my eyes open for another trail branch that would begin to lead me more toward the east and back to my car. Before long I could see that I was approaching the road on the edge of Fallen Leaf Campground and knew I was getting close to the end of the day’s hike. I also noticed this unusual campervan made out of a portable sleeping device fastened to the top of a Cooper Countryvan (I obscured the license plate number in this photo to protect the camper’s privacy).
5. Planned visit to Fallen Leaf Lake
I spent some time reviewing the photos I’d taken during my first exploration of the area as well as online satellite maps and hiking maps found on the Alltrails app. I decided that my return trip to Fallen Leaf Lake would head more toward the northern end and the place where the lake drains into Taylor Creek (which eventually drains into Lake Tahoe).
Two days after my initial exploration of Fallen Leaf Lake, I was back, arriving at nearly my same parking space on Fallen Leaf Lake Road sometime between 6:30 and 7 AM. I grabbed my backpack of camera gear, hung my camera from my neck (this time with the more versatile 35-105mm lens attached), and followed the same trail I had two days earlier. But after a bit of start up hiking, I opted to connect to another trail/road that more directly led to the edge of the lake close to the northern end. I arrived to take this photo (40mm, 1/80 sec, F/16, ISO 12800) at around 7:15 AM.
You can’t really see it in this photo but just before the trail/road ends at the edge of the lake, there is an intersection with the trail that follows the shore. That is shown in the image on the left below.
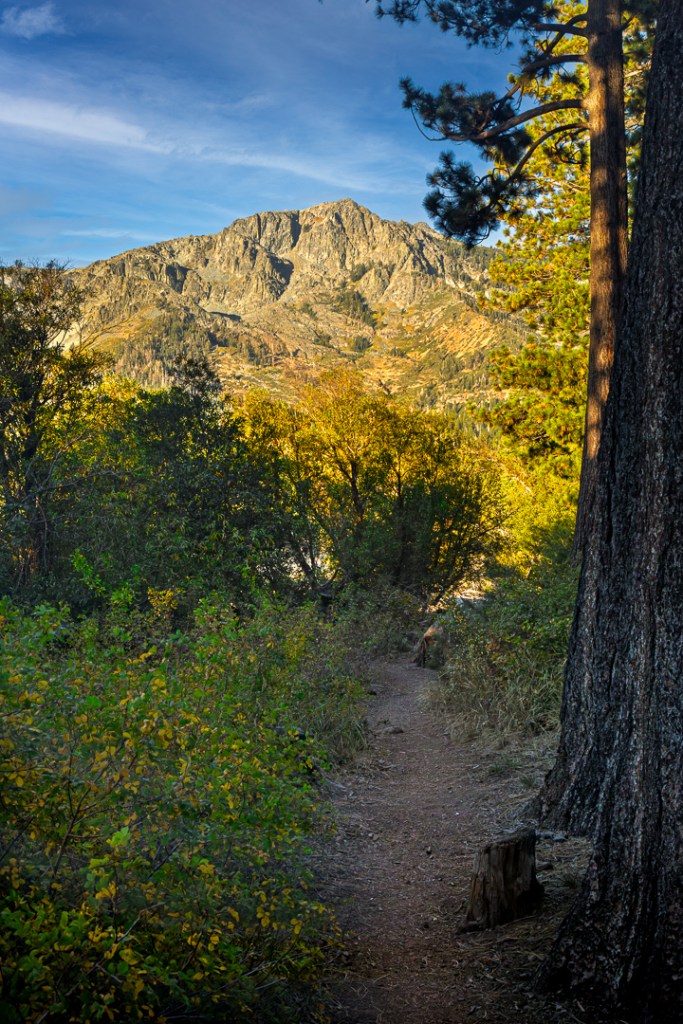
Then, a couple of minutes after capturing the (deeper in the woods) image on the right with Mt Tallac obscured by all the trees, I broke into a clearer section of the forest with an amazing view on Mount Tallac.
And, about 20 minutes later, I arrived at a bay at the northwestern corner of the lake, that is blocked off with a fence of connected, floating logs. This is a protected area that surrounds a pond in front of the Fallen Leaf Lake Dam.
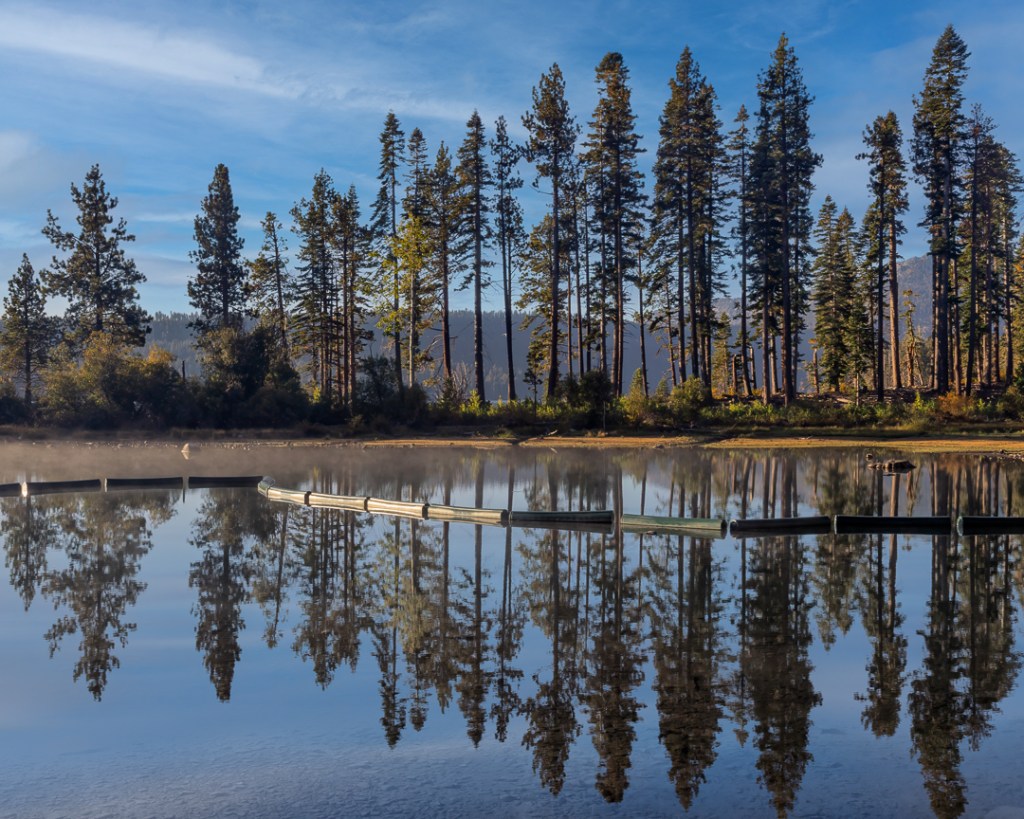
The dam controls the flow of water from the lake into Taylor Creek and was primarily built for recreation purposes, but also serves for Fish and Wildlife Pond and Flood Risk Reduction benefits. It is currently owned by USDA FS.
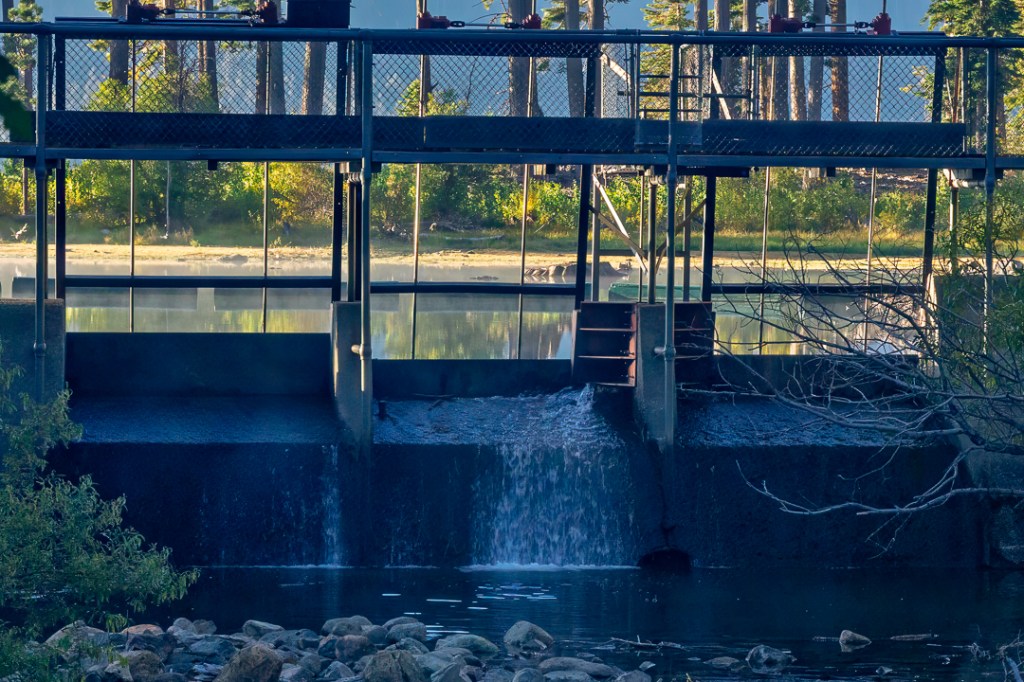
I had little trouble finding good spots from which to take most photos during this trip, but getting to a position to capture an image of the spillway required some scrambling around all the foliage surrounding both banks of Taylor Creek and its very uneven banks. I did manage to keep both my feet and my camera dry in the process. On this day it looks like the spillway is closed to the point where is is allowing only a minimum amount of water to enter the creek (or else, it just leaks a bit even when it is closed).
At any rate, reaching this point on the trail felt like it satisfied much of the itch I was trying to scratch with regard to photographing newer (for me) sites in the region. I decided this would be a good time to start making my way back to my car and thought to follow the trail that tracks Taylor Creek — for a while, until its course was no longer helping me to head back to my starting point.
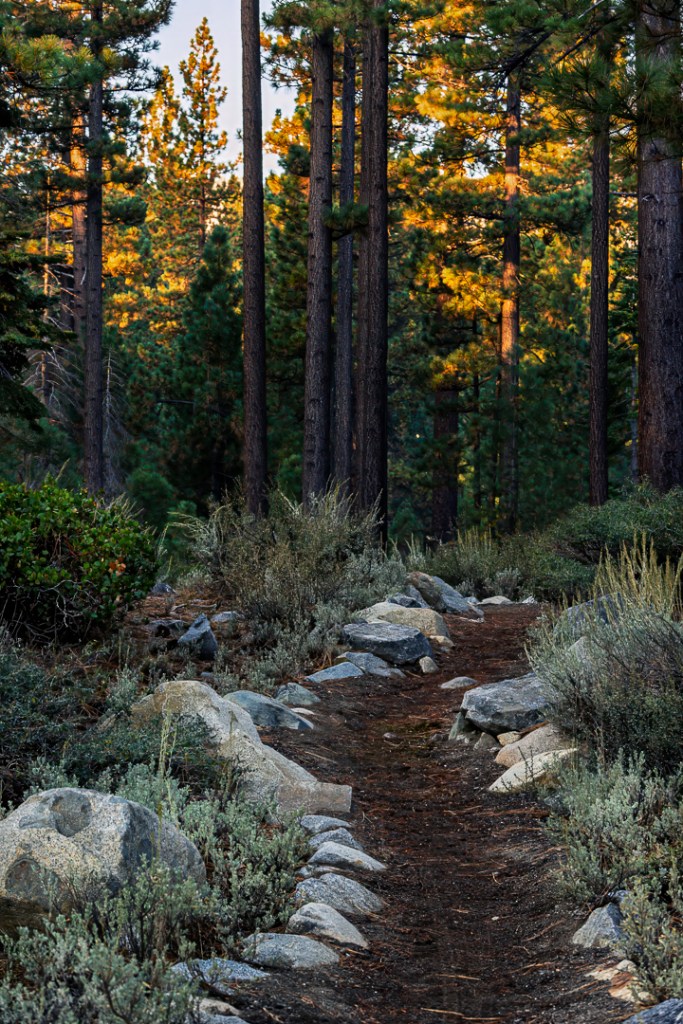
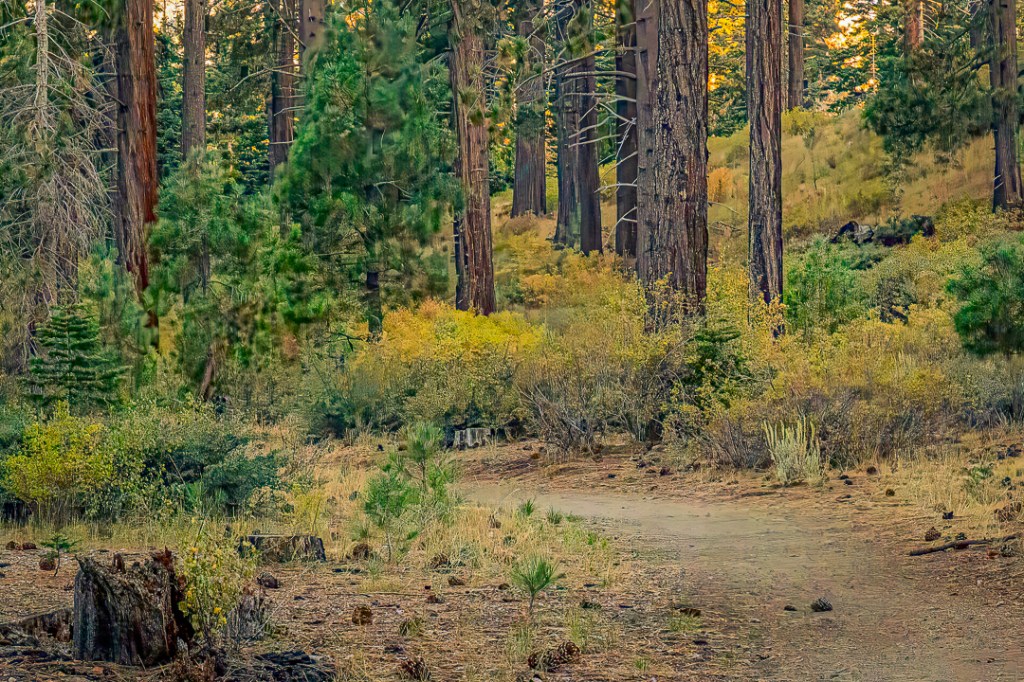
I took the photo on the left primarily because I liked the way the sun was highlighting the new saplings growing near the trail (55mm, 1/80 sec, f/16, ISO 5000).
My ankles also noticed that the trail had a slightly uncomfortable tilt toward the creek which was normally about 10 to 12 feet down a steep bank to the left.

I also shot the image, above on the right, of the creek handling a minor rapids section which also clearly demonstrated its shallow water level (that is also partly the result of the dam spillway being mostly closed at this time).
Following the creek was not that difficult and was helpful as long as it tended to take me in an easterly direction. But after a while, I began to sense that Taylor Creek had turned a bit more northerly so I kept my eyes open for another trail intersection that would allow me to continue my easterly hike. And, I came across this interesting choice of paths to follow.
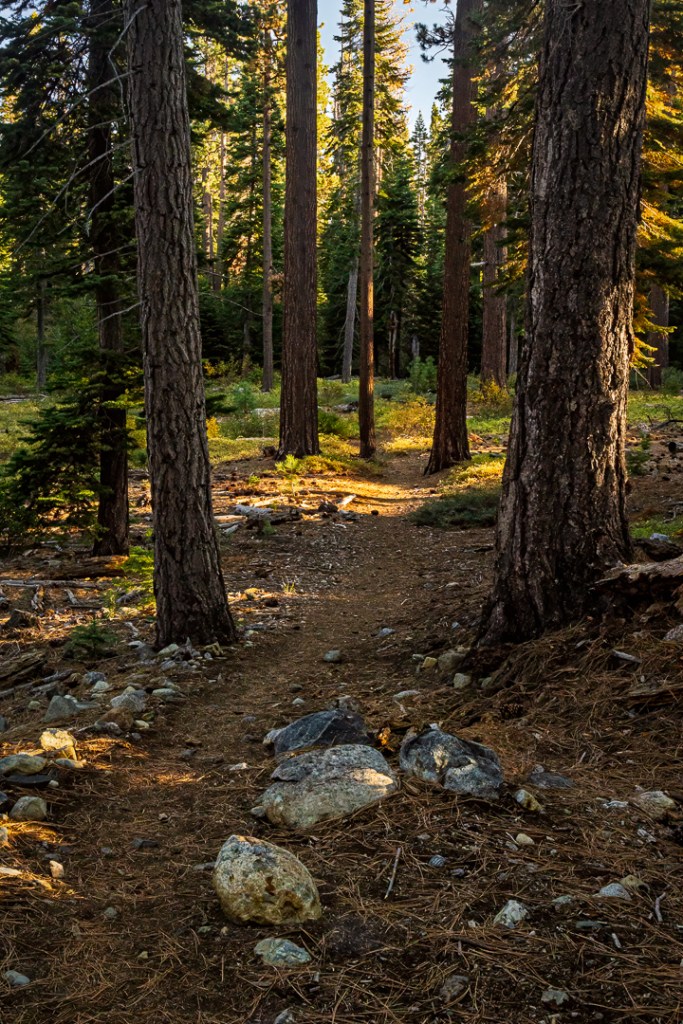
The forest was quite dense, not allowing much view of distant objects at this point but my general sense of direction told me to continue straight ahead and I’d probably soon see the southern road of the Fallen Leaf Campground — which I did, and it worked well. After that, the trail paralleling that road took me directly back to my car and I headed back to the hotel to join Billie for breakfast.
6. Sunset visit
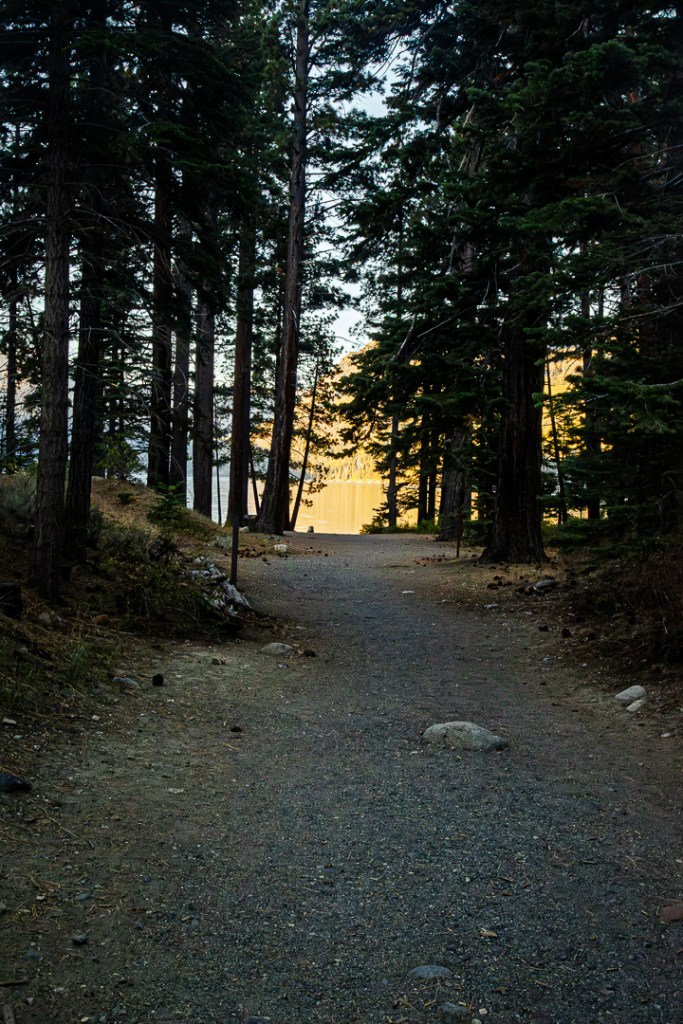
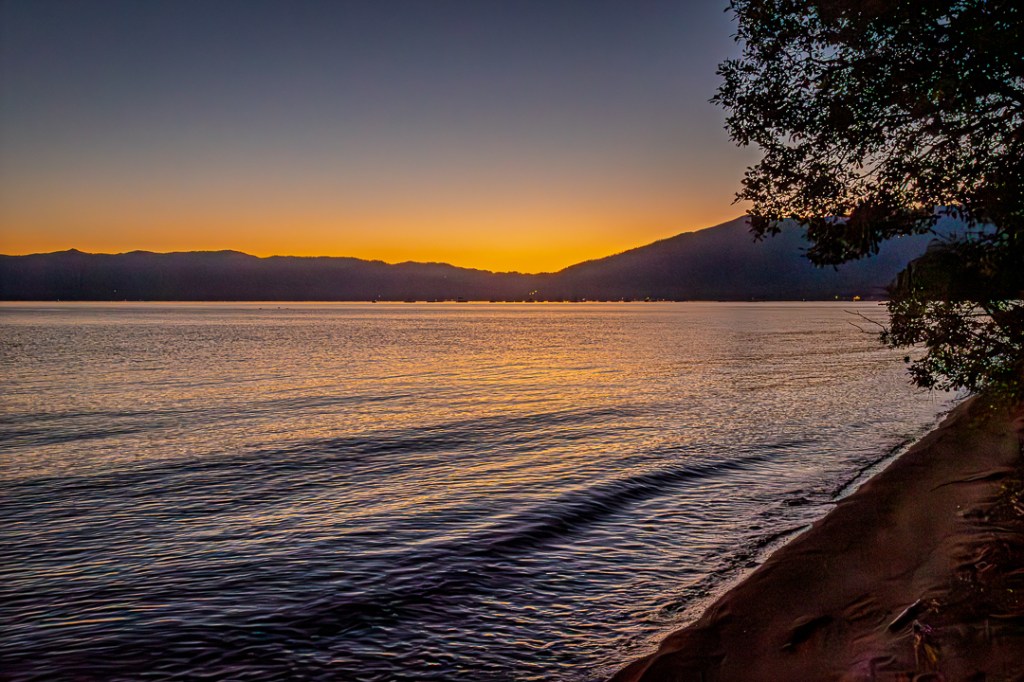
I thought to myself that I still ought to try and see what sort of sunrise shot I could get before we left for home in just a couple more days. So, I set a very early alarm, and the very next morning, in the very dark and quiet, drove over to Kiva Beach on the south shore of Lake Tahoe. It was still quite dark when I got there, so I carefully hiked around the area, seeking a shooting position along its very narrow beach. As the eastern sky began to show some light, I settled on the spot shown in the image below, and waited for the sunrise. Eventually, just before 6:30 AM, there was enough light in the sky to support a photograph, and I captured this cloudless, pre-dawn sunrise.
It was also fairly cold that morning, so I hiked back to my car (still the only car in a large parking lot), packed up my gear and headed back to to the hotel.
All in all, as we prepared to head home and I mentally reviewed the trip, I felt satisfied with the photographic outings and especially the time spent at Fallen Leaf Lake. I’ve a feeling I will try to spend more time exploring other aspects of that area on future Tahoe trips and I think I’ve worked out a process to try out again next time, as I explore other sites in that region, as well.
NOTES
Note 1: Thank you for taking a look at this post. I hope you enjoyed it, the images, and my occasional attempts at humor. If you would like to see these images somewhat larger and with greater photographic detail and color fidelity, just click on this link to my photo website and the What’s New section or use this Flickr link to my 2025 Album. There you will find all of the above images as well as the ability to just click to see them larger. If you agree with any of my choices or find something in my collections that you like better, you can always let me know by commenting in the Reply section below or by leaving a comment on the photo itself while viewing them in my photo website or Flickr site.
Note 2: If you enjoy reading these occasional posts you might consider subscribing to this blog (generally no more than five or six posts per year and sometimes far fewer, so email boxes are not being overly clobbered by my stuff).
To subscribe is easy. You may have noticed while reading a post, that anytime you scroll up a little, a dialog bar will appear in the bottom, right-hand, corner of wherever you are in the post. And that dialog bar will include the word Subscribe. [It may also include two other words (“Comment” and “Reblog” plus a “…” option)]. If you click on the “Subscribe” word, another dialog will appear, just asking for your email address. Once you complete that process, you will likely receive another communication asking you to confirm your subscription.
That’s it. Then whenever a new post is published you will receive an email letting you know. It will include the post’s title (linkable, directly back to the full post, in the blog), and first few lines of the actual post text. If the post includes a “featured photo” (a picture at the very beginning of the post, which nearly all of mine do) it is also included.
