The above park map courtesy of the Nevada State Park website.
Regular readers of this blog may remember that we traveled to Las Vegas as a part of a road trip with our travel buddies, Lew & Louise, close to the end of February in 2022 (see that blog post here). While there, I took a photography scouting side trip to Nevada’s Valley of Fire State Park and brought back a few images for my collection. I was pretty sure I wanted to spend a little more time exploring this park again. So, this time in February of ’23, Billie and I drove to Las Vegas again, to meet up with L&L (we live on the opposite end of the country from them and look for ways to hang out together) and also so I could revisit the park.
As before, we took two days to drive there; on our second day of travel we experienced an ‘exciting‘ wind storm that sometimes covered the road and our visibility with so much dust (and small rocks and other debris) that our progress was slowed considerably. Still, we got there safe and sound. While we were staying in Las Vegas we also got to experience some real winter weather, including an unexpected snowfall.
I spent only a bit of time planning my approach to revisiting the park. I was anxious to give it the better part of a day (and still get back in time for an evening with our friends). I thought I remembered that it took about an hour-ish to get there from our hotel (but I realized later that I had not done a very good job of estimating the time to my first photo stop). My objective was to head up to the White Domes Loop Trail (a one mile long, loop trail, seen on the park map marked with a white oval near the top). This is the same place where I began a hike last year but had to curtail it in order to get back to Las Vegas in time to meet everyone for dinner (take a look at the last few photos and text in the February 2022 blog post — you might want to look at that section of last year’s post to acquaint yourself with my first impressions).
After a quick breakfast, I left the hotel at around 8:30 AM, made a gas stop, and started driving northeast on Interstate 15. After about 40 miles, I turned off the interstate onto the two-lane Valley of Fire Highway. About 20 miles later, I reached the western entrance, paid for my out-of-state day-pass. and headed for the turnoff to the White Domes Road, turned north and drove some more (with a couple of stops for commercial film crews to unblock the road) until I reached the parking lot for the White Domes Loop Trail.
The White Domes Trail
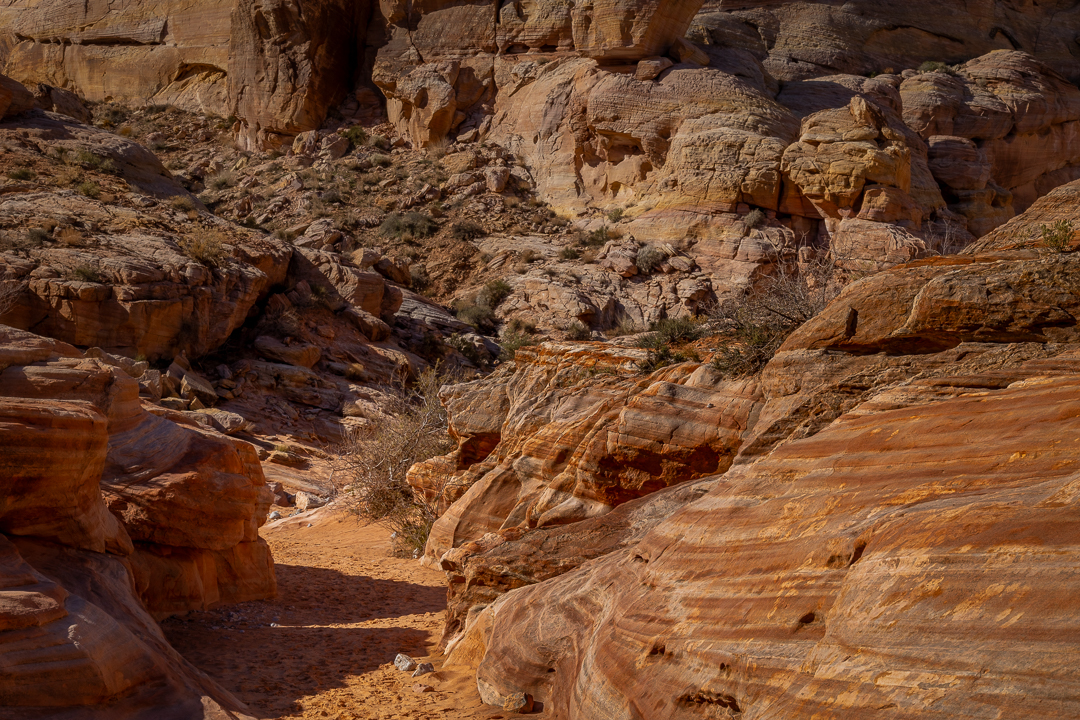
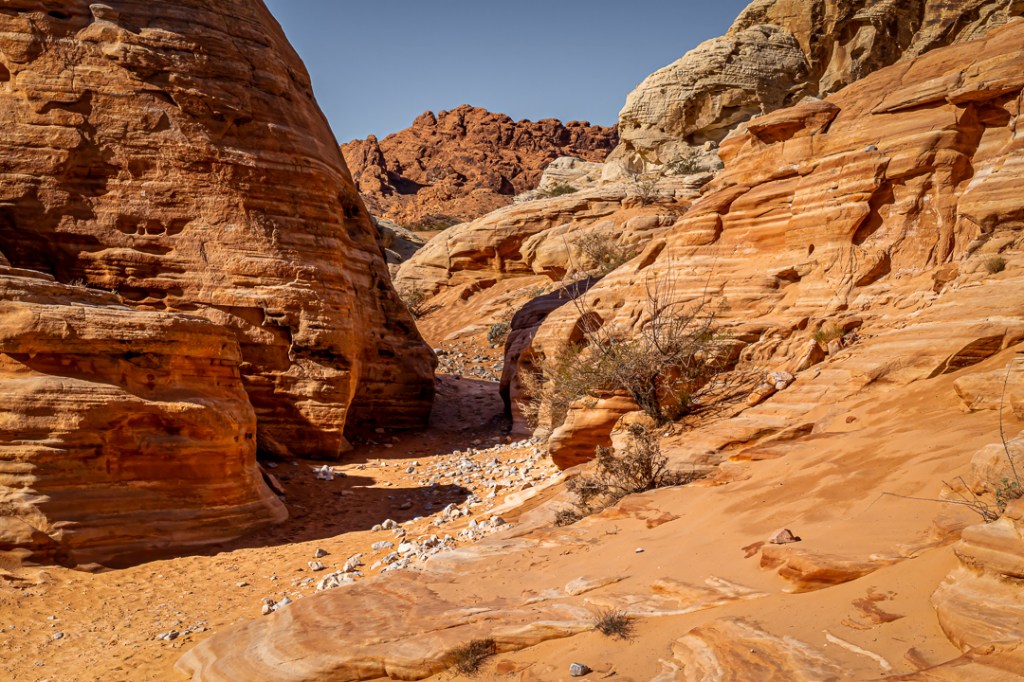
I changed from my hiking shoes to boots, and gathered my gear (including my light-weight adjustable hiking pole which I preset to longer than the normal setting for flat hiking for some upcoming steep downhill hiking — Hint: Longer pole for downhill and shorter pole for uphill). After a bit of hiking though a flat, sandy surface, I started down the very steep, rock-scramble section to the point I’d reached on my first visit. Then I took out my camera and started looking for a first composition — which I found in the image below of the trail leading to the entrance of the slot canyon on this route.
I noted that I took my first photo at about 11:15 AM — seriously overshooting my one hour-ish estimate by nearly two hours! Sheesh! I’ve got to do much better next time.
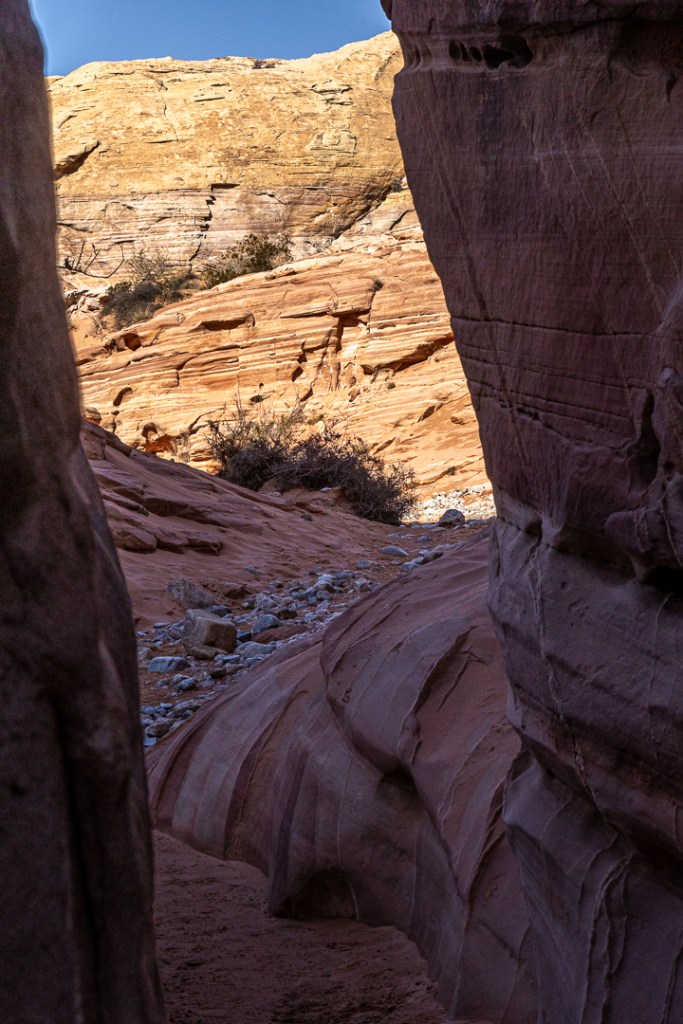
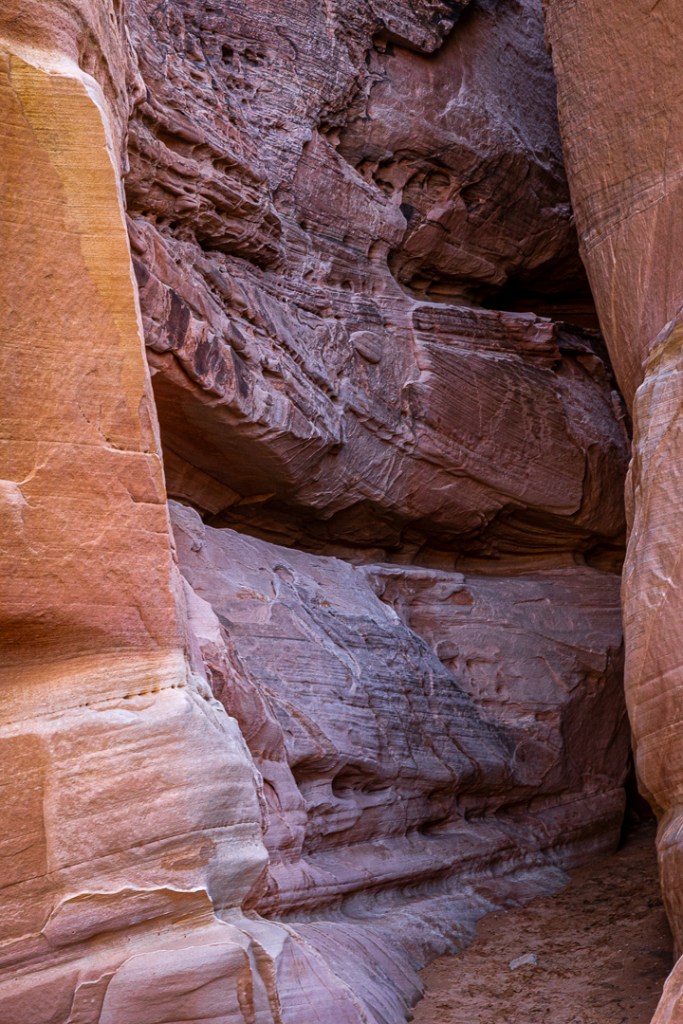
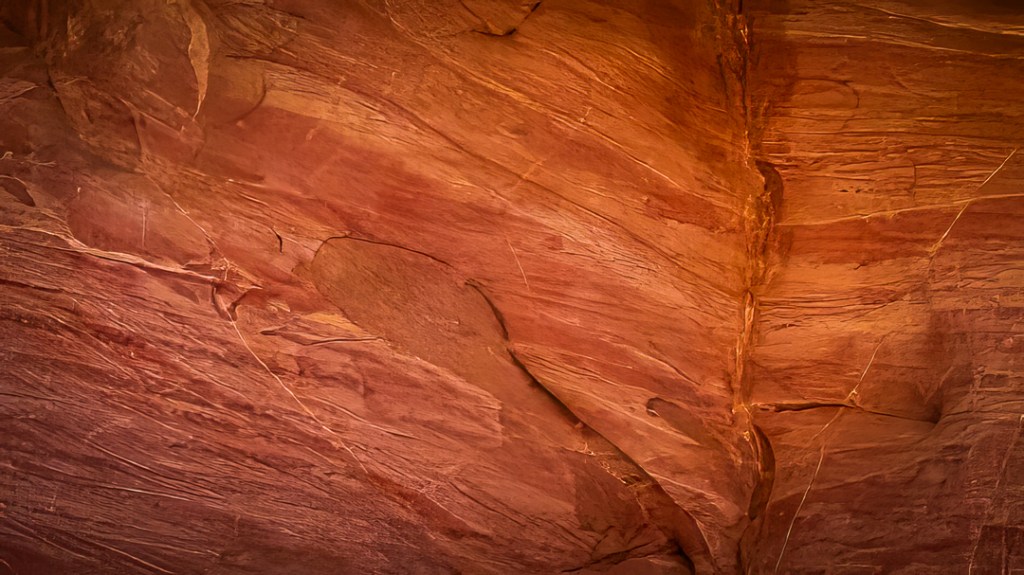
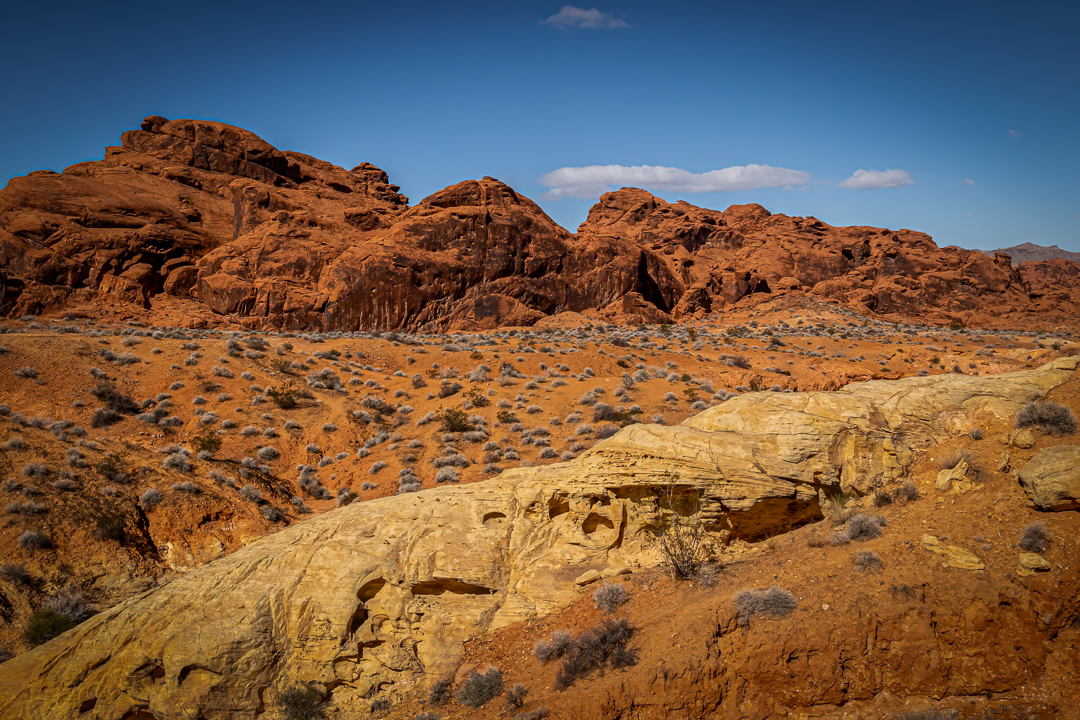
I was already beginning to remember the amazing colors (probably the inspiration for the park’s name) found in the different rock formations of this place as I continued on toward the slot canyon I’d read about before getting here. These next two images show the eastern entrance to the canyon and a shot captured from within.
Also, those interested in photography might notice that because the inside of the canyon is significantly darker than the entrance, I raised the ISO by 3 stops while keeping the camera set to aperture priority to allow the camera to automatically select a shutter speed that can be successfully hand-held (that is, without setting up a tripod). I could have accomplished the same thing by increasing the aperture (to a smaller number) by three stops but I wanted to insure a maximum depth-of field (DOF) so I kept that at f/16 and increased the ISO instead.

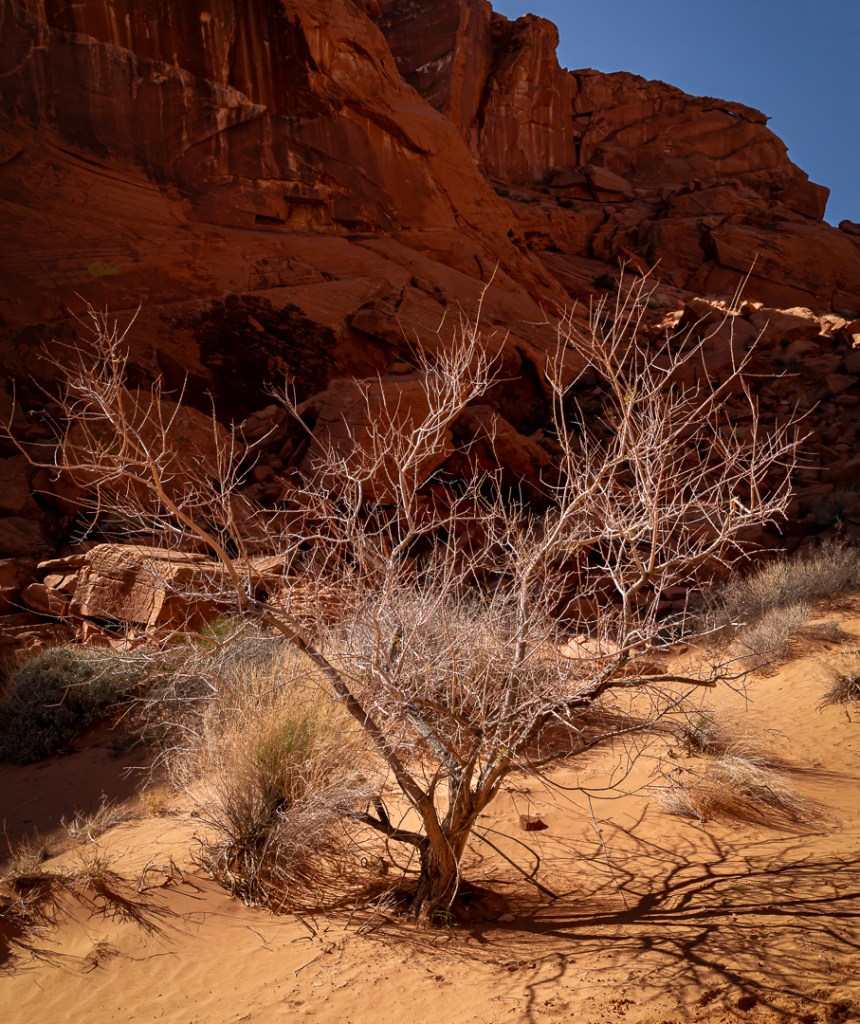
The other thing I began to notice more than just the color variations was the way many of the stones and water-carved surfaces began to suggest somewhat recognizable shapes — you might notice that the inside of the canyon had some downright spooky-looking shapes. Once I had that general idea in my head, I began to see interesting imaginary shapes of things throughout much of the day (queue the old Twilight Zone theme music).
It surprised me that this particular slot canyon ended in just a few more steps. I was more than just slightly disappointed at that point just because none of the documentation prepared me for its brevity.
My only other photographic experience with slot canyons was a 2016 trip that Billie and I took to visit the Upper and Lower Antelope Canyons near Page, Arizona (the canyons are actually on the nearby Navaho Nation with tours and access controlled by them). Back then, I was mostly blogging ABOUT my website and this blog and not yet starting to post about these kind of adventures and including lots of photos here. The result is that I never posted an entry for that specific trip. If you are interested, here’s a link to a few photos on my photography website from those canyons.
Getting back to this trip, the two photos below are self-explanatory – just two shots of the narrow exit from the slot canyon (of course, “narrow” is often one of the characteristics of ‘slot’ canyons).
More importantly, coming out of the canyon left me with an important question; that is, “What’s next?” And by that I mean, where is the trail I’m following. I wasn’t carrying a map (generally the trails are well enough marked in this park). I knew that the trail was an oval shape and that I was on the bottom of the oval heading west. I also knew that before long I should be heading north, to begin to close the loop. But, as I came out of the canyon, the first thing I saw, right in front of me, was what looked like a trail, still heading west. I was a bit confused.
Later, when I was home and looked at the map again and compared it to Google maps, I saw that this path was also a part of the southerly 4.6 mile Prospect Trail that, if I’d just followed it, would have taken me far from here (and my lonely, parked car).
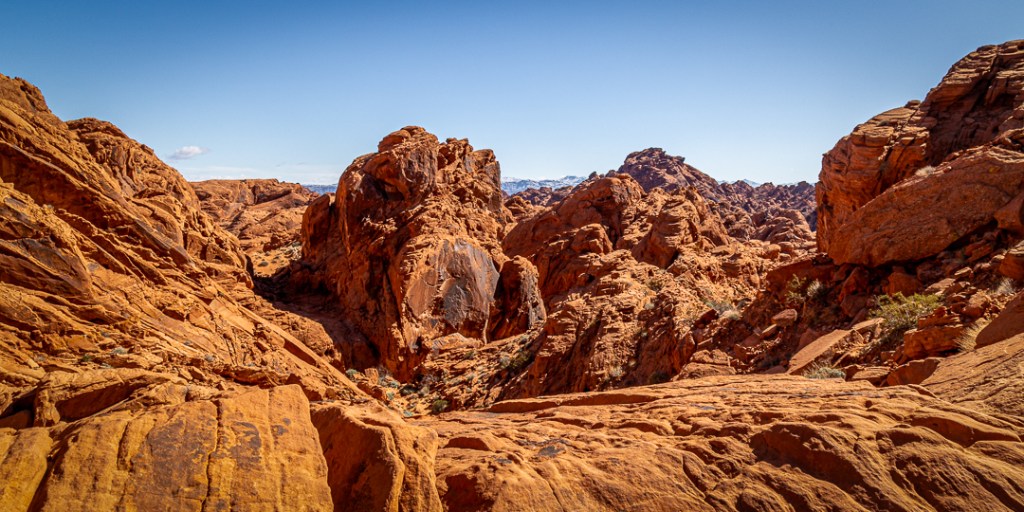
I did actually walk a bit up this way to see where it would lead but there was no obvious trail behind that “crouching animal/person rock.” As I mentioned earlier, my imagination continued to see things in the rock formations.

It actually took me a few minutes of looking around, thinking it over, sort of intuitively rejecting some alternatives before I finally spotted what you probably zeroed in on immediately in the third image, just above. There is, a definite and clear (but kind of small) trail marker which says TRAIL in all caps, and is headed by a little arrow pointing to the right (the sign is also snugged in among some brush). In this photo. I’ve highlighted the actual trail with post-processed additional light to make it stand out more than it actually did.
When I first looked in this direction, all I saw was a pile of rocks that looked impossible (or at least ankle-threatening) so I didn’t spend another look at it until I began to wonder where the trail was. As it turned out, it was a simple path over some almost step-like flat rocks which led to a more conventional dirt path just past that giant-head rock shape.
Shifting back to photography, as a subject, for just a moment or two, some of you may have noticed that the shutter speeds on these outside, sunny-day images have jumped to very large numbers. Is that something I decided to do for some reason? The answer is no. What you are seeing is what happens when the photographer forgets to reset his or her camera to a more appropriate setting. In this case, along with everything else, I simply forgot to return the ISO setting to 200 or even 100 since I was getting plenty of light even with my f/16 aperture. My camera, still set to aperture priority, simply raised the shutter speed to offset the increased sensitively still being applied because the ISO was still set to 1600. You’ll find that it took me quite a while on this day to eventually notice this and set things straight.
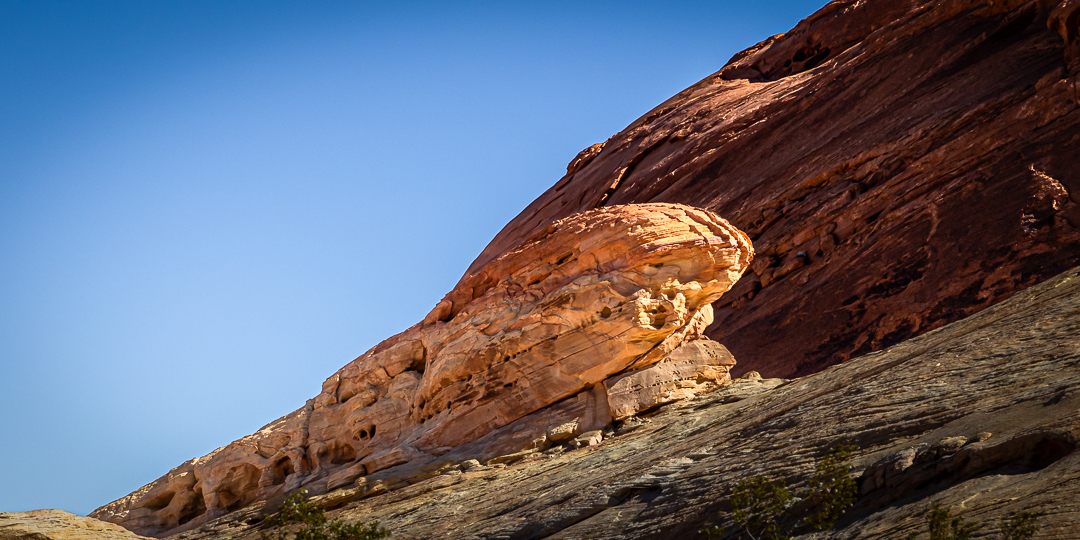
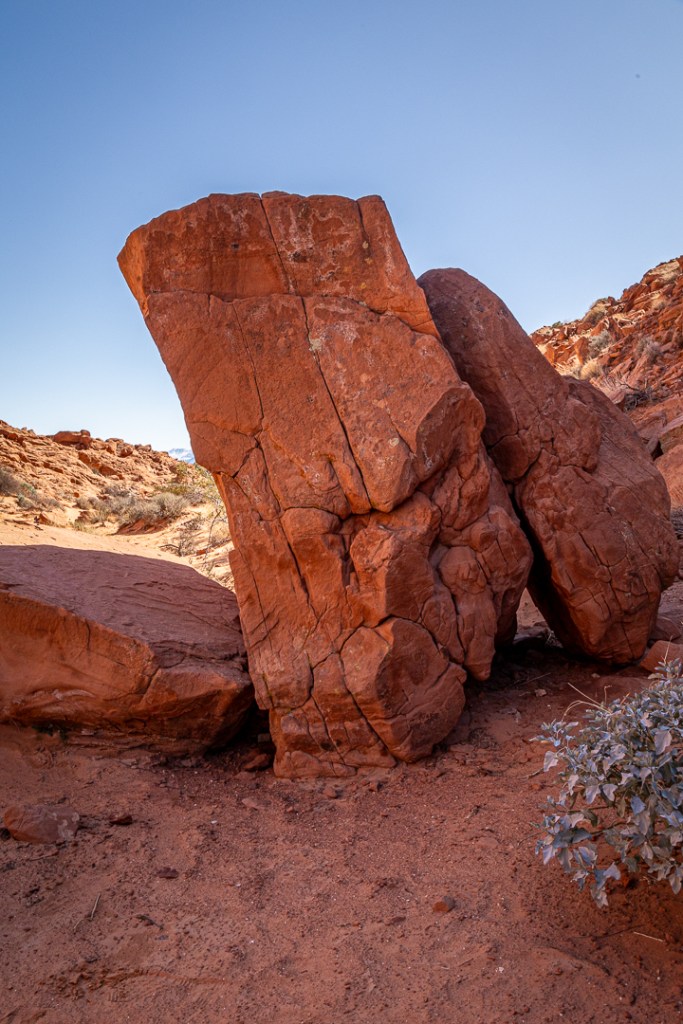
The trail became quite easy after all that concern; I had since collapsed my hiking stick and put it into my backpack. I came across this interesting rock formation and was drawn to the large, oval cave. So I left the trail (temporarily) and scrambled up to get a closer look.
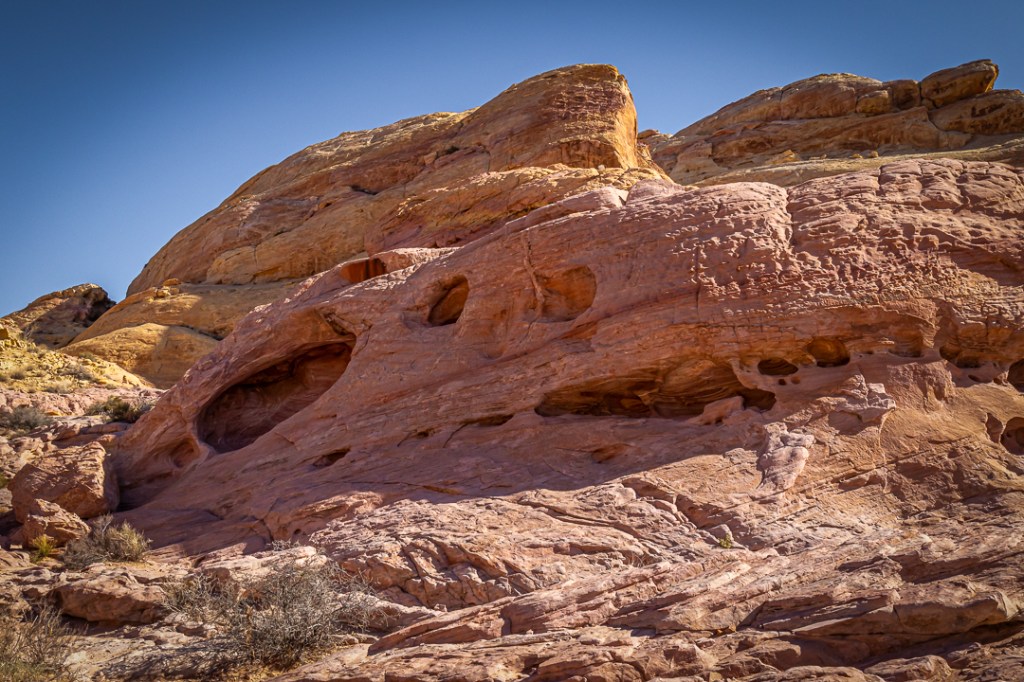
I have to admit I was fascinated by the layers of colors with interrupting white lines and cracks that changed direction and I wondered how many thousands, hundreds of thousands, or even millions of years it took to form this particular rock.
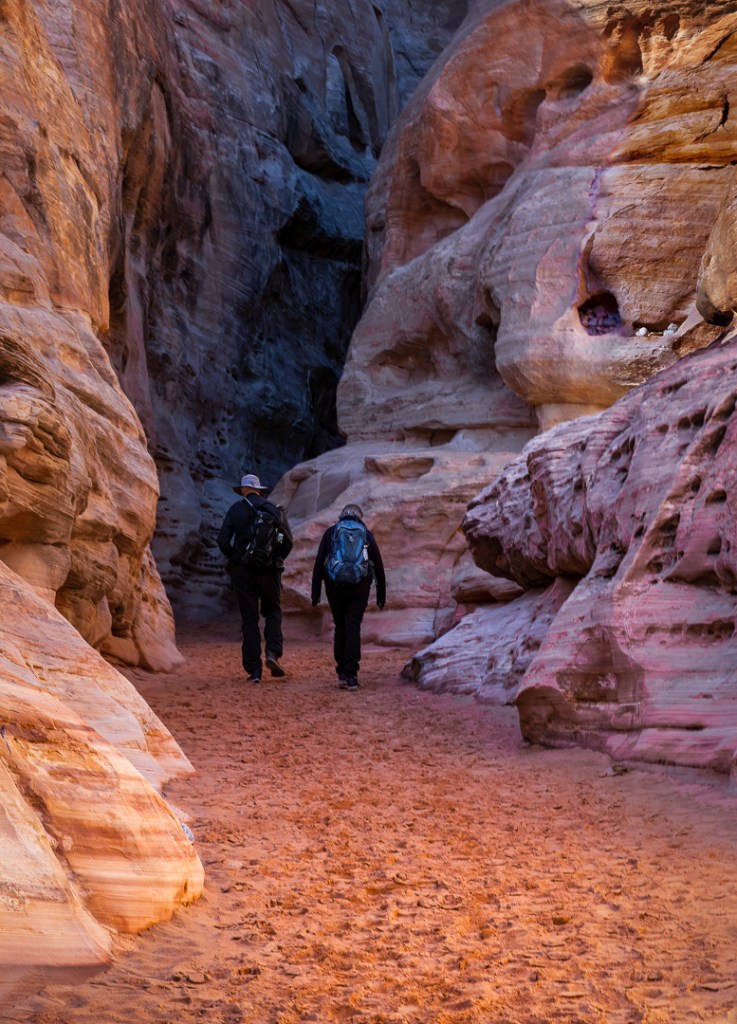
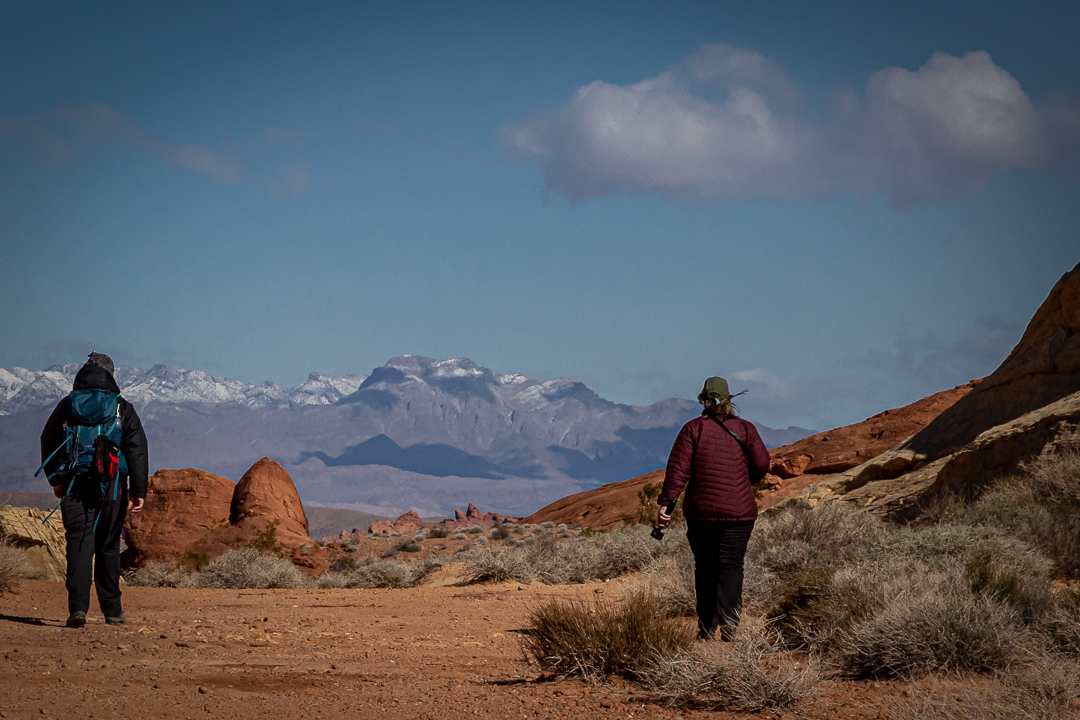
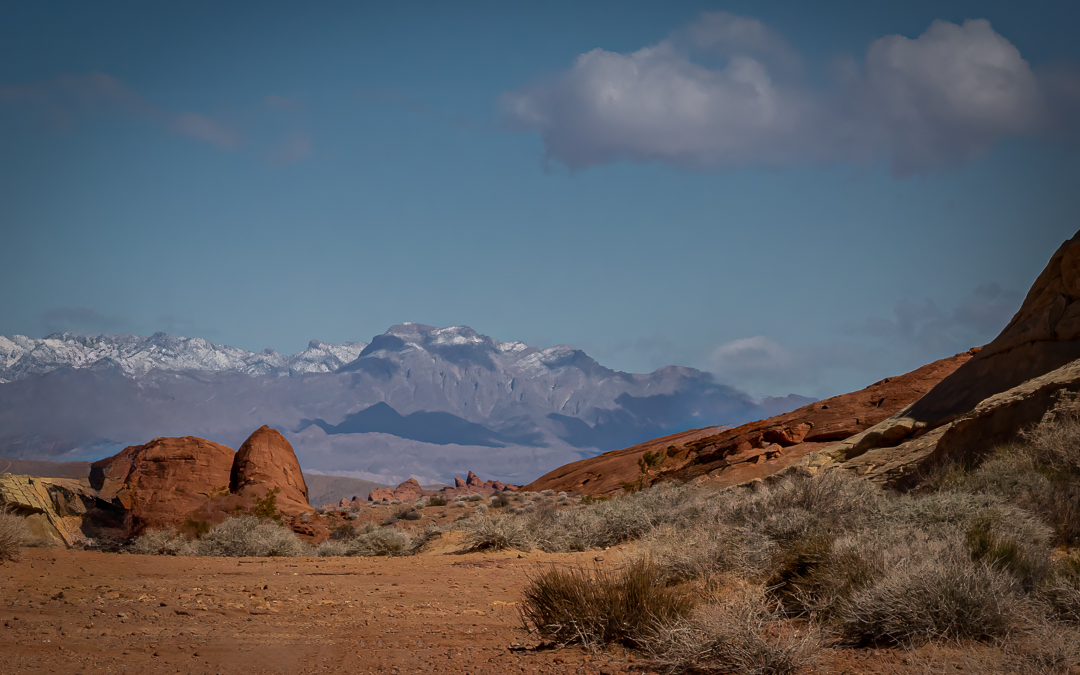
I found myself walking a bit faster than the hiking couple in the image below. I wondered if they were angry with each other. I caught up to them (after taking this image without them being aware) and chatted with them for a couple of minutes (I’m pretty sure they were just hiking and spread apart at that moment for other reasons). Much later, when I was home post-processing my way through the photos, I realized that without them sort of ‘photo-bombing’ the scene, it might make a fairly nice landscape. To see the image without people in it, just swing the line all the way to the left to see the landscape or all the way to the right to see the reason for my initial puzzlement.
The last few photos I got on this hike around White Domes included the following:
I didn’t realize just how close to the completion of the loop I was when I reached this large puddle reflecting a little of its surroundings. Once I stepped around the water and started up what looks like stone steps I was in sight of the parking lot about 150 yards away.

I was back at my car at around noon. At this point, I took a few minutes for a refreshment break. I also spent a few minutes reviewing some of my photos on the LCD back of the camera. That was when I realized that I needed to reset the ISO to something more appropriate to the amount of available light. I also had to think about where to go next.
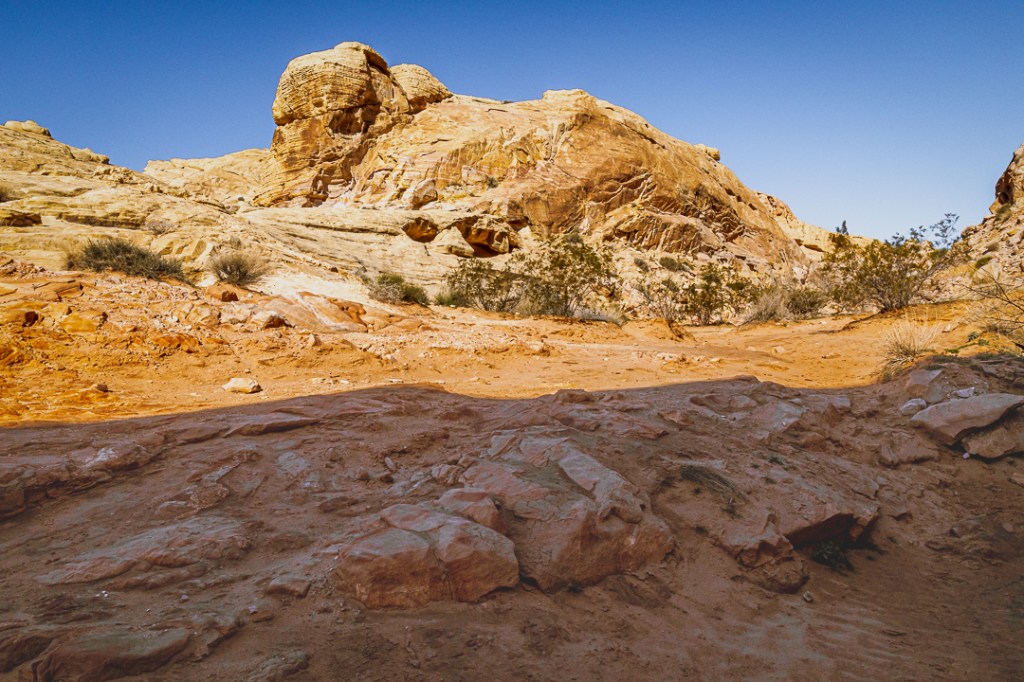
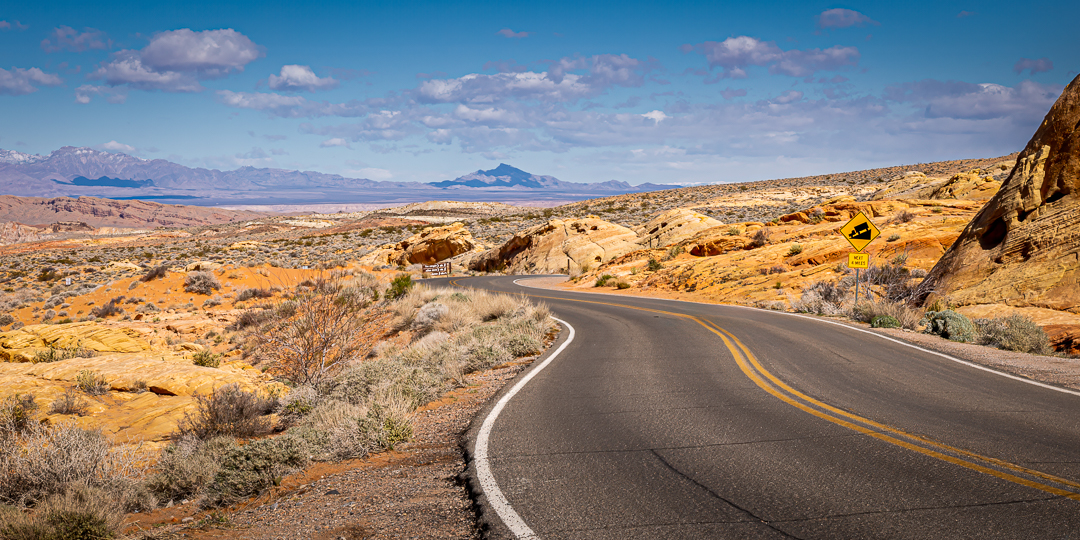
I decided to head back down the White Domes Road a little over half way and stop at the trailhead for the Rainbow Vista Trail. The image below was taken from just across the White Dome Road from the Rainbow Vista trailhead parking lot about a half an hour later.
The Rainbow Vista Trail
On my first trip to the Valley of Fire in 2022, I also stopped to consider hiking this trail, especially because it was relatively short at only one mile round trip (not a loop but an out-and-back design). However, very early on I discovered that the trail was predominately sand which could make a simple mile much more difficult and time-consuming (and I didn’t have sufficient time on that trip). On this trip, on the other hand, I still had plenty of time to check it out.
I did not take any photos along this trail on the outbound half-mile but rather just noted possible composition possibilities for the return leg. Then I took several pictures on the way back.
Sadly, I did not see any signs of rainbows along this Rainbow Vista Trail.
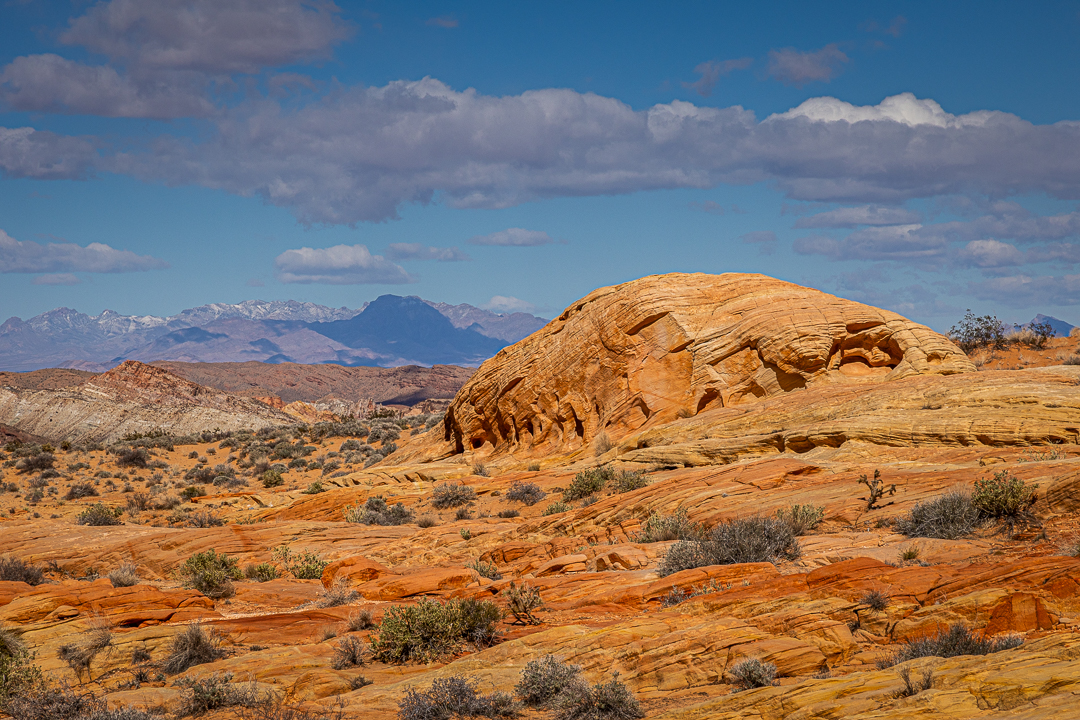
While my car was still parked at this trailhead parking area, I crossed the road again to see what else I might find. I took this broad scope landscape looking at a dome-like formation with distant mountains in the background.
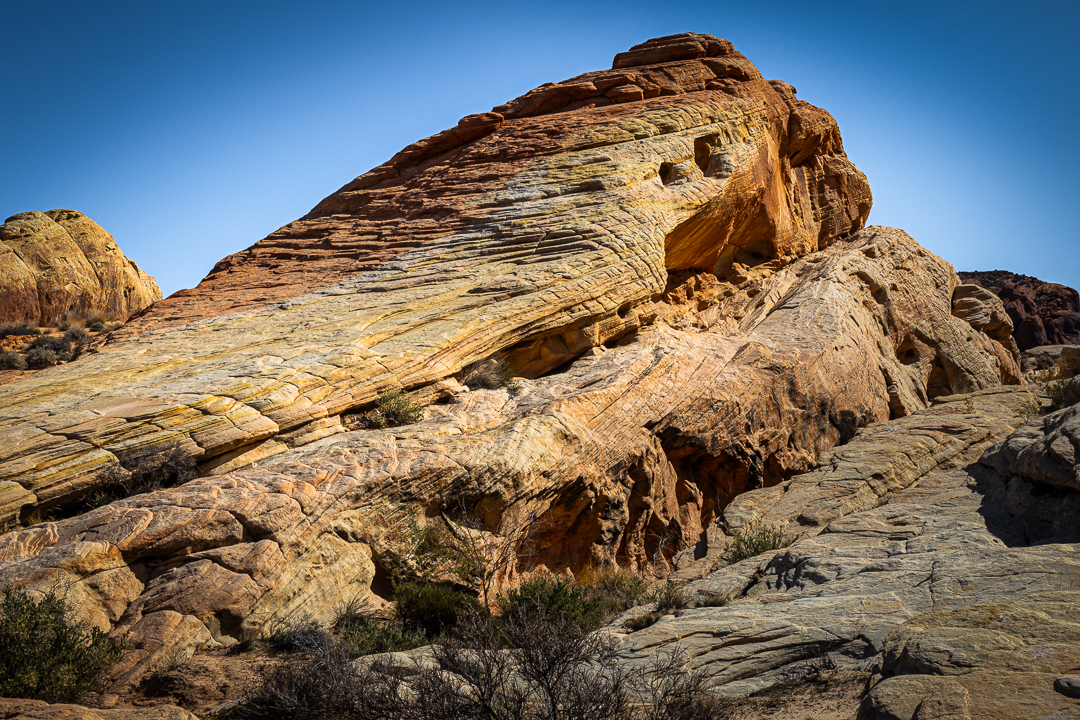
And I also noted a rock formation directly across from the parking lot that seemed to be getting attention from many phone cameras. Instead of just snapping it from that same vantage point, I scrambled, hiked, and climbed around to the other side to see if it offered a more interesting perspective there.
Heading back to Las Vegas
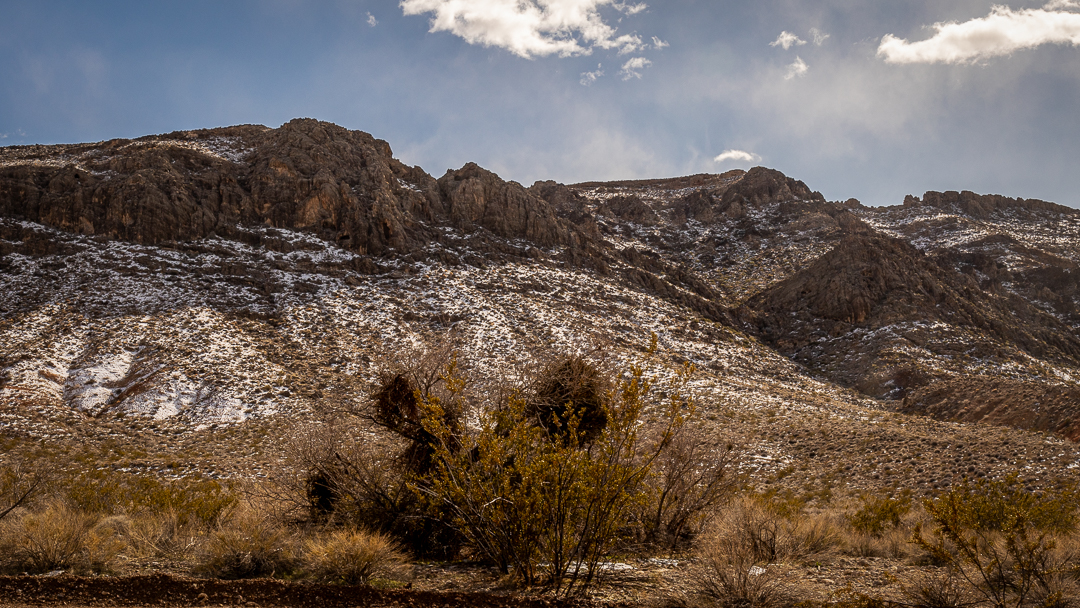
I drove back down to the main Valley of Fire Highway, and then turned east to just quickly explore that end of the park. I took a few photos that didn’t really inspire me and eventually noticed that it was getting close to mid afternoon. So, I turned around and started heading west toward Interstate 15. As I was leaving the park, I was reminded again (as I was while entering the park that morning) that it had snowed the previous night in LV and adjacent areas. So, although the day had melted much of what I had passed coming in that morning, I grabbed a quick shot of some of the snow covering the hills surrounding the park.
I left the park at around 3 PM giving myself plenty of time to get back and get ready for dinner with friends and family. The following morning, Billie and I left Las Vegas and decided to try driving the entire return home in one longer driving day. All in all, it took us about 8 hours but we were happy to have eliminated an extra day of ‘just driving’ travel.
I think this has been a longer than normal blog post. If you’ve stayed with it all the way, thank you. Many of the photos in this post are also included in my photo website CedBennett.Photography where they may be reviewed in a larger format and better color fidelity (that site is designed to show photos at their best). All of the photos in this post (including those NOT found on my photography website) can usually be found on my Flickr site (albums on this site are organized by year) which also does a very good job of presenting images.

1 Comment