Sheltering-in-place (the new byword for most of us while we all aid in the defeat of the Covid-19 pandemic), if followed as intended, prevents me from really getting out to other places to create new images. Plans to travel this spring (and probably this summer) have been curtailed until things change enough to make it safe for me and others to mingle again.
I’ve been spending some of my copious free time looking at post-processing tutorials online and even a course or two to try to expand my post-processing skills. I do much of that processing in Lightroom and sometimes also in Photoshop and/or specialty photography plugins when a more complex process is required. Recently I’ve been going through my archive of photos (literally thousands of photos over the years most of which have not been seen by anyone) looking to see if there are good candidates where I can apply a newly learned technique. In the case of images that were originally processed more than a year ago, images might also benefit just from the application of the same software that has been improved over the intervening time period. This post is to show some of those updated images (hopefully improved — your opinion may differ).
Because I know that some readers of this blog are also amateur photographers I’ve included some discussion of my thoughts and objectives when capturing many of the initial images as well as brief indications of my post processing steps. To other readers, I apologize for the added length.
Previously Published* Photos
Only three of the images I’ve selected have actually been shown publicly before (plus one other which I ended up replacing with a different but related image from the same place and time); for each of those four images I’m also including a view of the image as initially published for comparison.
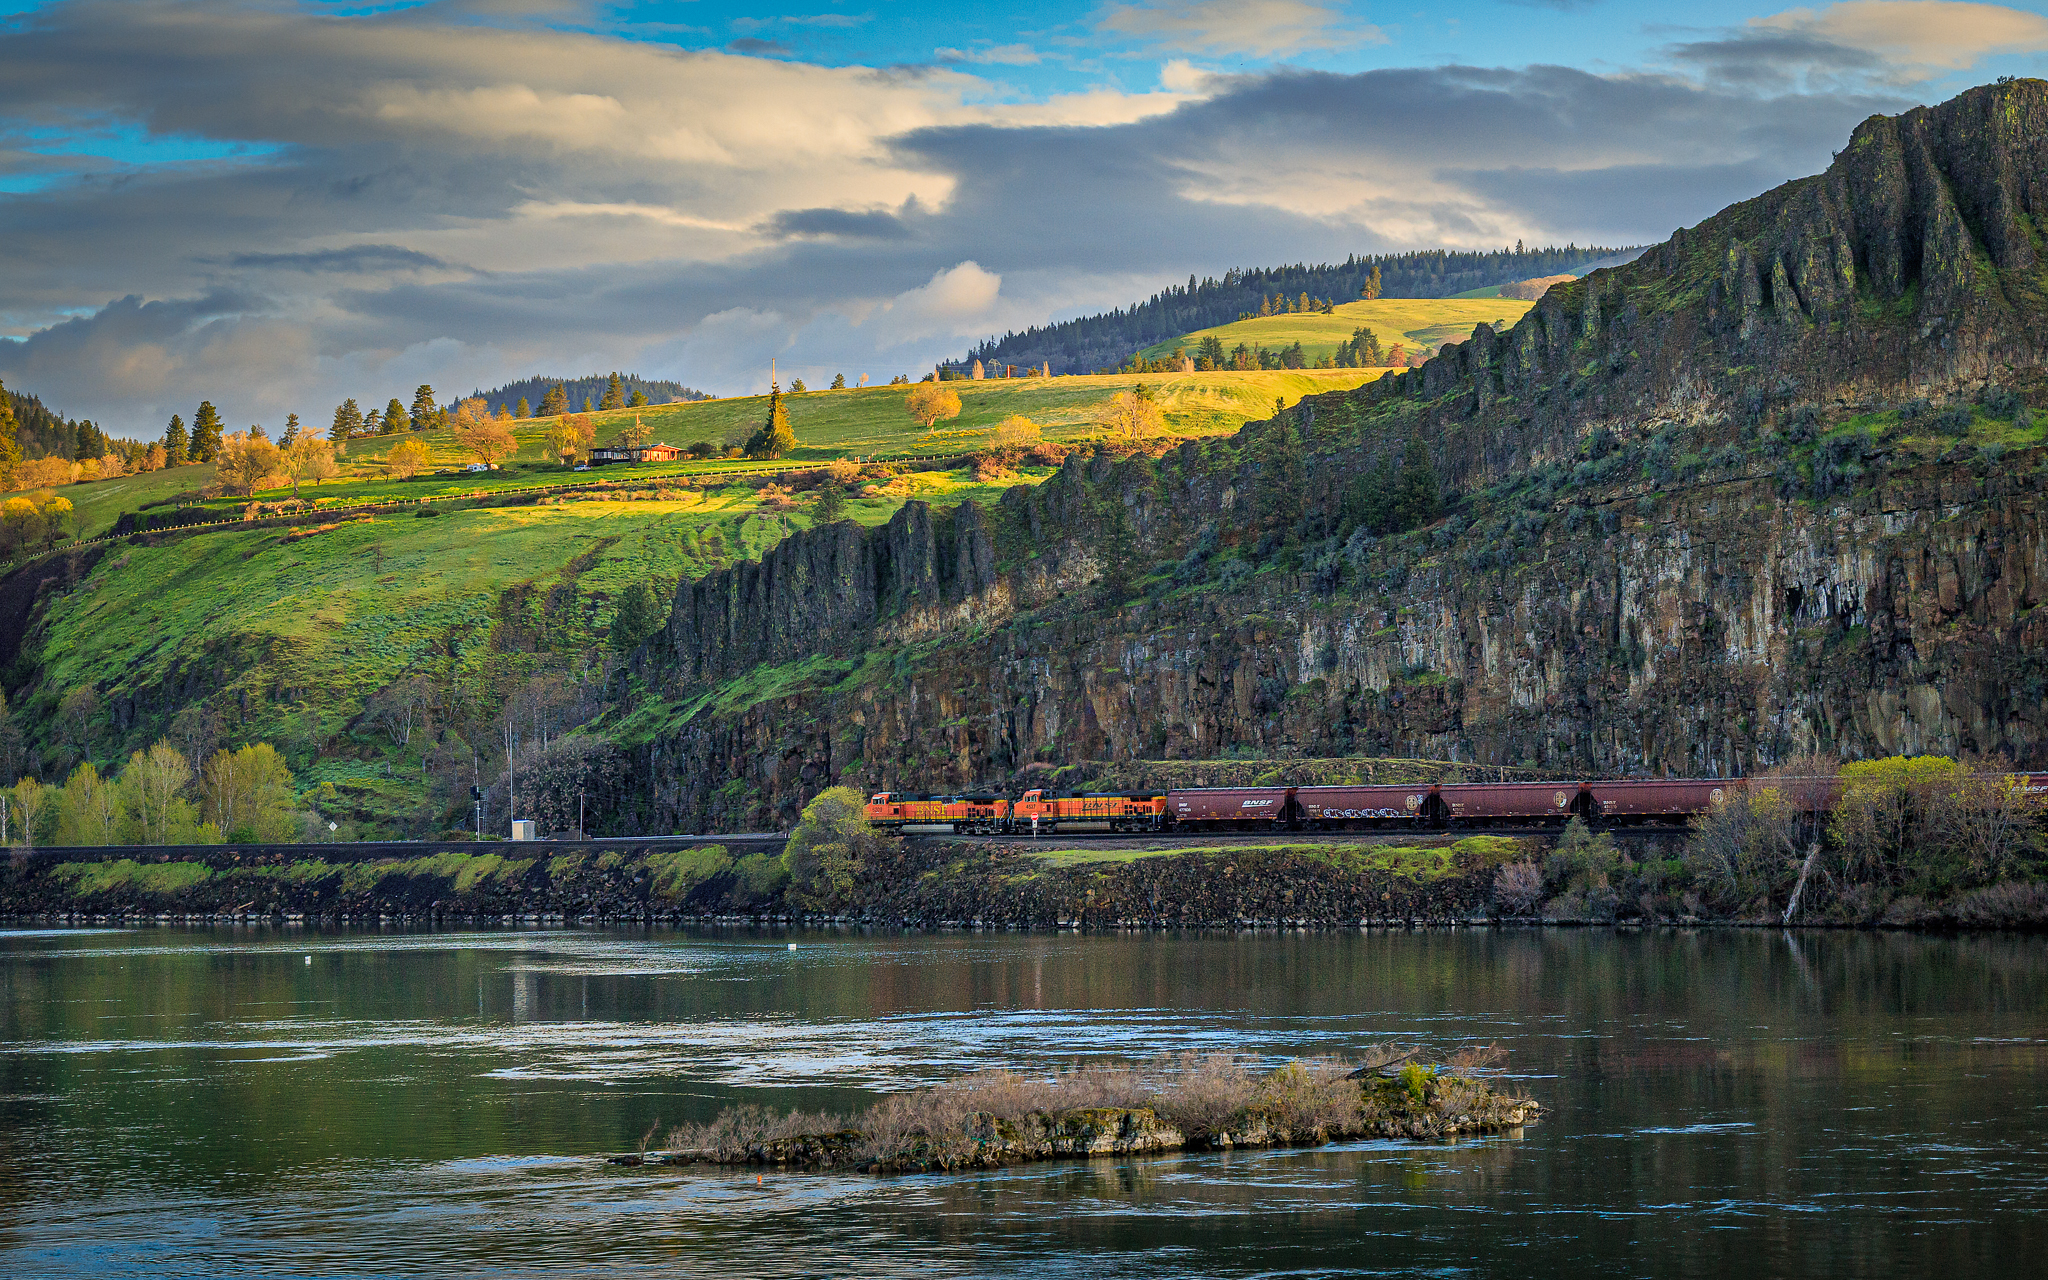
The first is a photo, captured before 6 AM on April 17, 2017 (while we were on a river cruise), of a freight train headed west on the Washington side of the Columbia River. I remember being out with my camera while most of the other passengers were still sleeping and spotted this wonderful pastoral/industrial scene coming up and grabbed a couple of frames as we sailed past.
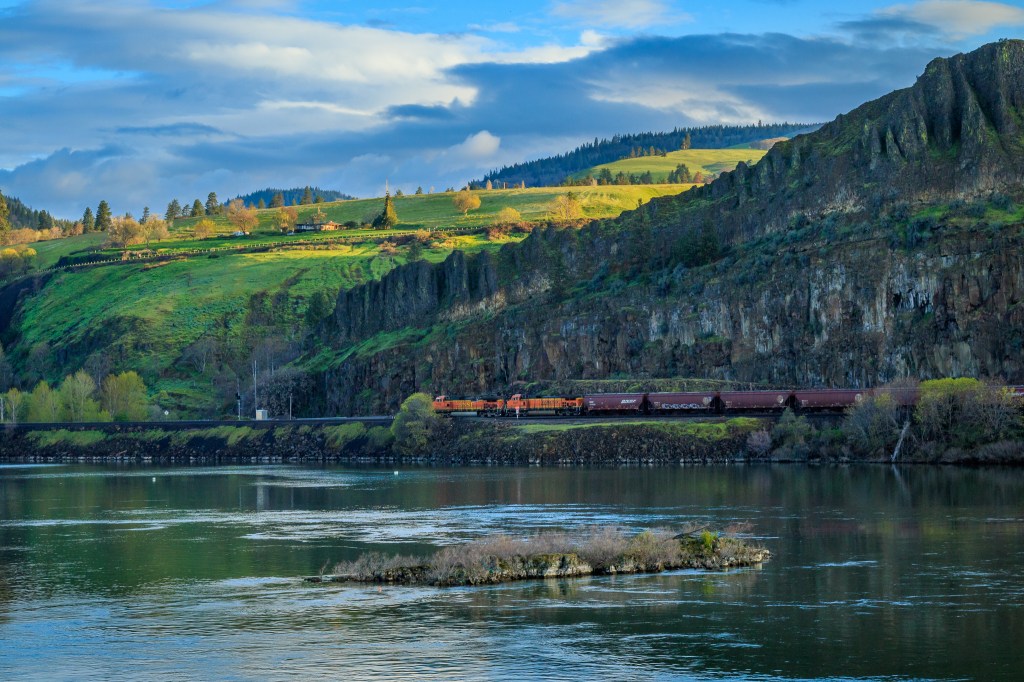
The newer version of the image is at the top of this post; the original publication version is shown on the right. The primary change was to adjust the white balance to more properly reflect the golden color of the early morning light. I also darkened the river foreground slightly and cropped it a bit while also darkening the left corner of the sky to focus attention more on the train and the sunlight warming the hills. Finally, I added a small amount of additional overall contrast and generally brought out more of the detail in the image. I also recently used the adjusted image on a birthday card for one of our granddaughters.
I came across one of several early morning Napili Kai Beach Resort photos taken just last May on the Island of Maui. I shot this particular image because I liked the juxtaposition of the rocks in the sand at low tide with the relatively calm ocean water stretching off to the horizon and the contrast between the dark and light dry rocks vs the wet ones in the water. But when I looked at it again recently I realized that there was not that much natural color in the image which made me wonder if it would be better as a blank & white photo. After converting it and adjusting the tonality of the water and the distant clouds and overall contrast to increase its moodiness I ended up liking the B&W version slightly more (my wife prefers the color version). Here are both versions — you be the judge.

Napili Bay, Maui, HI 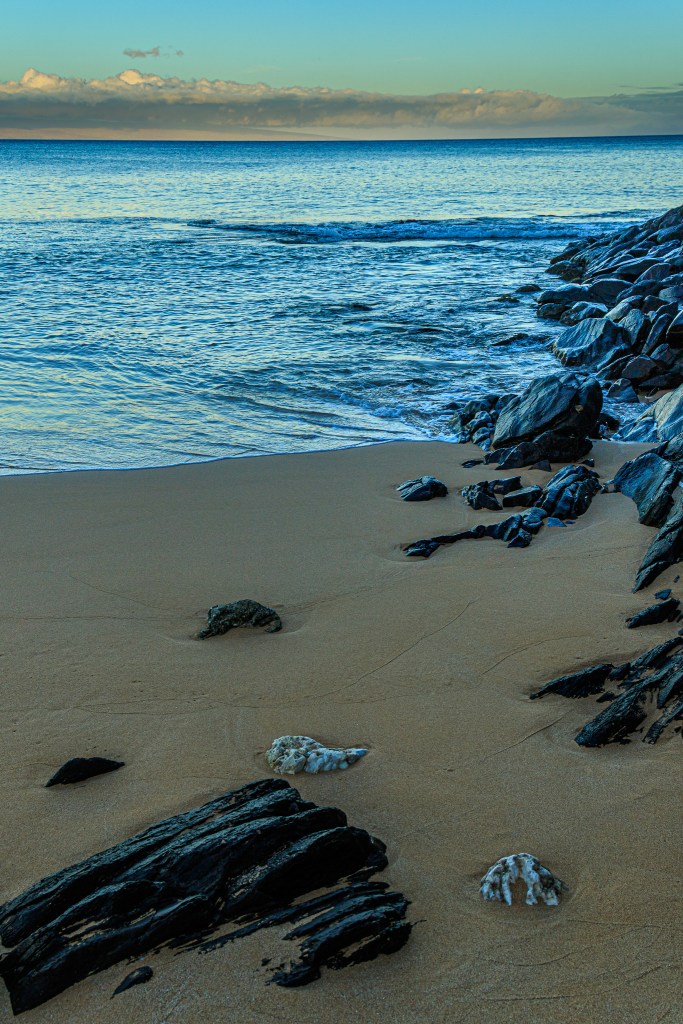
Napili Bay, Maui, HI
Interesting (to me, at least), in the process of examining photos I also decided to replace one published image with one that had not been published. Both images portrayed breaking waves at Fort Point (captured in January of 2020). They both told a similar story about crashing waves but the newer image choice puts the waves in context by including some landmark objects where the original image’s location would probably only be known because the photo caption identifies it (except for a local National Park Ranger that I know — he’d know its location immediately either way).
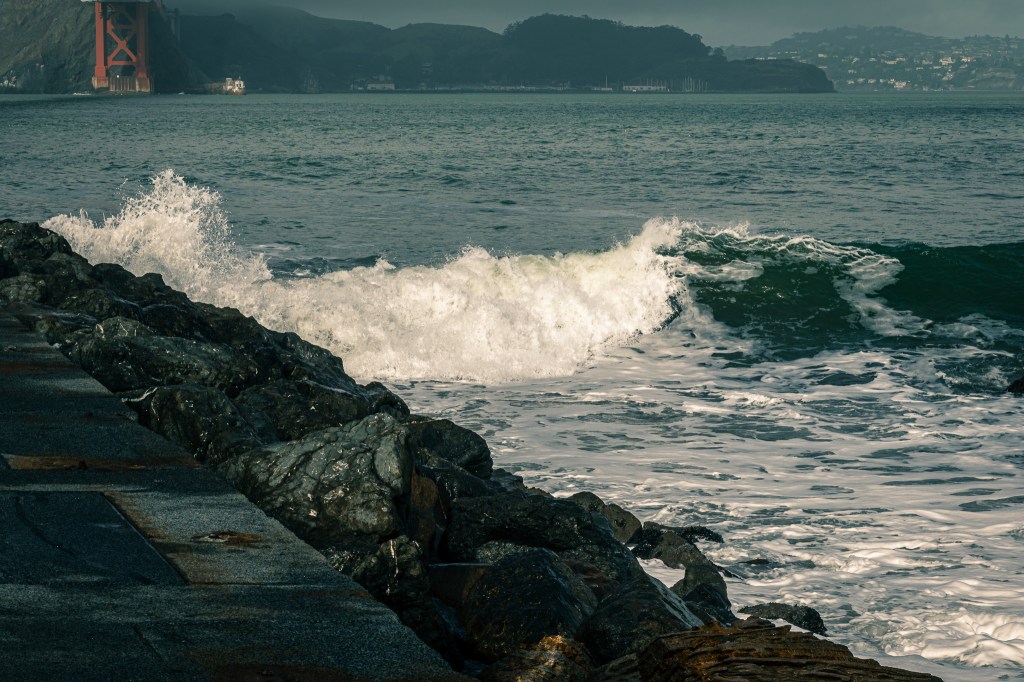

In processing the above image, I wanted the landmarks to help identify the location without overpowering the image intent so I defocused emphasis on the background by slightly increasing its haziness and reducing its saturation a bit.
As you can see in the replacement photo, the entrance to the bay is just to the left, under the Golden Gate Bridge. As a water exchange, such as a rising tide, travels west to east coming through the bay’s entrance, it then spreads out to the north and south and we see waves traveling at almost 90 degrees to their initial entry crashing along the breakwater.
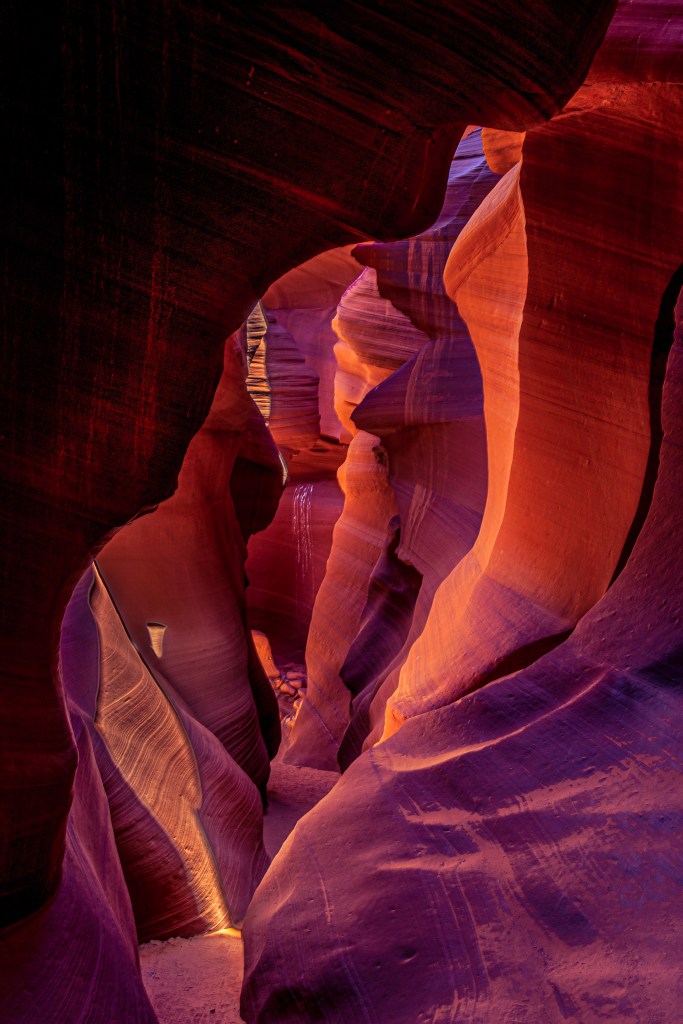
In April of 2016 we “road-tripped” to several southwest locations including the town of Page, AZ. Page was selected because it is very close to the Antelope Slot Canyons located in the nearby western edge of the Navajo Nation. Over a couple of days we toured both the Lower and Upper Antelope Canyons (in small tour groups). The re-adjusted image is shown below on the left and the image that was replaced is on the right.
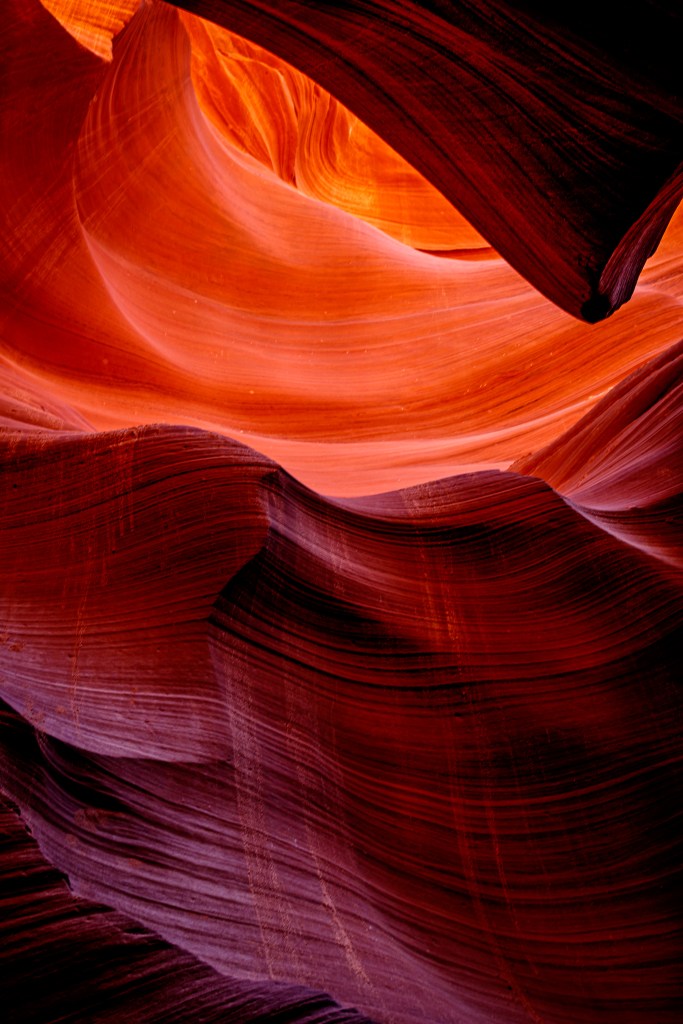
Lower Antelope Canyon, Navajo Nation, near Page, AZ 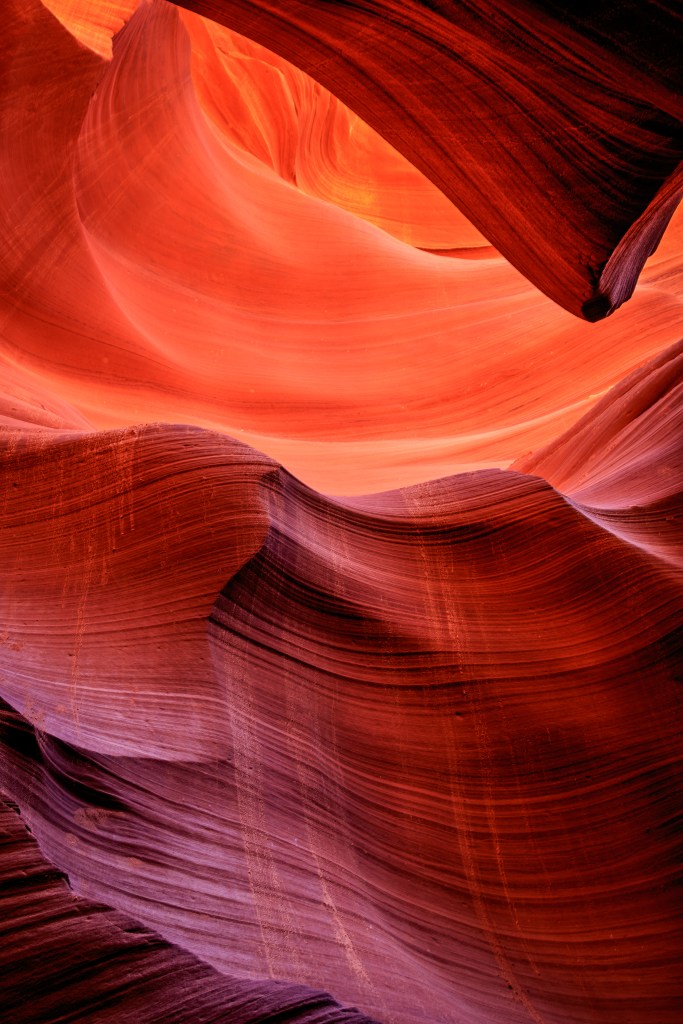
Lower Antelope Canyon, Navajo Nation, near Page, AZ
There are no artificial lights in the slot canyons; they are lit entirely by the daylight that filters down through the narrow openings above (these are canyons, not caves, though sometimes they feel very cave-like). In some places there is very little natural light so longer exposures are necessary to capture a usable image.
My purpose in reprocessing this image was to better reveal the sweeping curves in the rock under realistic lighting conditions. To do that I made several subtle changes that dramatically improved the image (in my view). I reduced the exposure slightly, sharpened the image overall, increased the saturation a bit, and added contrast to bring out the detail in the lines that water, wind, and sand had carved into the stone over the years.
Previously Unpublished Photos
While working on the image above, I was reminded that we had taken hundreds of photographs while touring those two canyons. I selected three of those that seemed promising, processed them for the first time, and added them below into a brief slideshow.
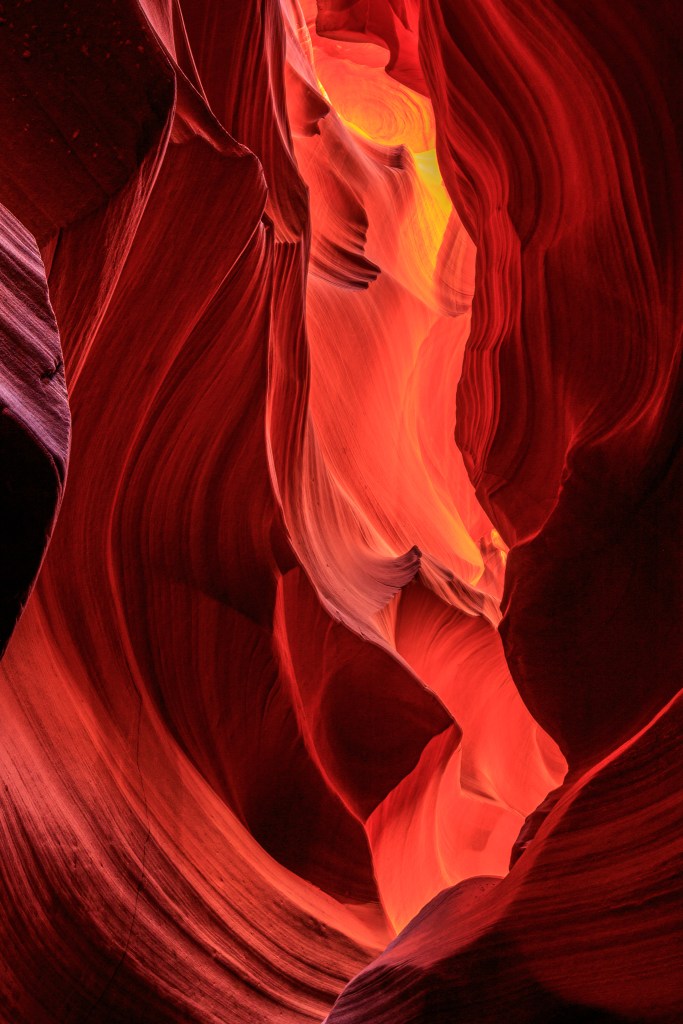
Sometimes, within the slot canyons, sunlight shines down extremely brightly through an opening from above causing an area so bright compared to its surroundings that it appears completely white when photographed, with no visible detail. The Lower Canyon photo in the slideshow above was like that. However, I had taken a series of shots of the same scene with increasingly shorter (darker) exposures so that in at least one capture, the detail in the bright spot does appear surrounded by extremely dark sections that show as almost totally black. By using a somewhat more complex post-processing technique in Photoshop called luminosity masking I was able to combine the detail from the underexposed image into the spot(s) that were overexposed to create a final, blended image.
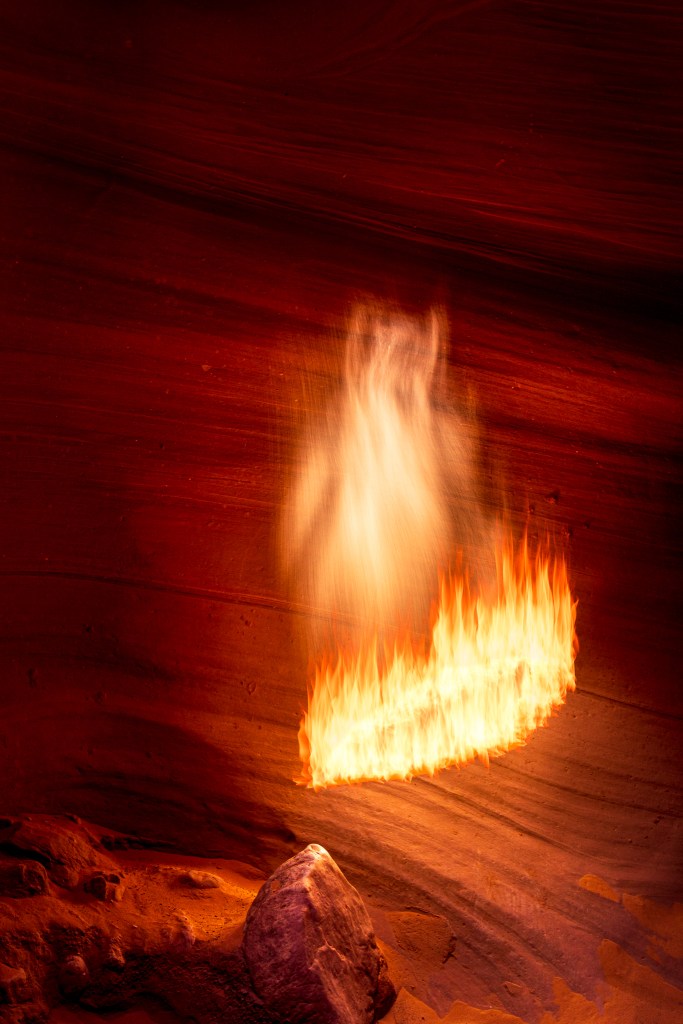
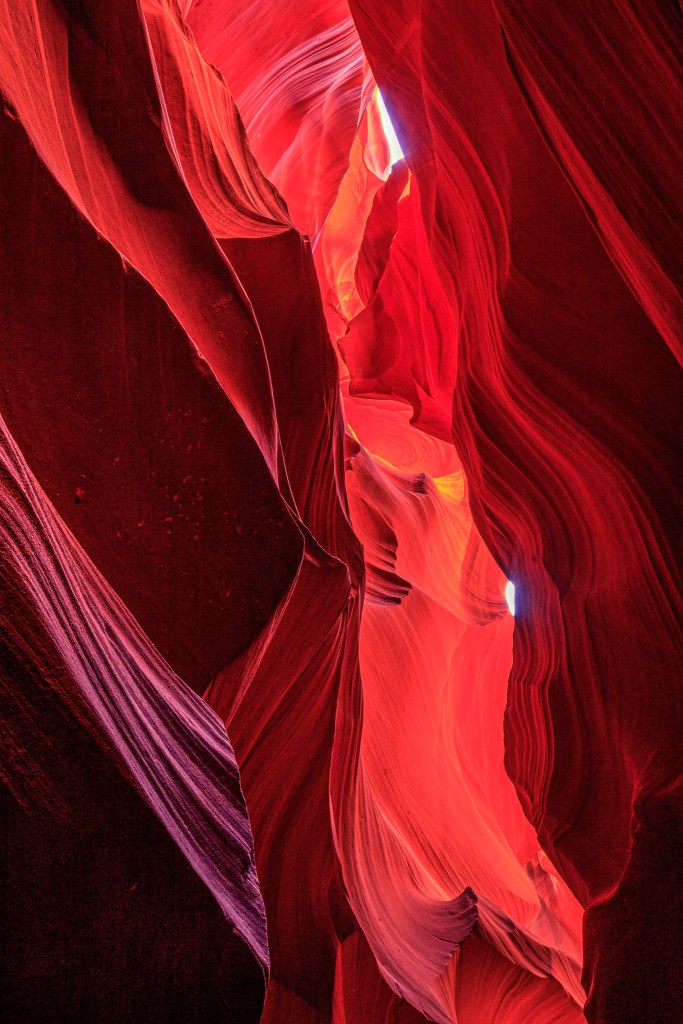
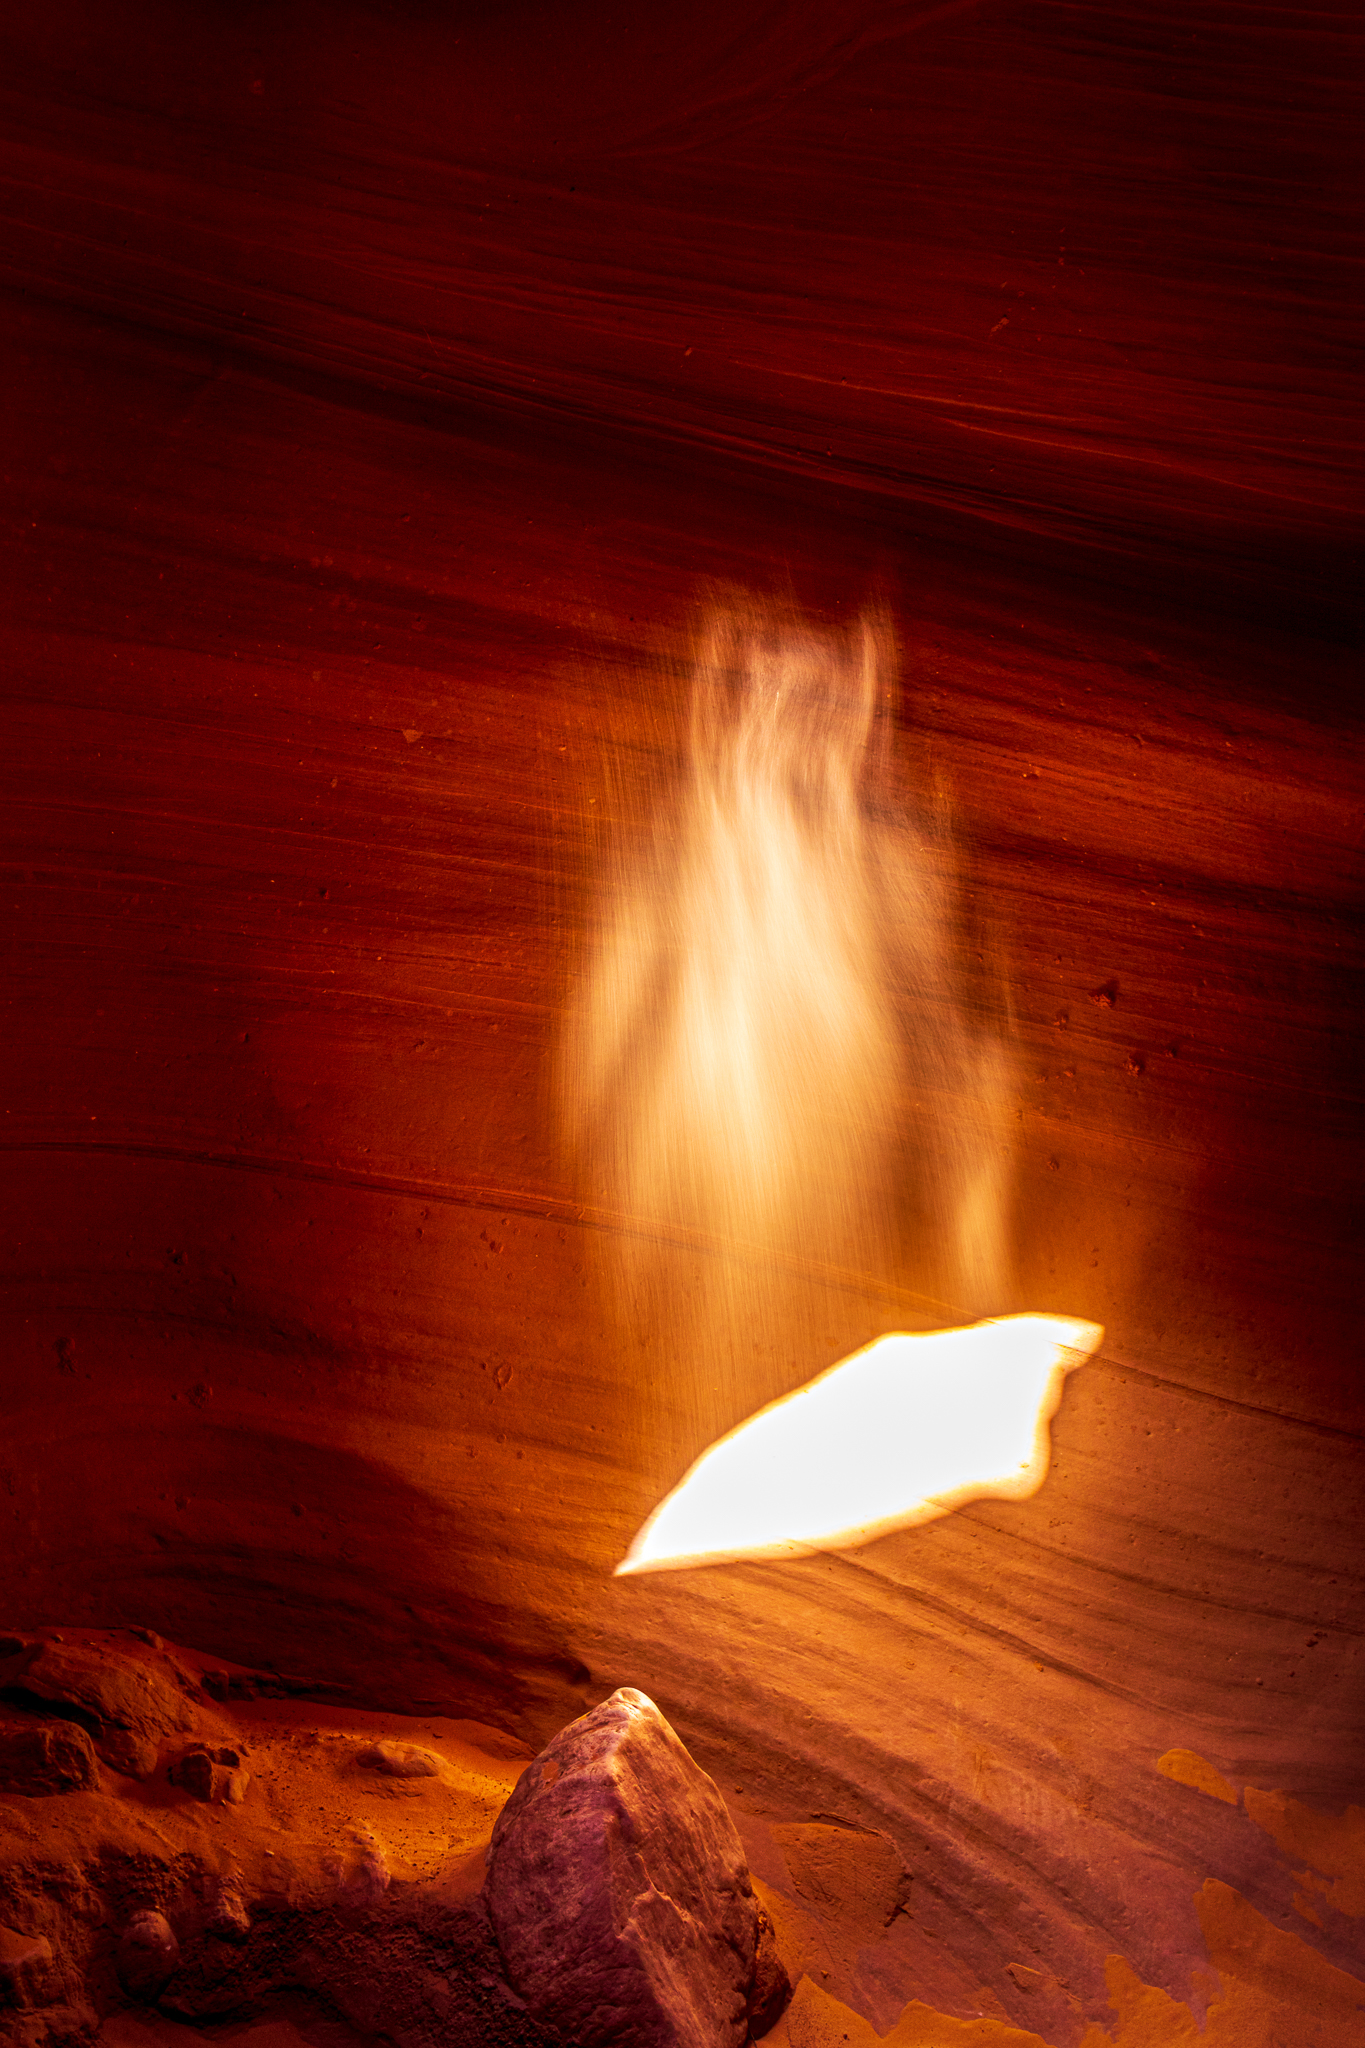
Before I left the Antelope Canyon section of my photo archive I came across another interesting image (but with that unfortunate overexposure flaw for which I had no other, darker exposures, to blend). But the flawed image has an unusual and interesting looking ghostly (demonic?) creature created from the dust illuminated by the otherwise invisible downward shaft of light from above.
So, just for fun and using Photoshop, I created a patch of fire and placed it directly over the overexposed spot to make it appear as if the creature was coming up through the fire from below. Here’s how the unretouched image looked.
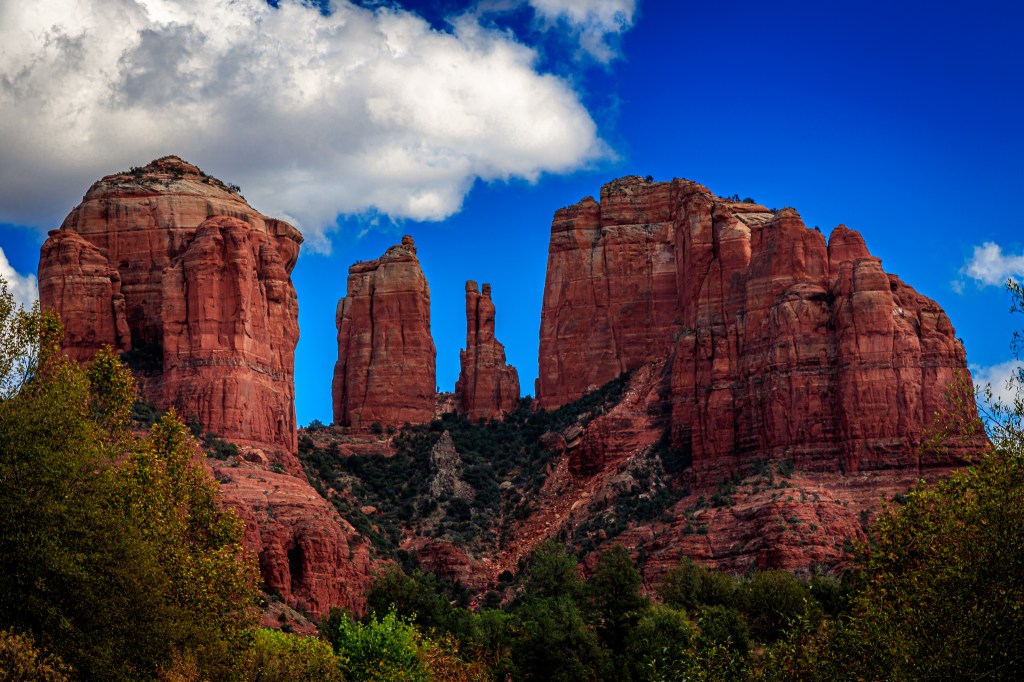
On another southwest road trip, this one in October of 2017, we visited the Sedona area of Arizona and its famous red rock formations. I have published several photos from that trip previously but did come across a couple more that I thought deserved at least some blog air time.
The image on the top (below) is of a formation called Cathedral Rock. It was taken from the Crescent Moon Ranch at Red Rock Crossing (part of the Coconino National Forest). This was processed in a straightforward way setting the white balance to daylight and making sure to feature the color of the stone.
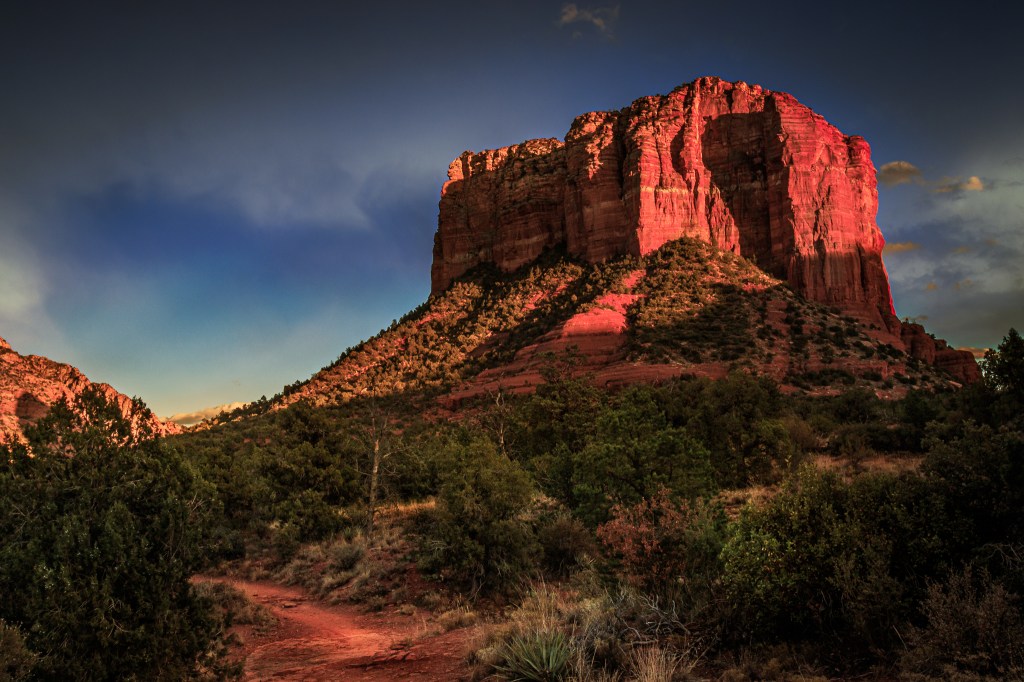
The photo on the bottom was captured from the Bell Rock Trail just to the east of AZ 179. The original sky in this image was mostly cloudless which made the entire image much less interesting. I processed it normally in Lightroom and then used another kind of blending method in Photoshop where I brought in a more interesting sky from another photograph and blended it into this one.
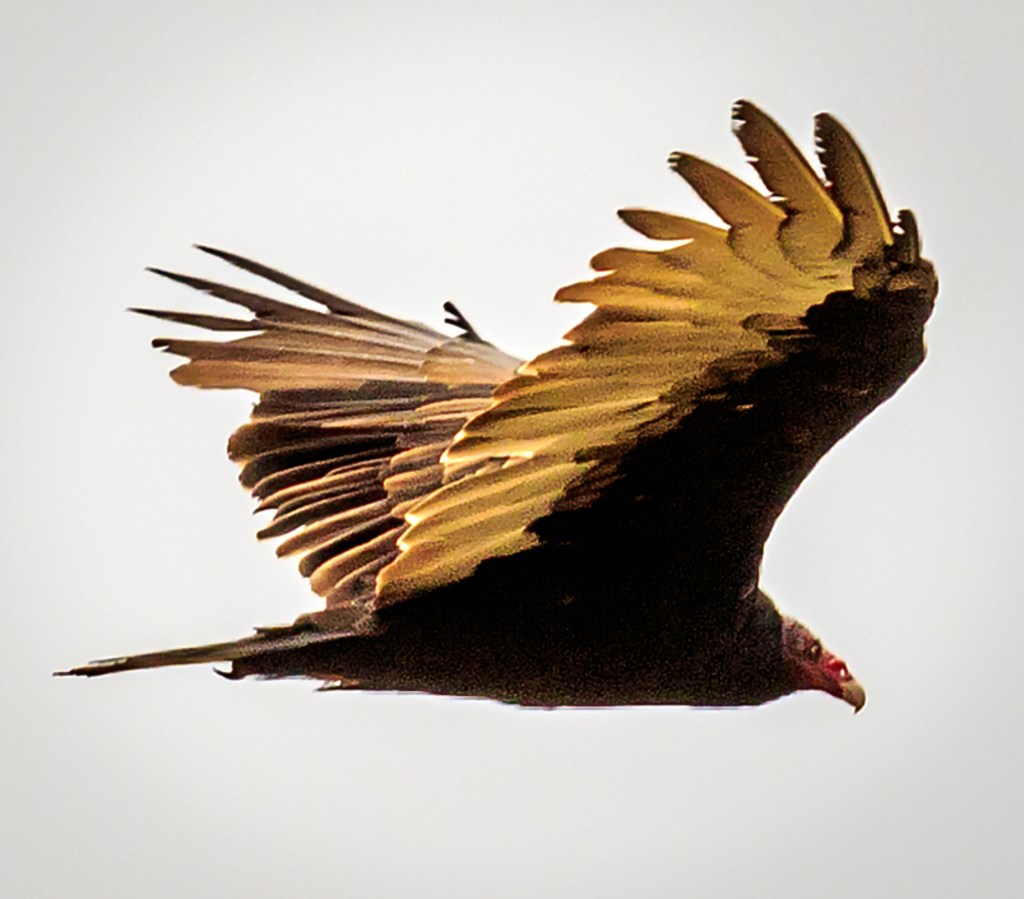
Regular readers know that I’ve spent several weekends over the years attending photographic workshops at Point Reyes National Seashore in California. Most of you also know that I am not a wildlife photographer (I have neither the patience nor the equipment for it) but will take a shot when the opportunity presents itself.
On one of those trips, we drove closer to the northern end of the park and hiked about half a mile to Kehoe Beach. While there I managed to grab an image of this vulture searching for its next meal. Unfortunately, the lens I had on my camera at the time was not telephoto so the initial image of the bird was quite small against a very large, bright, grayish, overcast sky. Post processing was fairly normal except that I also cropped this image severly in order to increase the size of the subject and then worked hard to sharpen it and reduce the generated image noise.
Finally (as far as this overlong post is concerned), my wife and I took an anniversary trip to Monterey, CA in early December of 2018. While there we traveled south along CA 1 for a dozen or so miles to visit the Bixby Creek Bridge. I published a different photo of the bridge at the time but this one also provides a somewhat more iconic view of the structure. Processing was very straight forward and nothing special.

*In this post the word “Published” predominantly means images which can be found on my photo website but occasionally can also mean they have only been published publicly on this blog. Nearly any publicly published photo can also be found on my Flickr web albums, as well.
Meanwhile, stay strong, safe, and healthy as we all hang tough together (separately) to shelter-in-place and assist in defeating this terrible Covid-19 pandemic.

2 Comments