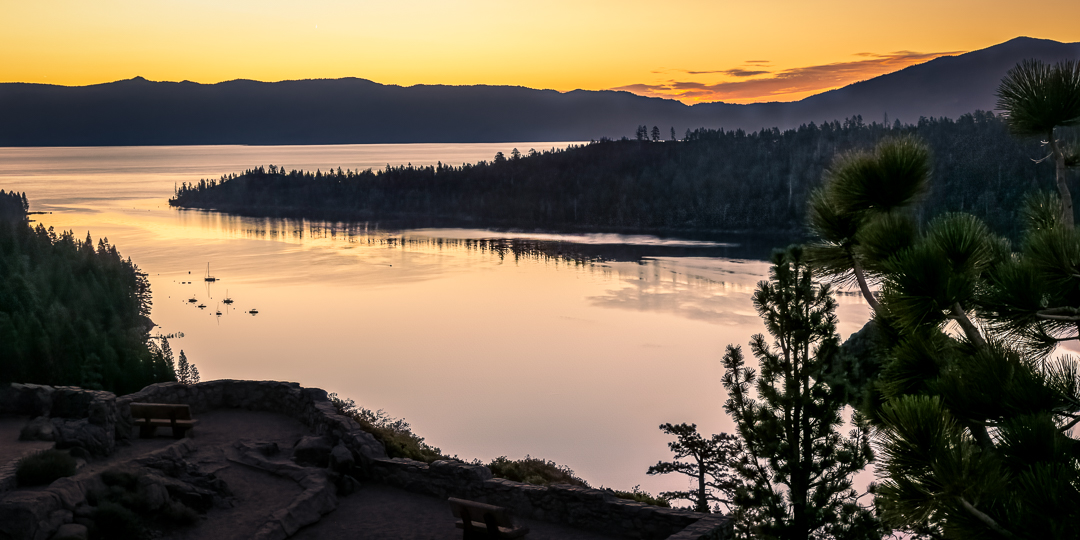
Another sunrise over Emerald Bay, this time from a slightly different perspective than all of my previous photos, described more completely in the post below (55mm, 1/125 sec, f/16, ISO 1600).
This year I tried to pull together a family get together at Lake Tahoe for early August and as it turned out, I was only partly successful. All of our family members have very busy lives (and/or temporary personal issues that can conflict with travel) so it is nearly impossible for them all to be available at the same time. Although we certainly missed those who could not attend, those of us who could make it reported having a great time.
But that was a private, family affair which I would generally not include in this photography oriented blog. After the get-together was over and the rest of the family left to return to their homes, Billie and I stayed around for another several days. I used a couple of those dark and early mornings to get out and try for some photos. On my first outing, I headed to what has become one of my favorite areas above Emerald Bay. But on the drive over, I thought more specifically about where I was heading and realized that I’ve always gone to the same general area. I usually park near the point where Eagle Creek goes under the highway and climb down onto a moderate slope there (before it drops off over a large cliff) and then move around looking for compositional opportunities in the general area marked on the Google map below.
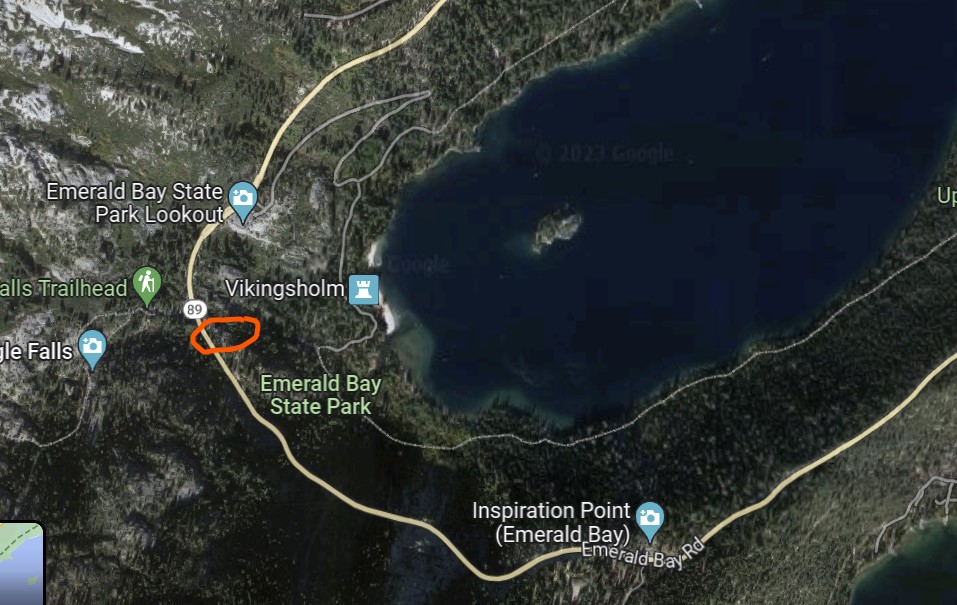
So, instead of going to that spot again, I decided to drive up the road about a quarter mile or so to the Emerald Bay State Park Lookout (labeled on the same map) and see what a slightly modified perspective might provide. The photo at the top of the page indicates that the direct rising sun perspective did not change dramatically from images captured in the past but because I was able to climb to the top of a granite mound to shoot from I did get this shot from a much higher perch than usual.
However, it was when I started to look around to see what other images I might find that I got an entirely different view of Lower Eagle Falls than I had found in the past. In fact, I learned that there was an entirely other set of massive falls of which I was totally unaware (because from above, the cliffs and the trees don’t let you see what’s directly below).

Most of the photos I’ve taken of the Lower Eagle Falls show up in this image as a tiny, white, short, waterfall in the far, upper-right-hand corner of this image. The closest I’ve ever come to photographing more of these falls happened when I very carefully crept closer to the edge of the cliff (back in September of 2017) and captured an image of the top of more waterfall (which still gave me no clue as to the much larger falls below).
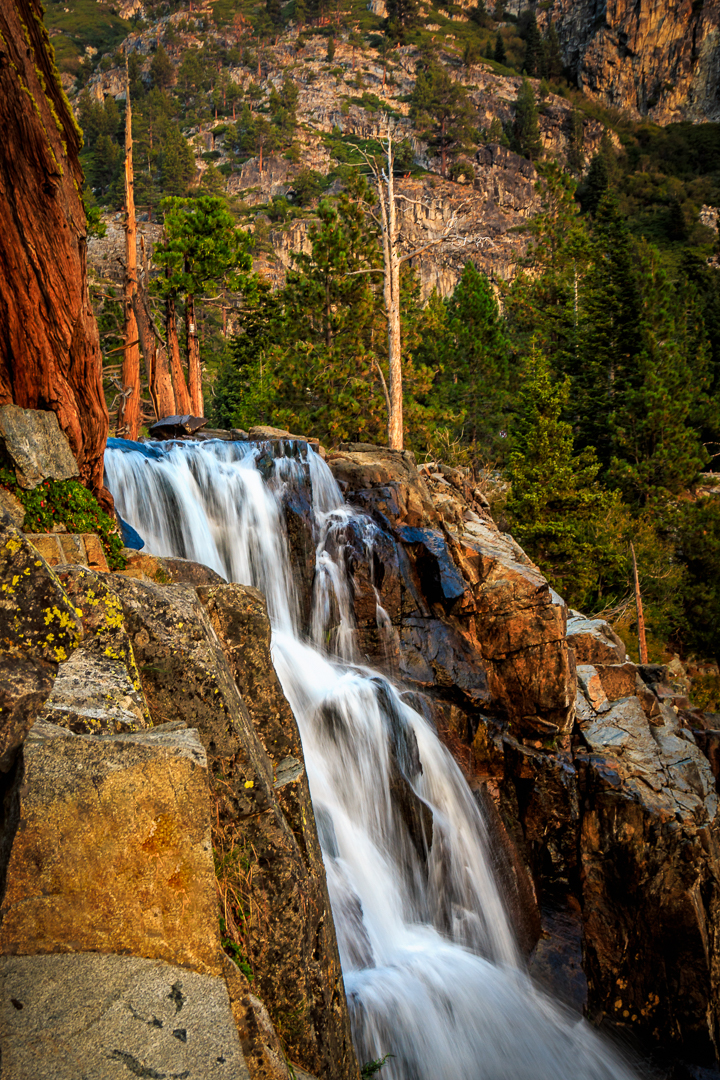
I did return to my car and drive over to my usual spot for shooting images primarily because this year was so different than the previous year –thanks to the volume of water coming from the enormous snow pack delivered by the drought-busting winter earlier this year. Here’s what I captured from my “usual” shot of Lower Eagle Falls this year.
And here’s what I captured at the same spot last year and documented in my A month later, back to Lake Tahoe September post.

After getting that shot of this years’ version of the upper section of Lower Eagle Falls, I climbed back up to the highway, packed up my gear, and headed back to join Billie for breakfast. A couple of days later, I went out early again, this time headed north up the east side of the Lake aiming to get some shoreline images. I decided to stop at a place called Memorial Point (much closer to the north shore of Lake Tahoe) and use that as a base. Here’s another Google map showing where it is located.

Again, I’ve marked the map to show where I wandered around looking for some shoreside compositions (although I must confess that I did not wander across the highway to its east side). There is a fairly new, paved trail, on the lake side of the highway useful for hiking or biking (or wheelchairs, for that matter) which makes travel along the shoreline easy. In my case, when I saw an area that looked promising, I could step off the paved trail and follow well-worn paths that allowed me access to the actual shore so I could search more directly for photo opportunities.
When I left to drive to this location, it was still dark. Once I was there, and had unpacked my gear, I needed a light to make sure I didn’t trip and fall as I started to explore the immediate area. Fortunately, within about five or ten
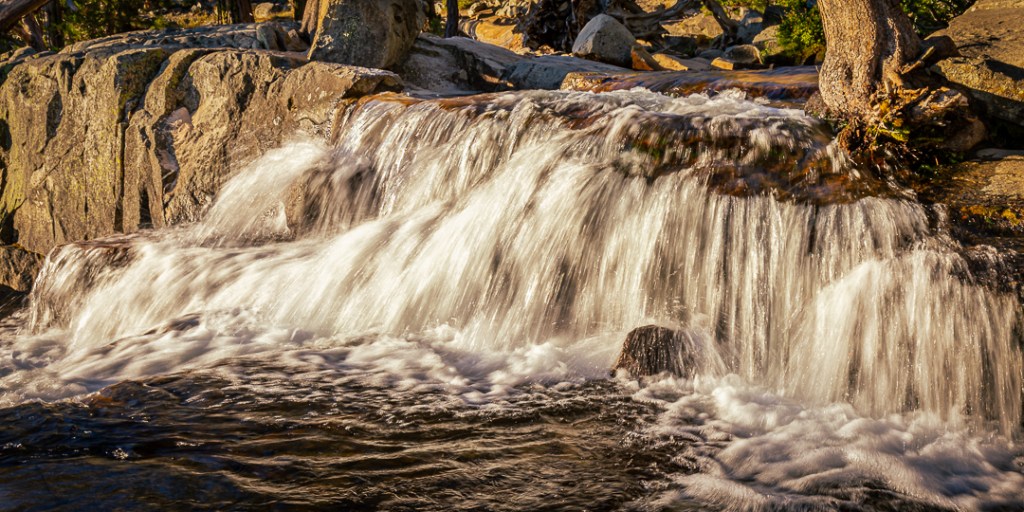
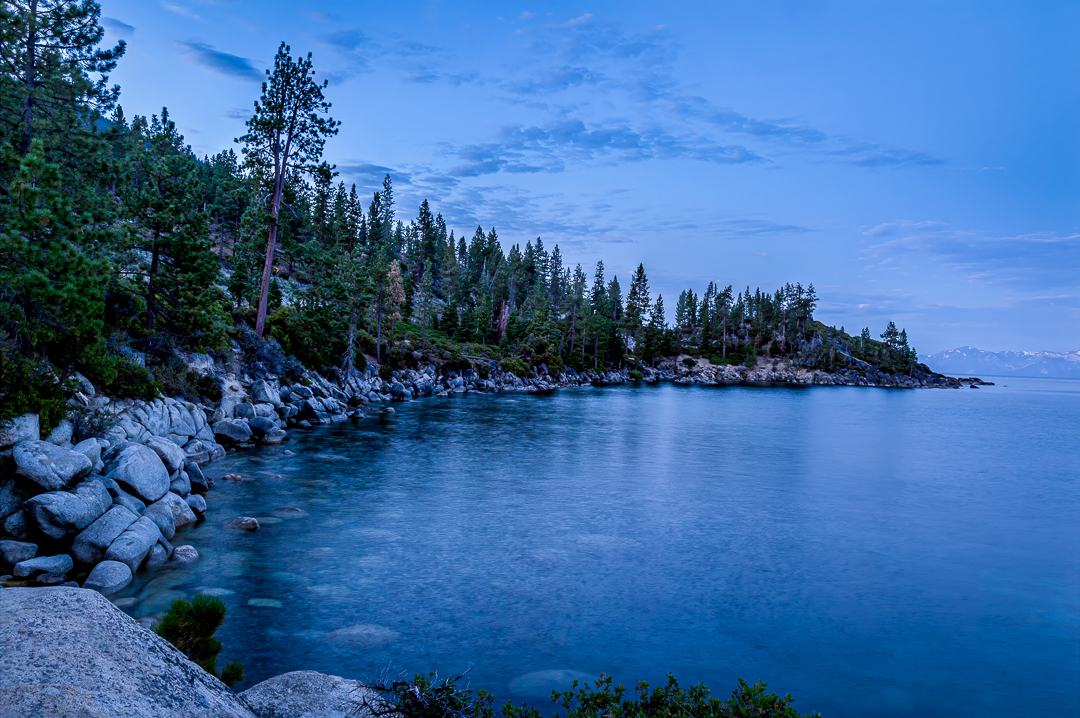
minutes the dawn sky began to brighten enough that I didn’t need to wear a headlight any longer to find my way around. By that time, I also decided to head south along the trail seeking something to photograph. I stepped off the trail a few times until I came to a spot that I felt was representative of the shoreline in this area (as in, very cluttered with boulder-sized rocks lining the shore). Here is how that appeared during that morning’s “blue hour” just a few minutes before 6 AM.
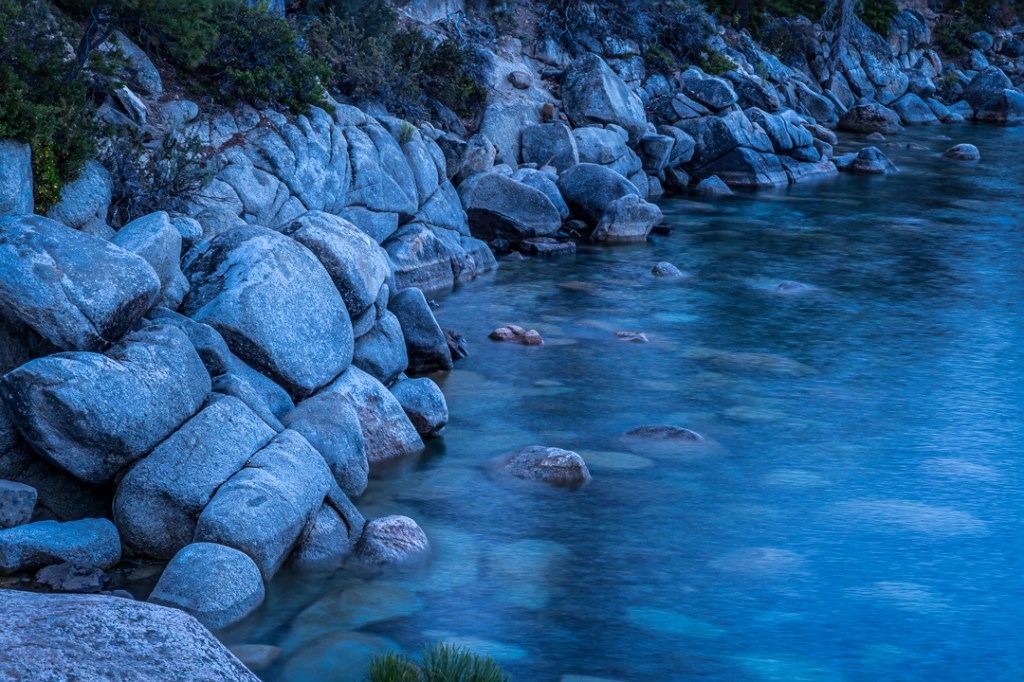
And here is what a more close-up view of the same area looked like just a minute or so later.
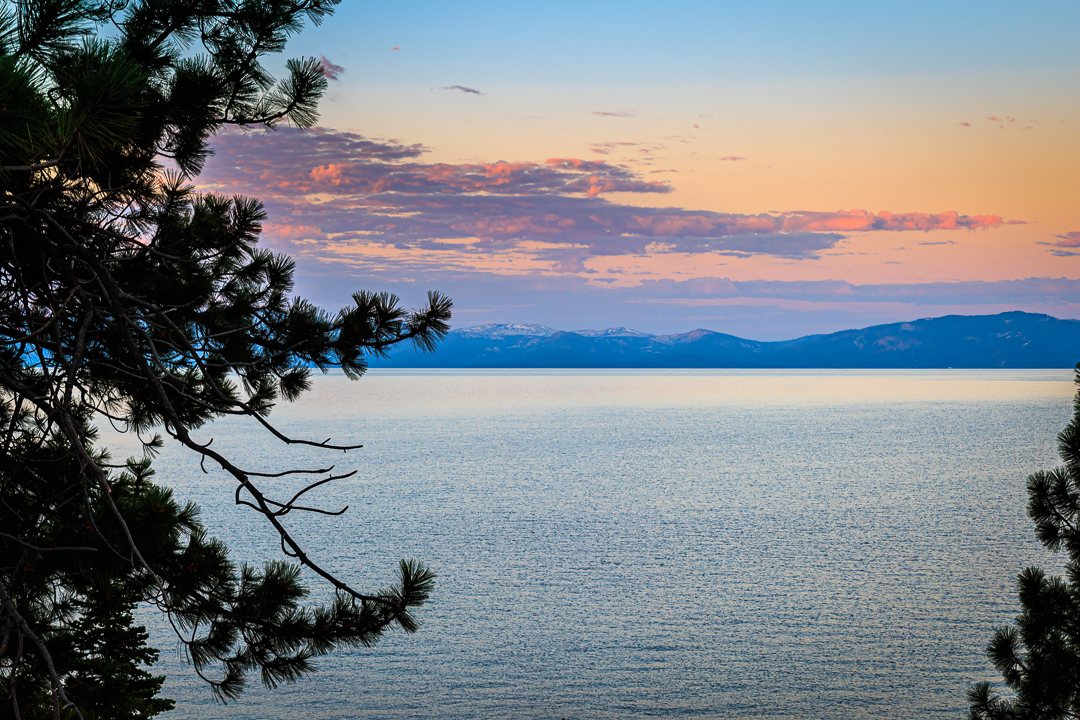
After capturing those images, I headed back toward Memorial Point with the idea that I was about ready to head back to our hotel. But I happened to look over my shoulder and noticed that the sunrise had finally started to light up and color the clouds, so I stopped and setup for this shot looking more across the lake through the trees to catch the view seen here.
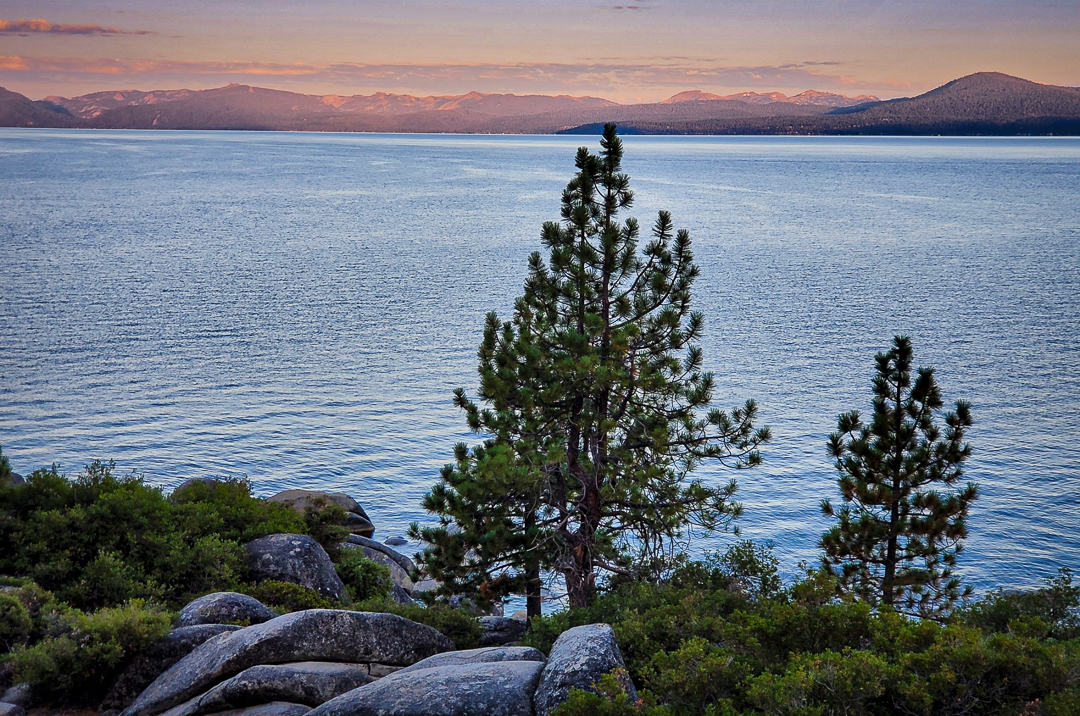
Then I continued on to where I’d parked my car, and started packing up my gear. When I was all ready to travel, I glanced up to take a final look at the lake and noticed that in the intervening time, the sun had continued to rise (duh!) and was now illuminating the mountain tops of the mountains on the western and southern side of the lake. Frankly, I was too lazy to unpack everything again, so I took a few steps closer to the lake to setup a composition, took out my mobile phone, didn’t even bother to switch it to taking RAW images, and just snapped a quick JPG photo, seen here (JPG images from my mobile phone do not provide the same level of metadata details as a RAW image so none are provided with this photo).
Then, I got back in my car and headed south to our hotel in South Lake Tahoe.
Photo Tips
I should really label this section Lessons Learned (or Re-Learned) since in retrospect, I did (re)-learn a lesson or two — which I’m sharing with you and just calling them Tips. And I don’t use the term retrospect loosely since most of what I’m about to write are things that came to me much later, as I sat at my desk, logged onto my digital darkroom, post processing the images. And even more so, as I considered some of the words I was using as I was writing this post, and thought about things I did (and didn’t do) on this particular trip.
Tip #1
First, and this is a real tip that I intended to share from the outset. One of the things I’m trying to remember to do, is to try to organize a composition such that I position something in the immediate foreground of some of my landscape images — particularly those that are of scenes of a broader vista. It is great if it is a very interesting foreground item but even if it isn’t, objects in the immediate foreground help to create a sense of depth which is always difficult to do when one is photographing a three-dimensional scene, knowing it is going to be viewed in a two-dimensional medium (on a screen or printed on something flat).
You may have noticed that I tried to do that in almost every photo I included in this post, from the pine tree on the right of the sunrise over Emerald Bay, to a part of the granite mound I was standing on when I shot the Lower Eagle Creek Falls image, and nearly every other photo which was focused over a distance. And in every one of those images, I combined two photography techniques; one called “hyperfocal distance” and the other called “focus-stacking” to ensure that both the close-up objects and the rest of the photo were all in acceptable focus. You can find much more on these techniques in the blog post I published on September 26, 2022 called Getting Everything in Focus — A Photography Tutorial.
Tip #2 [and, for me, Re-learning #1]
This tip is actually quite easy to do but (for me, at least) not always easy to remember to do. A photographer often goes somewhere to capture a particular image; maybe a sunset lighting up the clouds and creating a reflection on the water or, perhaps the various layers of the plains, foothills, mountains, and sky in the background. That’s good — having an objective in mind (and even some planning on how to photograph that image ahead of time) helps create a successful outcome.
But what happens once the photographer is there and nature doesn’t cooperate? Or, what happens if nature does cooperate and the image capture is successful? In both cases, the photographer is there and should try to take advantage of the locale and the conditions. So, what is the “easy tip?”
It is simply, “look around.” In particular, look behind yourself to see what scenes are there. Look to the right — look to the left. If you’ve been concentrating on the scene in front of you, you probably have not really seen things that might be to either side of you. And you certainly are not yet aware of what is behind you. Move around and look all around again. You’ll be amazed at what you might discover.
I do, do that, at least sometimes. But not always with enough intention. In at least one situation on this trip, I picked up my camera and tripod and deliberately turned around assuming that there would not be that much interesting to see looking away from Emerald Bay and toward the mountains. I was amazed to “discover” that there was an entirely new (to me) huge waterfall in a place I’d visited regularly and had been photographing for several years.
I keep trying to remember to do this. More often than not, I discover something worth capturing. This is not just advice relative to landscape photography. It works for street photography. It works for pictures taken at parties or family gatherings. It works in almost any situation. LOOK AROUND! LOOK BEHIND YOURSELF! MOVE AWAY FROM WHERE YOU ARE STANDING, AND DO IT AGAIN! You’ll be happy you did!!
Tip #3 [and, for me, Re-learning #2]
This one is particularly embarrassing for me, as you’ll understand, when you read this section.
If you are going somewhere and you expect to be taking photos, it is ALWAYS helpful and useful to do a bit of research. Even if you are familiar with the area, you may not be aware of changes since you were there last. I know this is hard. It requires work, like reading a book, or some brochures, or a map, or some pages on the Internet. It requires giving it some of your time.
I’ve visited Lake Tahoe, on and off, over a good deal of my life, but until recently, not that regularly. But over the past eighteen-ish years, Billie and I have been there at least once a year and sometimes more than that. And that makes me feel that I’m very familiar with it. But I’m not really, except for the same places that we visit more frequently. And, I notice, the places I’ve tended to go to take photos, are often the same places (more or less) that I’ve been to before. Plus, if you are a regular reader of this blog, you know I really dislike hikes that start off going downhill (because that means they generally end by going uphill — at the end of the hike — when I’m very likely to be the most tired and winded from both the hiking while carrying all my gear — and the altitude).
So, although I’ve chosen some hikes that were just the sort that I dislike, I’ve also avoided many others for the same reason. And, although I did do some research about things to see (and possibly photograph) years ago, and I have resources that I can use for research whenever I need them, I’ve done very little of that, with regard to Lake Tahoe, in recent years.
Once we were home, and while I thinking about what I didn’t actually know and “discovered” on this trip, I turned to one of my favorite photography books, written by Gary Crabbe (a professional photographer I happen to know personally), titled, PHOTOGRAPHING CALIFORNIA Vol. 1-North A Guide to the natural landmarks of the Golden State and looked up the chapter called TAHOE SIERRA and, within that, the section on Emerald Bay, and started to read. Imagine my surprise (actually, embarrassment) when I read all the things I already knew (about the small part of the falls I’ve photographed multiple time) and all the things I only recently “discovered” about the existence of the larger, and more photogenic, falls that I only needed to read about in a book I already owned (if only I had taken the time to do so – years ago). His book even explained what I had just realized from taking a photo from a slightly different perspective — that is, most people photographing the upper section of the falls, are never aware of the much larger falls, below. The book also includes information about the trail down to those falls, with advice about the best times to visit, the amount of time a round trip would likely take, and other useful information.
I also took a look at the information available on the All Trails app that I have on my phone, which provides a visible version of the trail, elevation gain, and other useful hiking information. That app may not have even been available at the time the book was published in 2012.
We left for home the next day but I was expecting that we’d be taking another trip to Lake Tahoe in September and I was definitely planning on taking the downhill hike to get some photos of the those falls. But as often happens, life interferes with plans and we couldn’t make it. Plus, that particular trail was closed for maintenance and would not be open again until mid-October. So, I’ve put that hike on my list for next year and started researching other hikes to consider, as well.
Lesson (for me), hopefully learned – this time.
Just a reminder that you can see all the photos included in this post by visiting my Flickr site and then the 2022 Album and then clicking on any of the thumbnail images to view it, and the other photos in the album, in a much larger, more detailed format, and often with better color fidelity. Similarly, you can see most (but not all) of these images on my photography website, and navigate to larger and often more colorful photos in a similar way.
If you read this far, thank you. I hope you enjoyed both the photos and some of what I had to say about their creation. I’m always interested in your remarks, should you wish to provide them — use the Leave a Reply section below.

2 Comments